 This is the drivers door. All the window gear, slides, and latch mechanisms have
been removed in preparation for the lower sheet metal repairs needed.
This is the drivers door. All the window gear, slides, and latch mechanisms have
been removed in preparation for the lower sheet metal repairs needed. Click on the small images to open full screen photos.
1/20/08
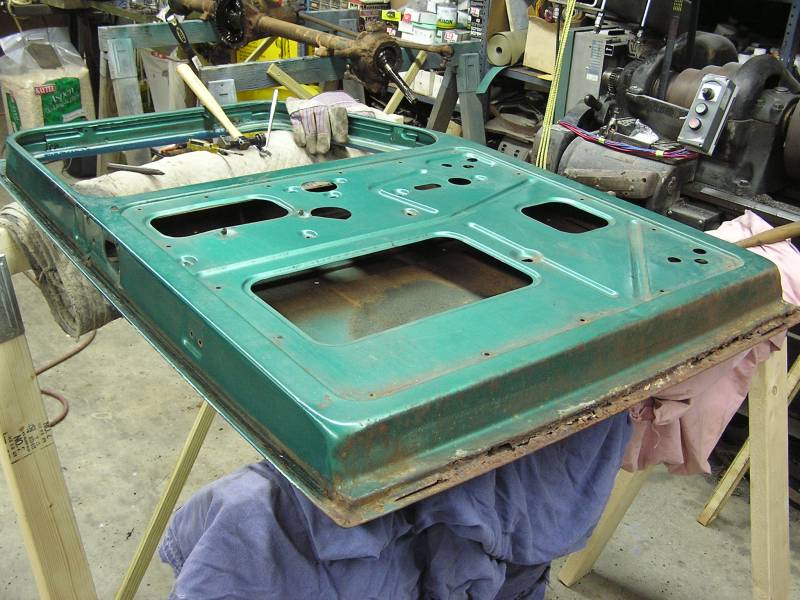
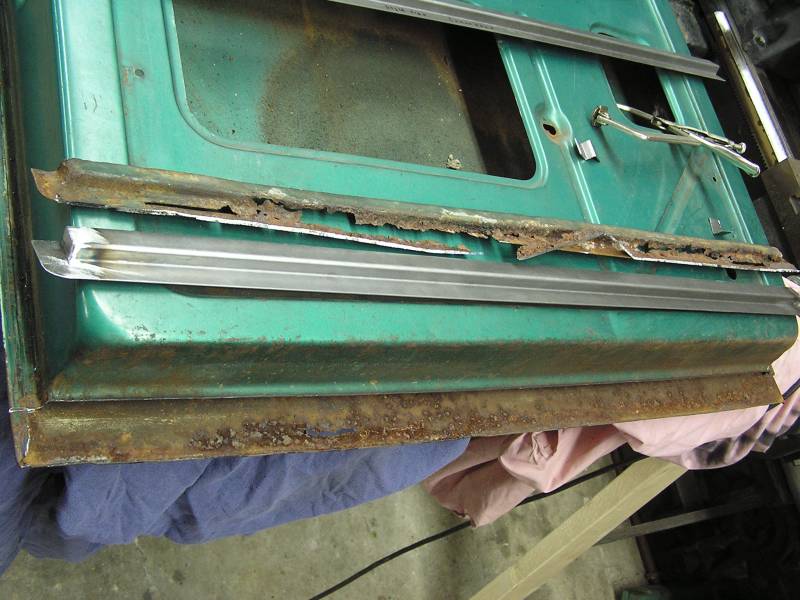
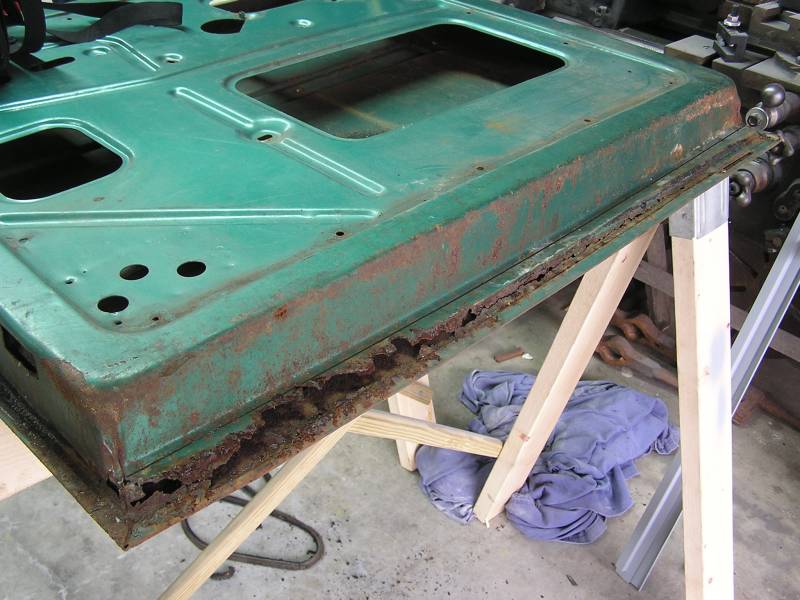
More rust! But that's just the way old cars are. Can we fix it?
This is the drivers door. All the window gear, slides, and latch mechanisms have
been removed in preparation for the lower sheet metal repairs needed.
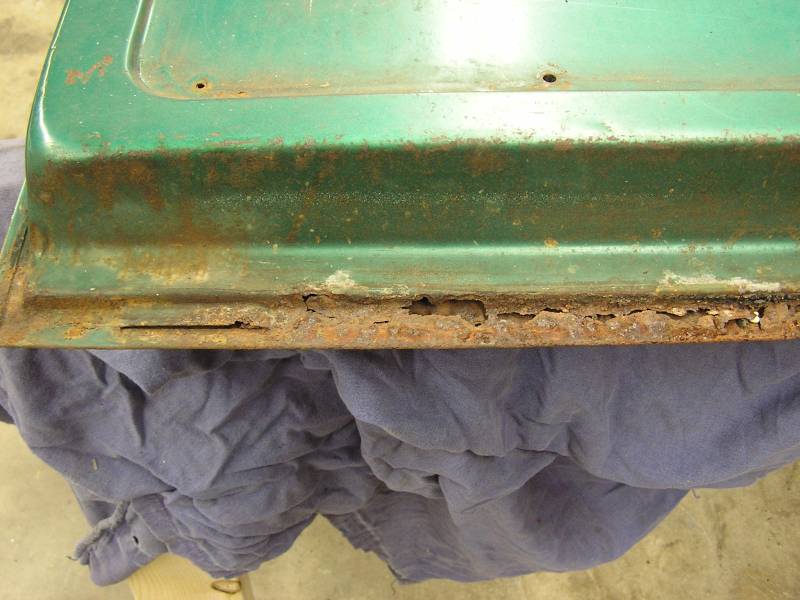 A close up of the back portion of the door showing the rust out of the inner
skin area.
A close up of the back portion of the door showing the rust out of the inner
skin area.
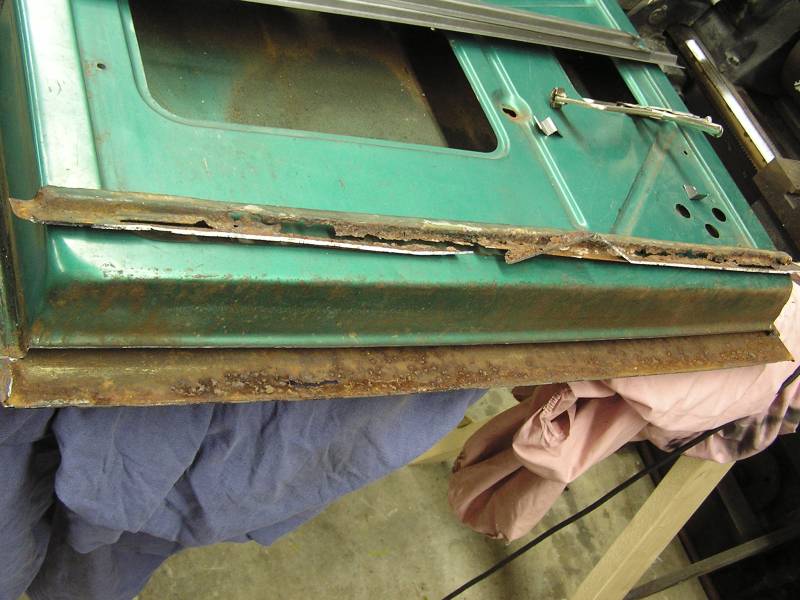
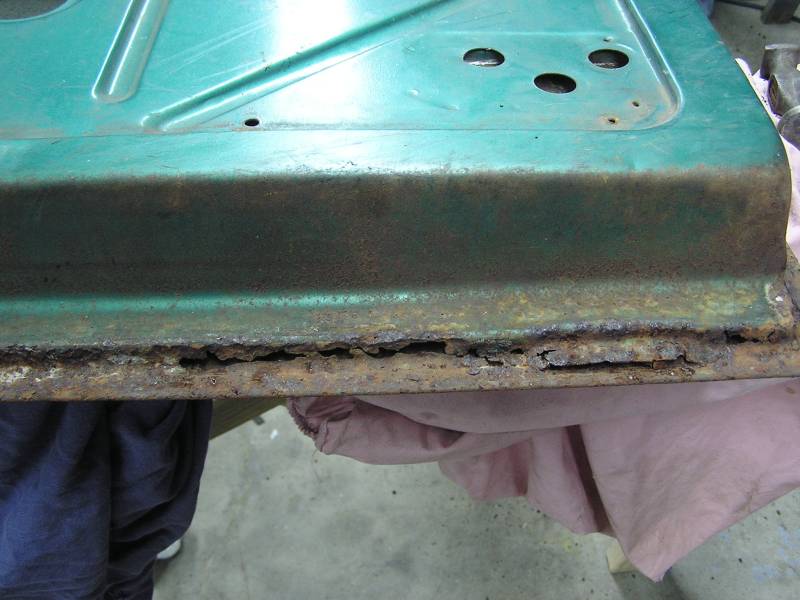 And this close up is of the front part of the door. The inner skin is actually
much worse than the outer one. So we'll start with this part first.
And this close up is of the front part of the door. The inner skin is actually
much worse than the outer one. So we'll start with this part first.
1/25/08
 The inner skin was cut about 1" up, just shy of the radius of the next bend.
Welding the repair piece in here will minimize distortion.
The inner skin was cut about 1" up, just shy of the radius of the next bend.
Welding the repair piece in here will minimize distortion.
 Measurements were taken and a "Z" shaped section of .040 metal was bent up on
the break. Then a little cutting and welding to mimic the original end shape.
Measurements were taken and a "Z" shaped section of .040 metal was bent up on
the break. Then a little cutting and welding to mimic the original end shape.
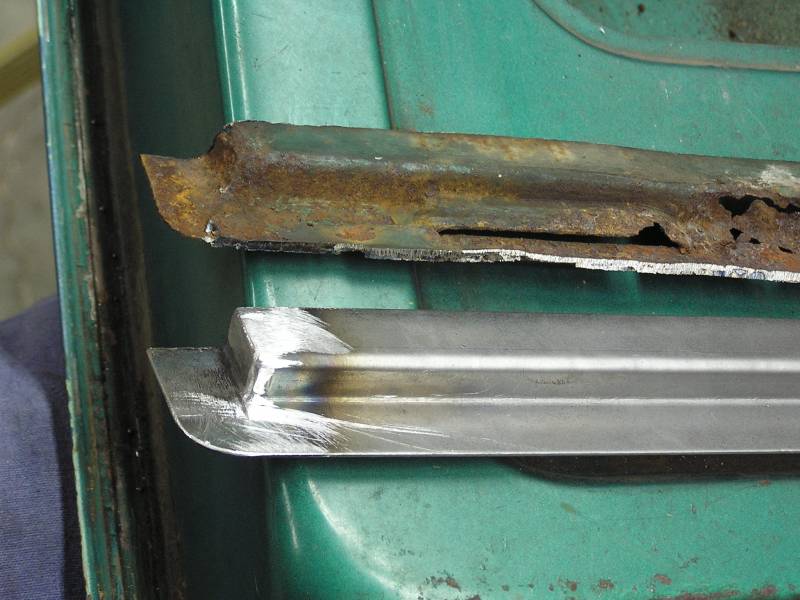 And a close up of the end detail.
1/30/08
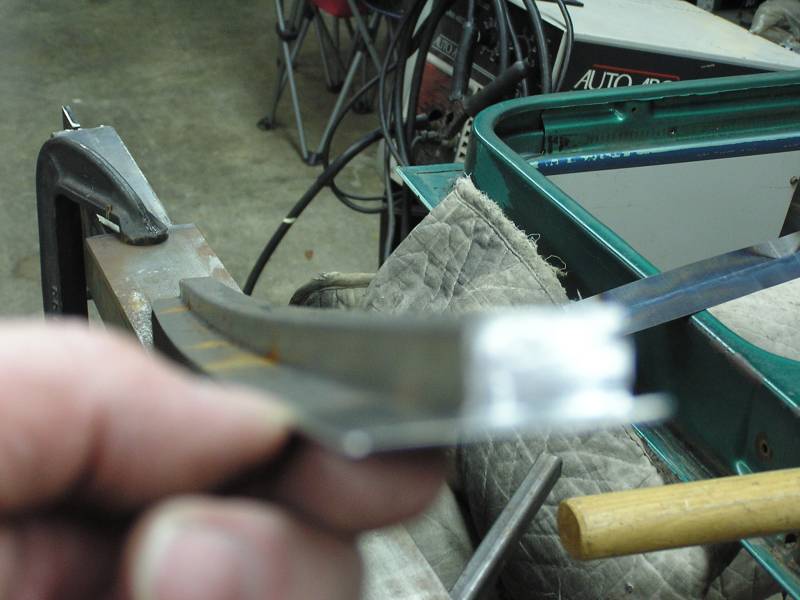
It would be great if this repair part could be used as is, in the straight condition, but the lower edge of the doors have crown to them. The crown is a 1/4" in the width of the door. So we have to make this straight repair section curved on this radius.
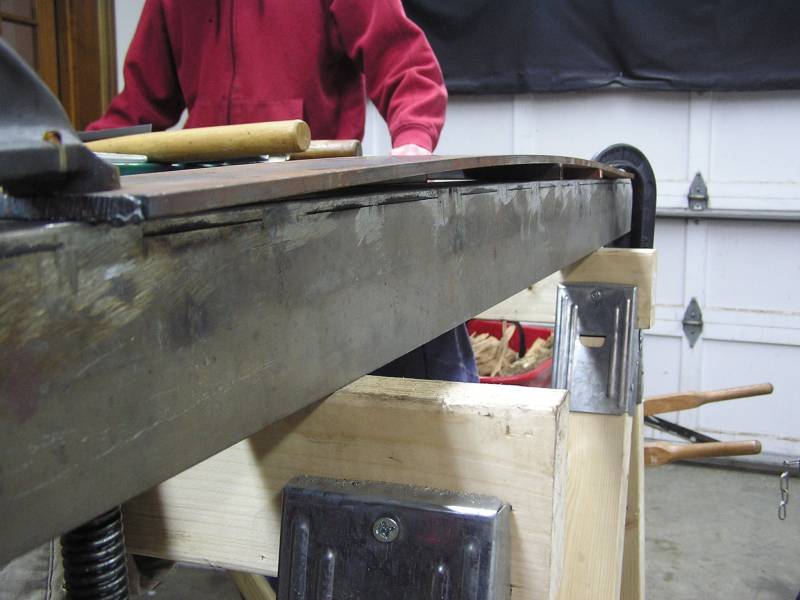 This home made variable radius "anvil" was made to aid in getting an even crown.
 The Z shape was firmly clamped to the curved anvil. To make it take on permanent
set, the correct side is put into compression, by skillfully peening along the
correct edge and flange. Both a ball and blade peens are used. More peen is
focused at the mid section of the Z flange to prevent warping in the other
plane. Keep peening and removing from the anvil to check for the correct amount
of crown.
The Z shape was firmly clamped to the curved anvil. To make it take on permanent
set, the correct side is put into compression, by skillfully peening along the
correct edge and flange. Both a ball and blade peens are used. More peen is
focused at the mid section of the Z flange to prevent warping in the other
plane. Keep peening and removing from the anvil to check for the correct amount
of crown.
 The part has been checked and it has the correct 1/4" of crown over its' length.
All ready to weld in place after we blast and prime it.
The part has been checked and it has the correct 1/4" of crown over its' length.
All ready to weld in place after we blast and prime it.
2/1/08
 A lot of work to the lower section of door was accomplished this weekend. First a patch for the
lower 1 1/2" of the outer skin was bend up and curved on the same 1/4" crown to match the contour of the door.
Here you can see the crown in the new part that had been blasted and primed
ready to install.
A lot of work to the lower section of door was accomplished this weekend. First a patch for the
lower 1 1/2" of the outer skin was bend up and curved on the same 1/4" crown to match the contour of the door.
Here you can see the crown in the new part that had been blasted and primed
ready to install.
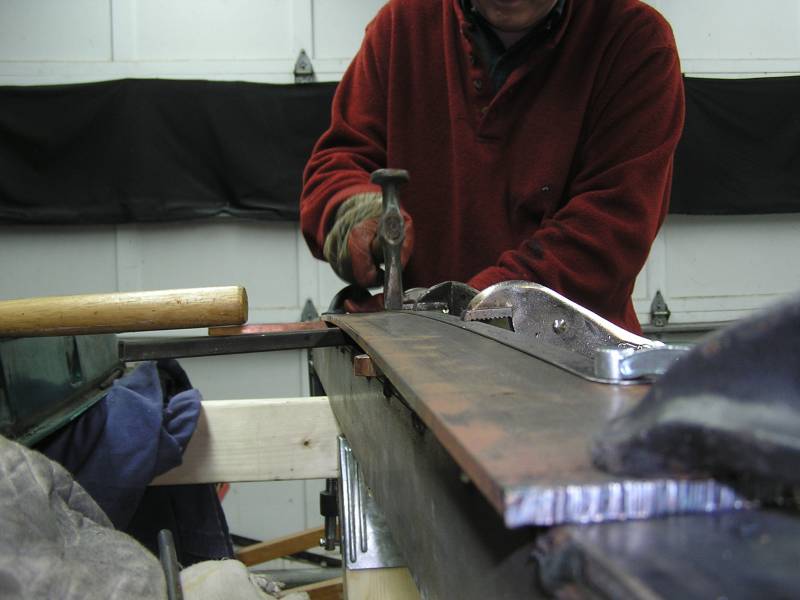
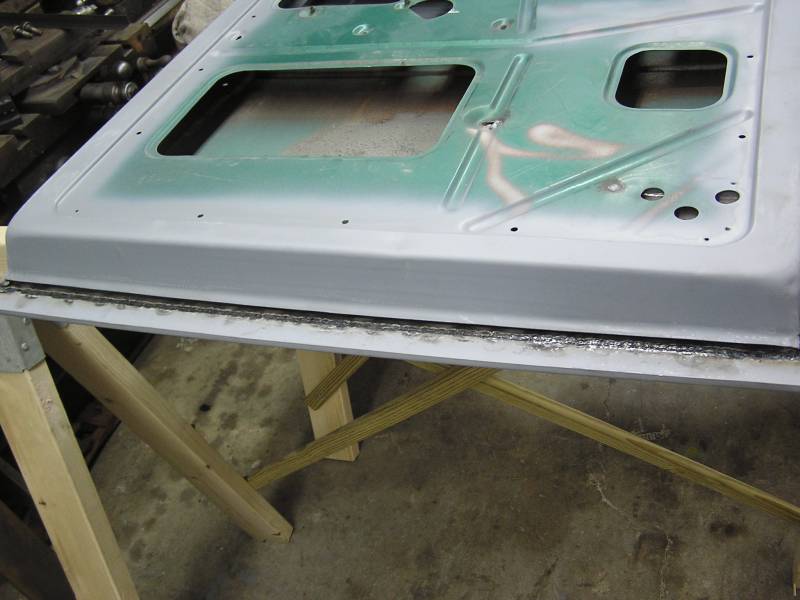
 The very long process of tack welding, grinding, and hammering to remove
contracting stresses has been completed. This door is about 34" wide. The bottom
is 100% welded full across and the process took right at 8 hours to complete. It
really turned out well. In fact so well it does not look like any body filler
will even be required! Just a couple coats of heavy 2 part primer and some block
sanding.
The very long process of tack welding, grinding, and hammering to remove
contracting stresses has been completed. This door is about 34" wide. The bottom
is 100% welded full across and the process took right at 8 hours to complete. It
really turned out well. In fact so well it does not look like any body filler
will even be required! Just a couple coats of heavy 2 part primer and some block
sanding.
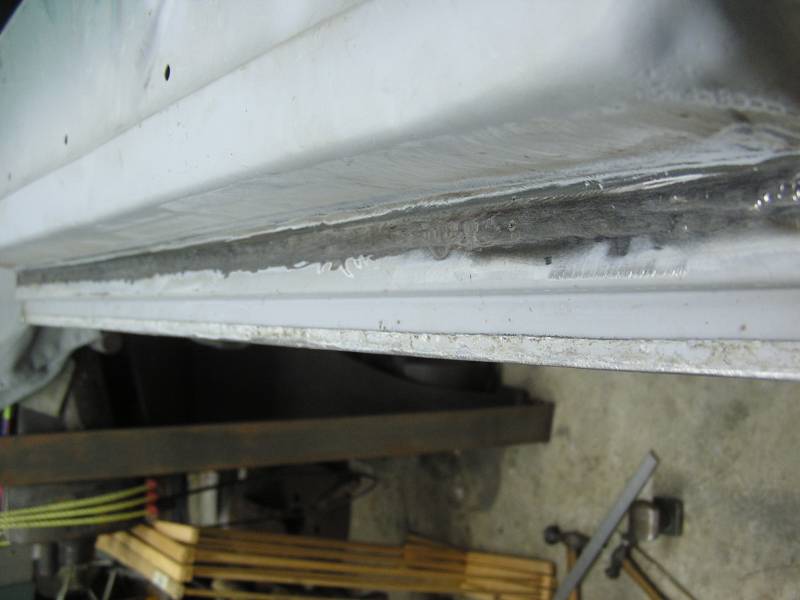
 Here is a picture of the back side. By backing up the back side with a copper
bar when welding on the front face, this minimizes drop out weld on the back
side, leaving very little weld to grind away. Having the inside smooth is
essential to successful hammer and dolly work. Very pleased with the outcome!
Next it will be blasted front and back and primed again in 2 part primer for
rust protection.
Here is a picture of the back side. By backing up the back side with a copper
bar when welding on the front face, this minimizes drop out weld on the back
side, leaving very little weld to grind away. Having the inside smooth is
essential to successful hammer and dolly work. Very pleased with the outcome!
Next it will be blasted front and back and primed again in 2 part primer for
rust protection.
2/3/08
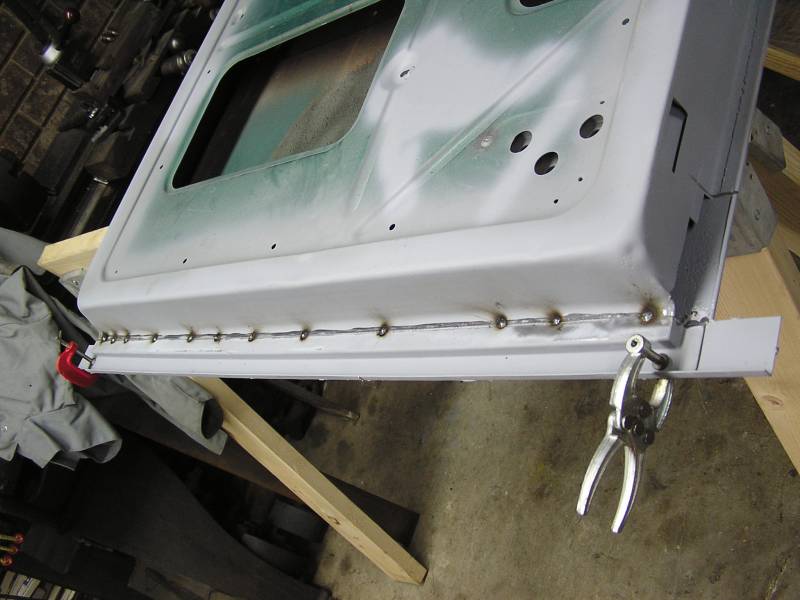 Now it is time to weld in the inner patch panel we made earlier. Here it has
been tacked every 1" or so.
Now it is time to weld in the inner patch panel we made earlier. Here it has
been tacked every 1" or so.
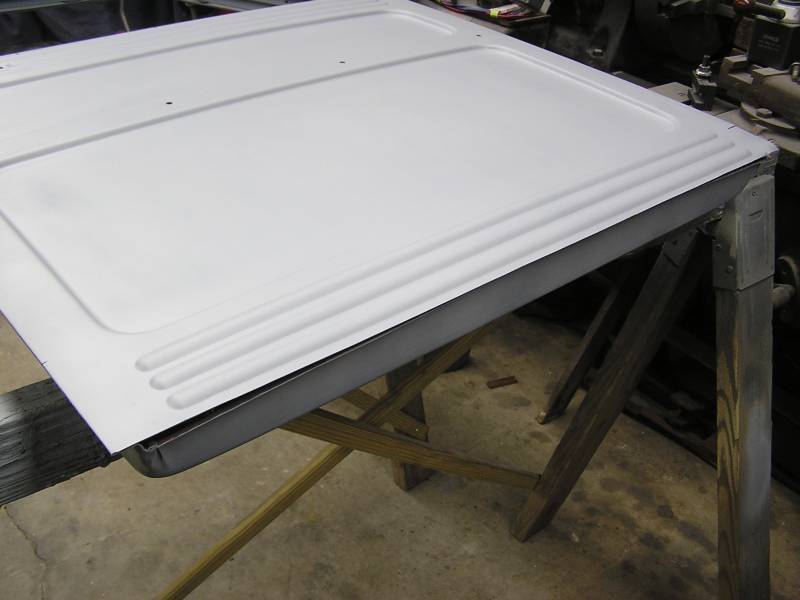
 The patch has been welded in 100% solid and the weld ground flush. Turned out
very well with no warping at all.
The patch has been welded in 100% solid and the weld ground flush. Turned out
very well with no warping at all.
 And finally the lip was rolled over completing the metal repairs to the driver's
door.
And finally the lip was rolled over completing the metal repairs to the driver's
door.
2/7/08
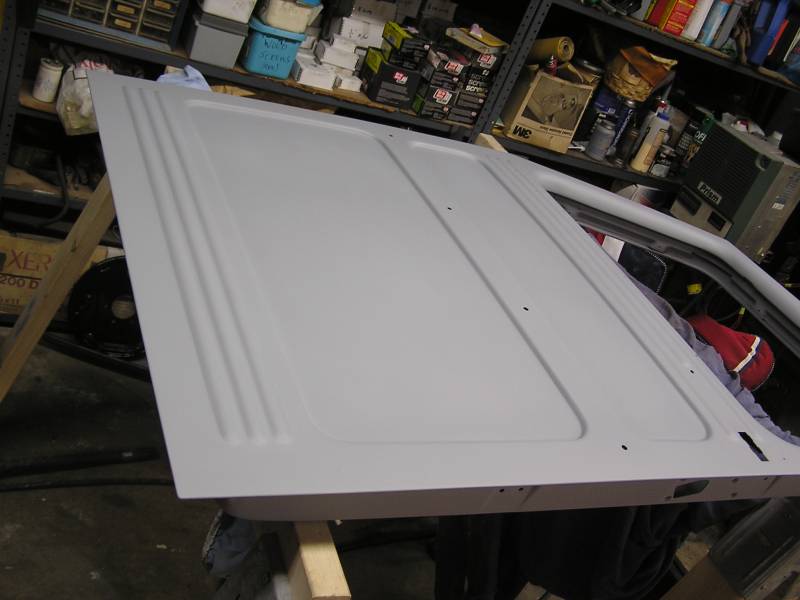 After several applications of 2 part primer surfacer and block sanding, things
are looking pretty good.
After several applications of 2 part primer surfacer and block sanding, things
are looking pretty good.
2/26/08
While we try and figure out the original paint codes we started working on the passenger door. I won't be near as detailed about documenting this repair, but here are a few photos of the passenger door repairs.
 This door's inside skin was worse than the driver door. The outer skin was
actually in better shape.
This door's inside skin was worse than the driver door. The outer skin was
actually in better shape.
 Here both the inner and outer skins have been cut up about an 1 1/2". The the
door was sanded, blasted and primed with SEM self etching primer.
Here both the inner and outer skins have been cut up about an 1 1/2". The the
door was sanded, blasted and primed with SEM self etching primer.
3/18/08
 Well I lost a week of productive time due to a bout of the flu. Nasty stuff!
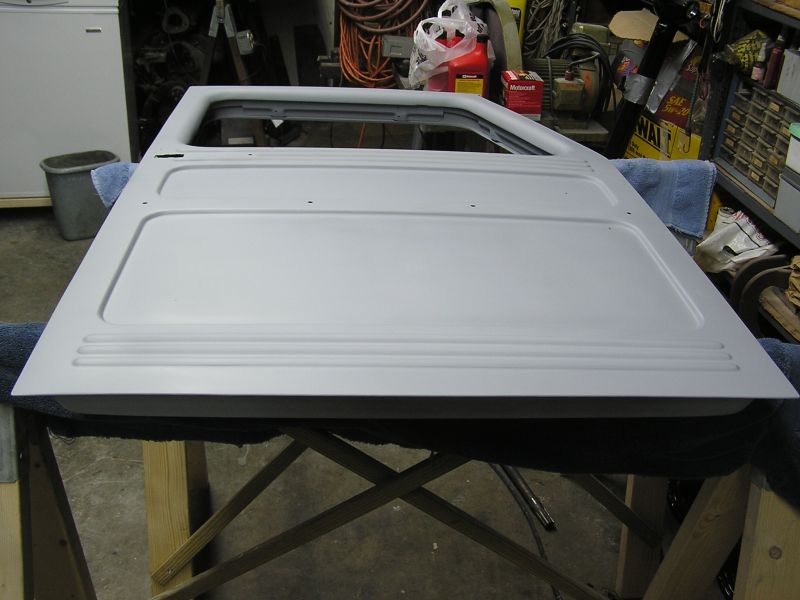
Finally got back on the project over the last weekend and here the new outer
skin panel and inner skin panel have been welded in 100%. Door has been primed
and sanded twice with 2 part primer surfacer.
Well I lost a week of productive time due to a bout of the flu. Nasty stuff!
Finally got back on the project over the last weekend and here the new outer
skin panel and inner skin panel have been welded in 100%. Door has been primed
and sanded twice with 2 part primer surfacer.
7/31/08
Finally! we have the paints formulated and could get some paint in these finished doors. The dark green poly was easy, but the light sea foam green proved a real challenge for Pat Dickson to mix. He got it and here is the result. I sprayed these at 5:00 a.m. to try and minimize the bugs so prevalent in July.
 All masked and the sea foam green sprayed.
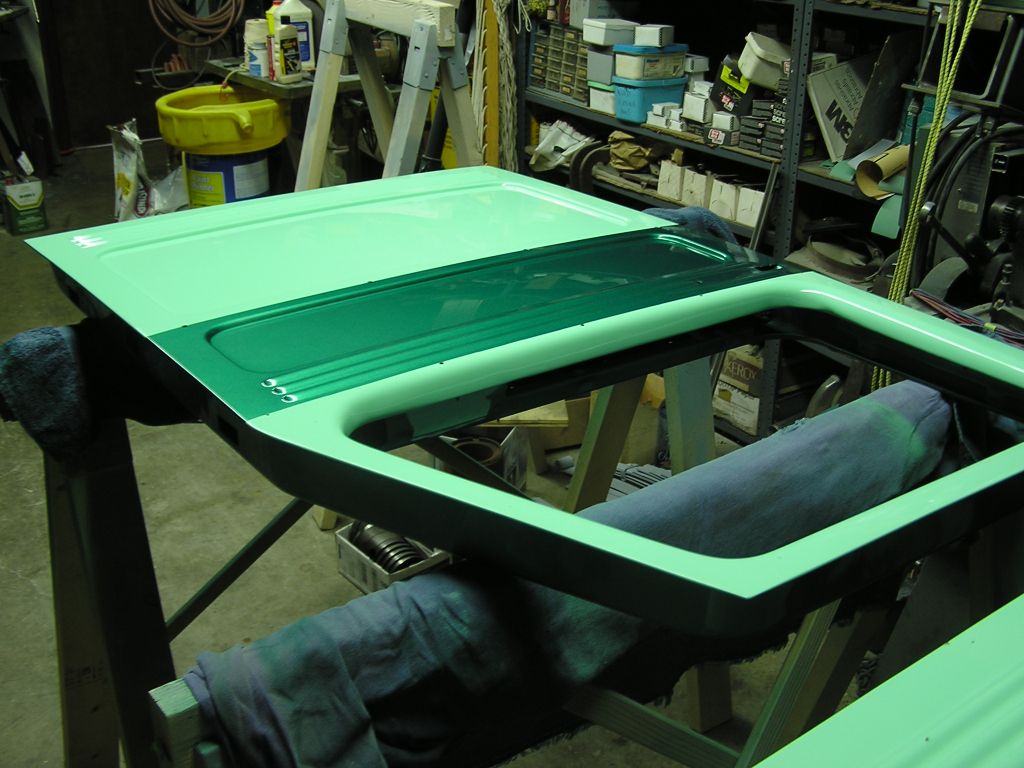 And here you can see the two colors. Actually the dark green is the primary
color on the Jeep, it's just on the doors that there is very little of the dark
green.
And here you can see the two colors. Actually the dark green is the primary
color on the Jeep, it's just on the doors that there is very little of the dark
green.