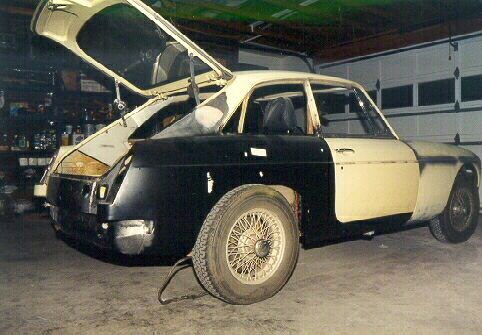
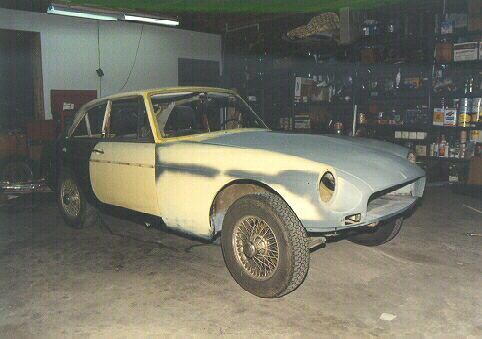
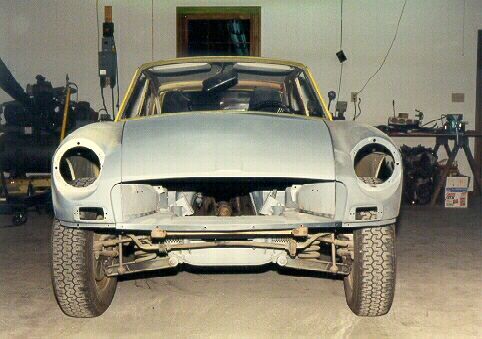
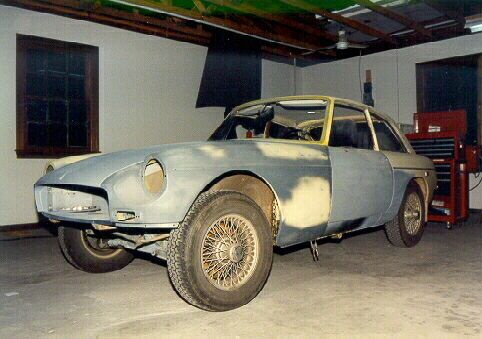
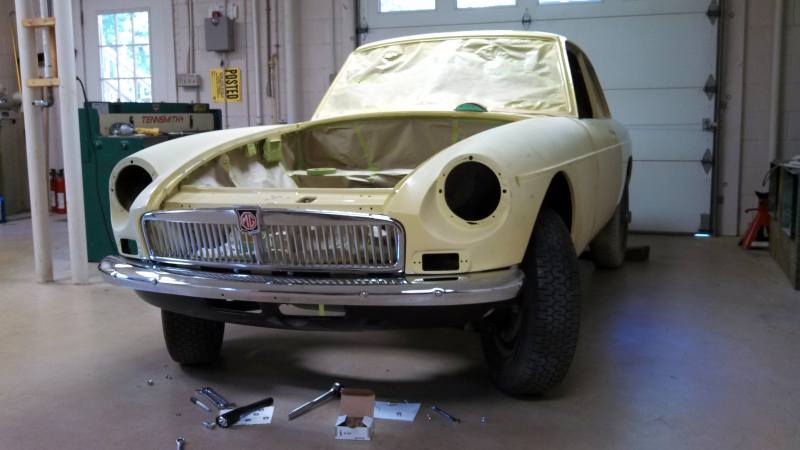
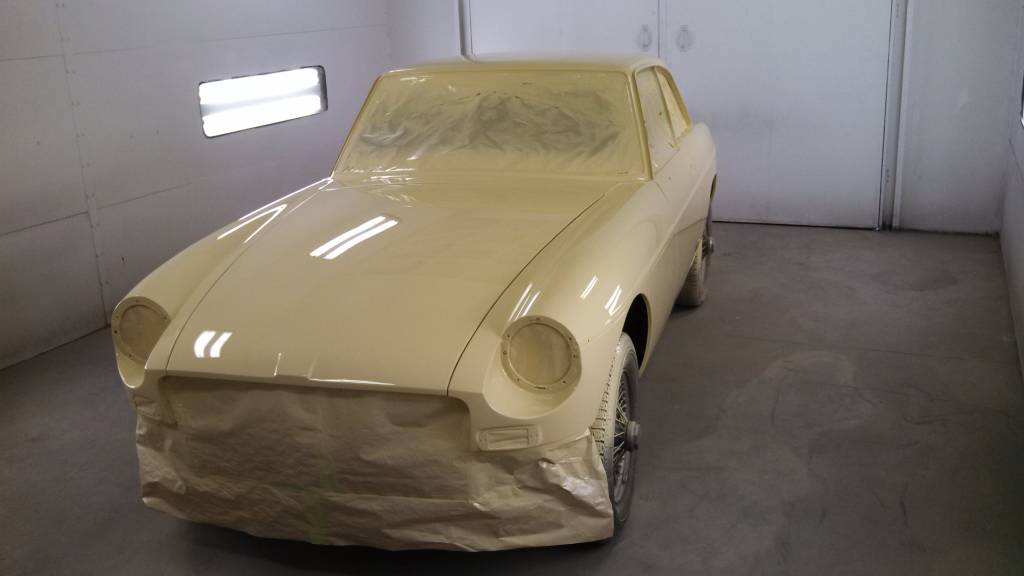
1969 MGB-GT Thumbnails
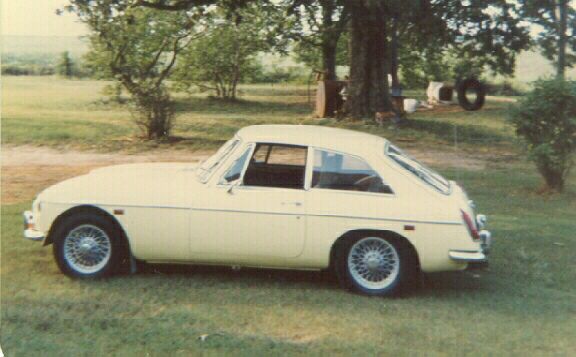
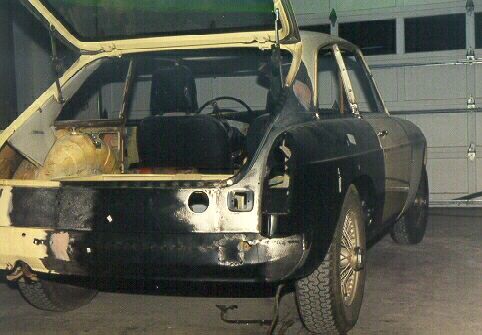
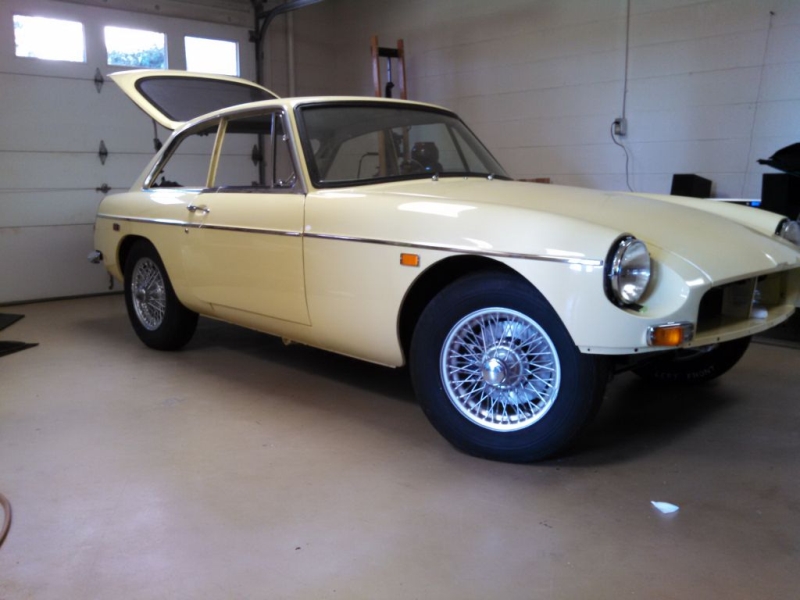
I bought this MG from a junk yard in 1981, my freshman
year in college. I did a good amateur restoration to the car and here is a photo
from the 80's.
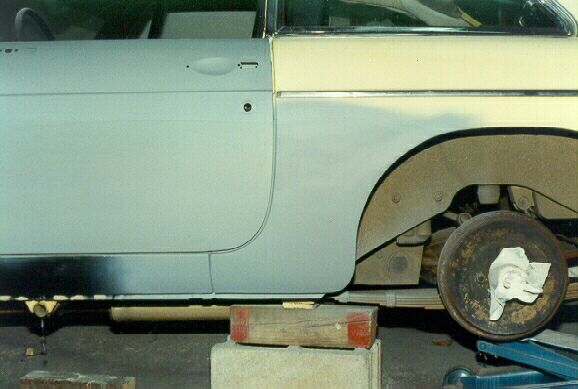
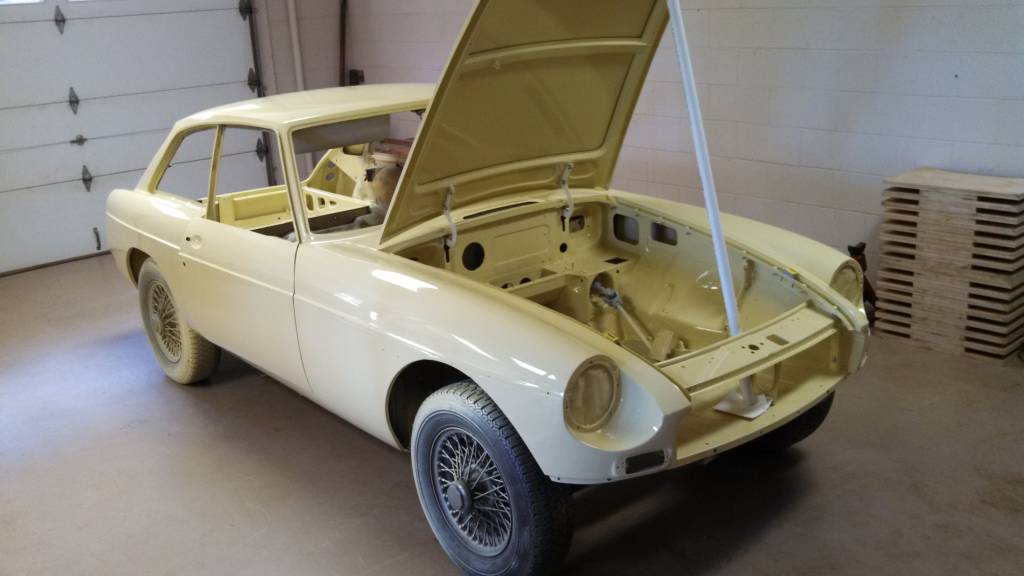
After driving the car many years, the paint began
to fade and I felt it was time to restore it properly, with all new replacement
metal for the originally damaged areas and to address typical rusty areas.
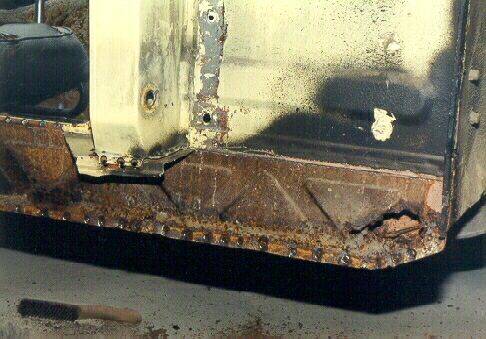
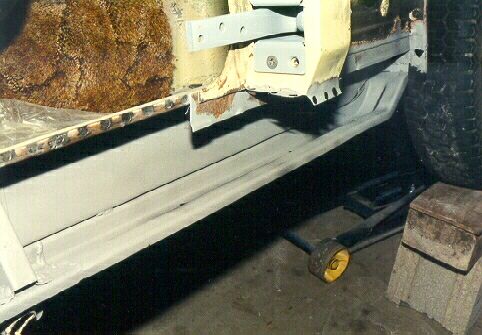
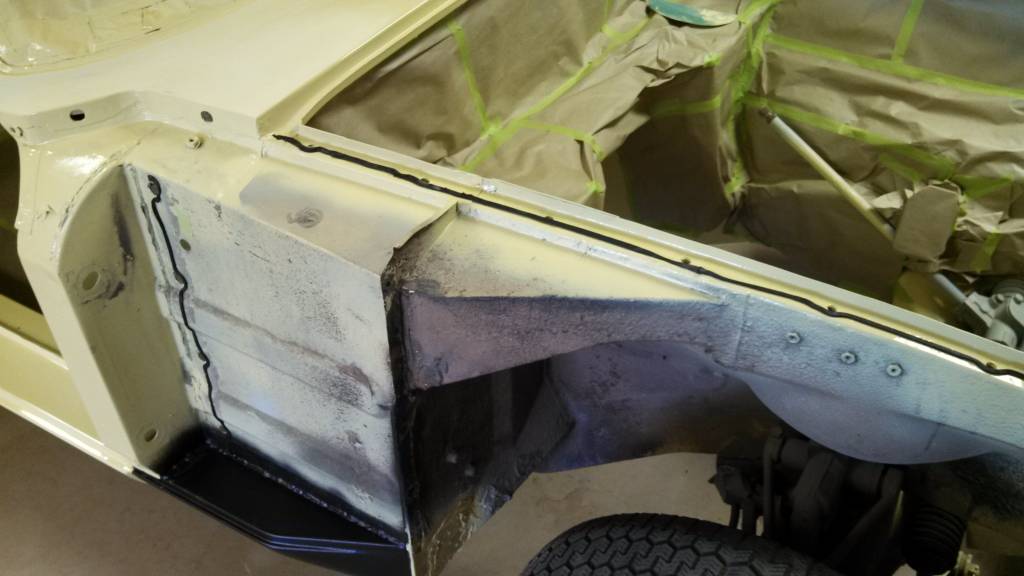
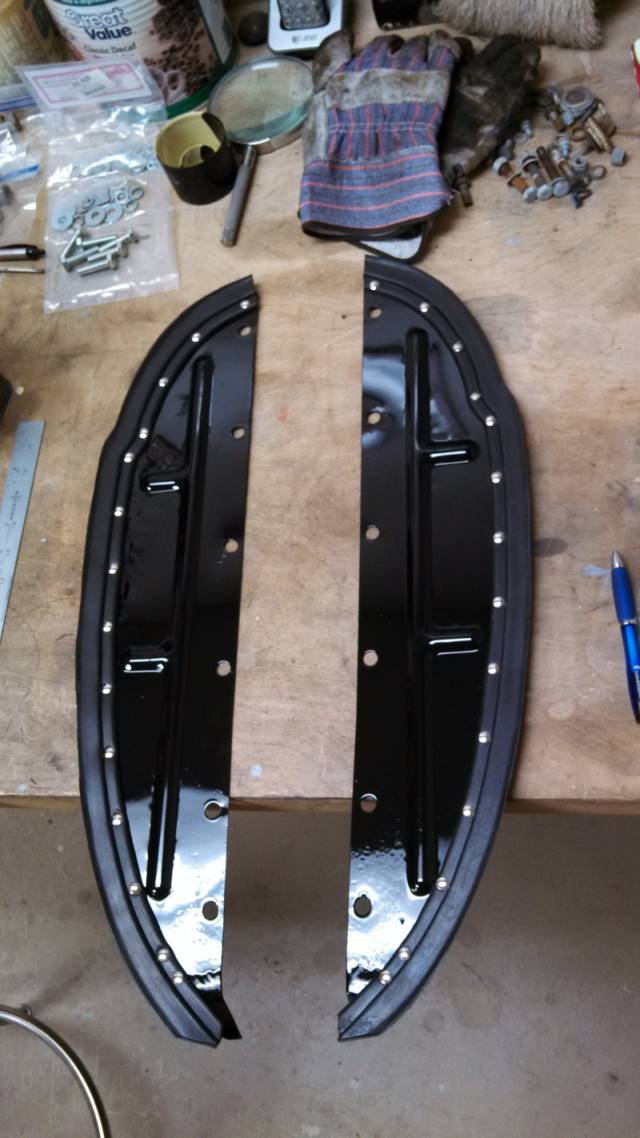
A few pin holes were in the original rocker panels and this
usually means more underneath! Sure enough, peeling the onion has begun.
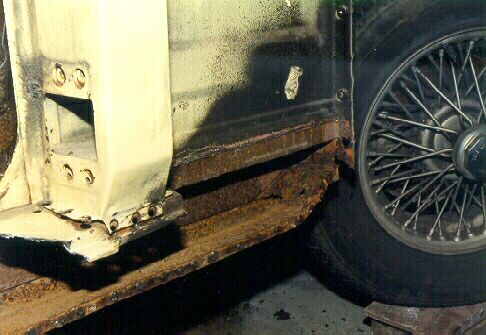
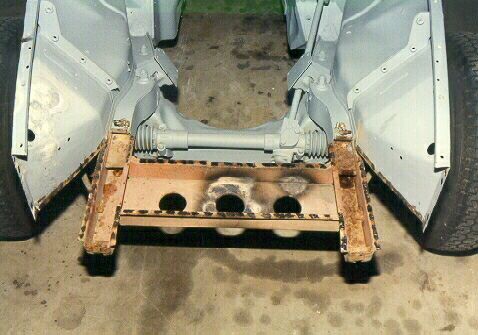
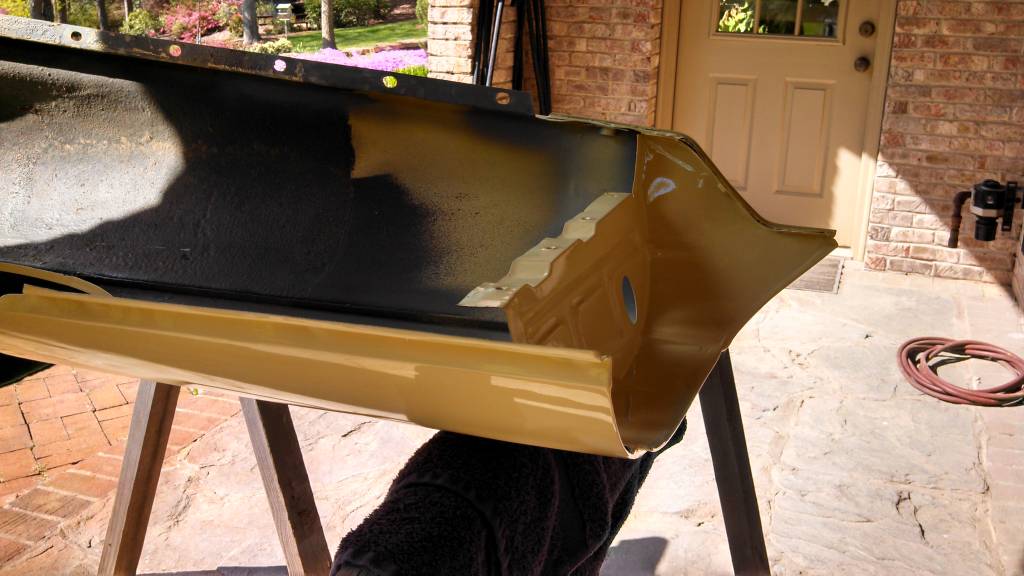
The lower sill, while still solid, will be replaced as access is
easy.
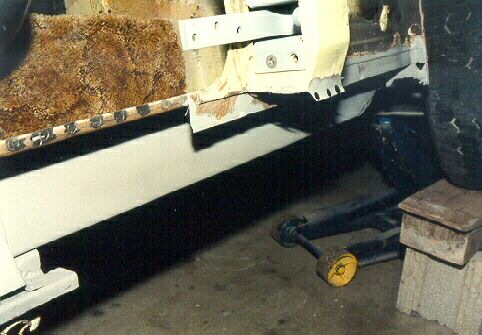
Removed and everything remaining sandblasted 100% clean.
New lower sill section welded in and welds blasted clean in prep
for primer and undercoating.
Now the web is welded in, the welds ground level, and primer
applied.
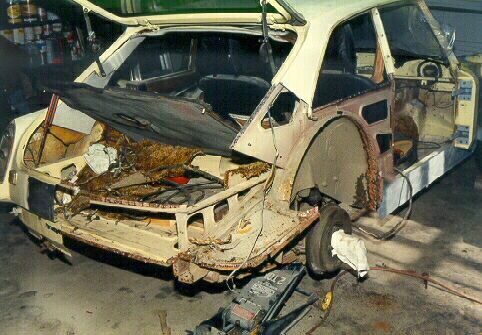
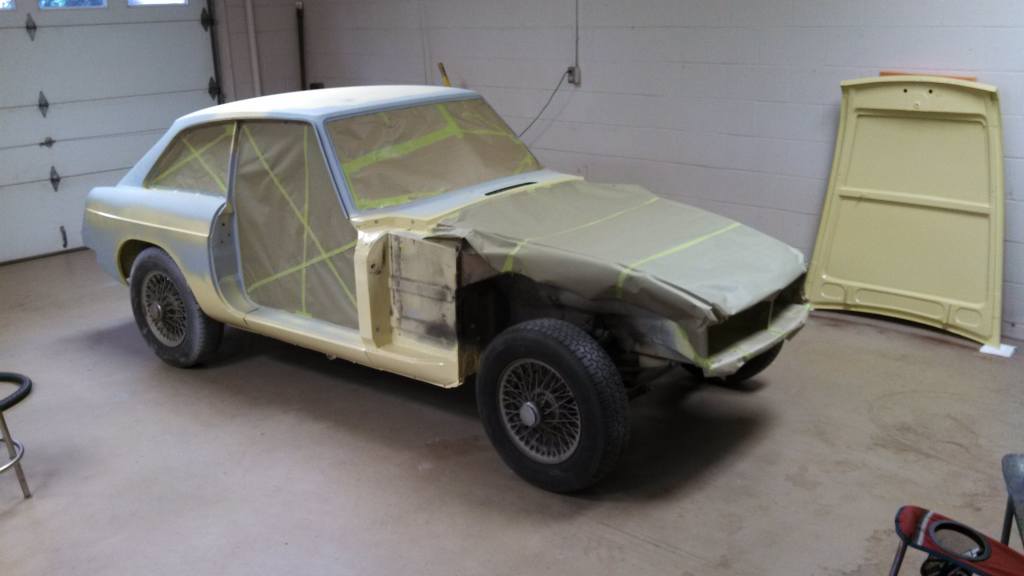
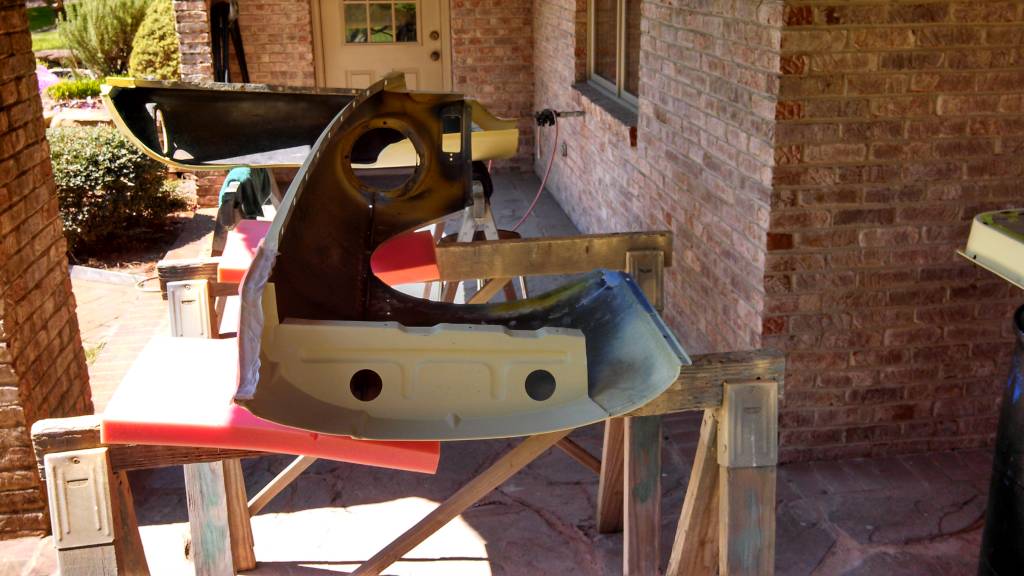
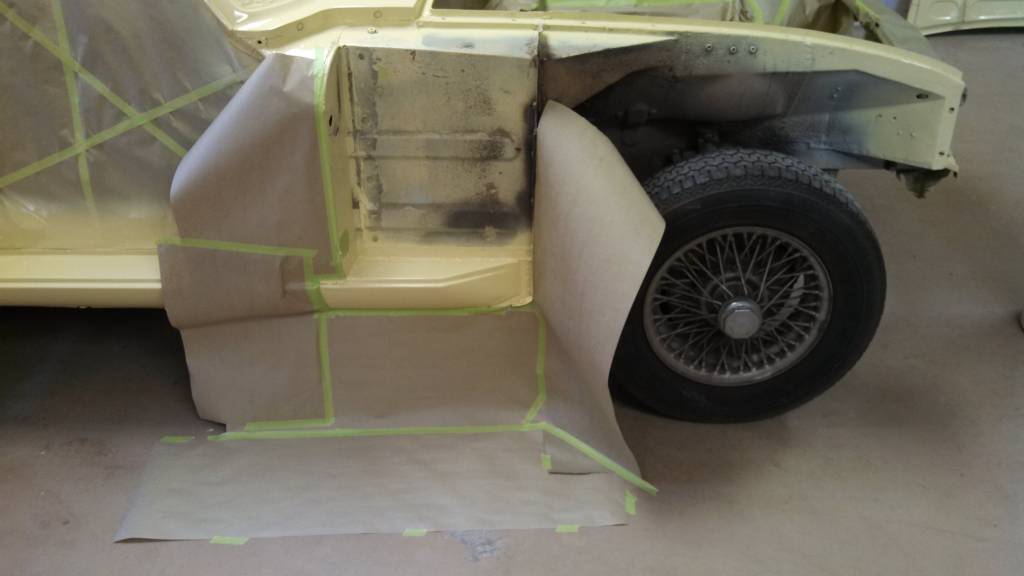
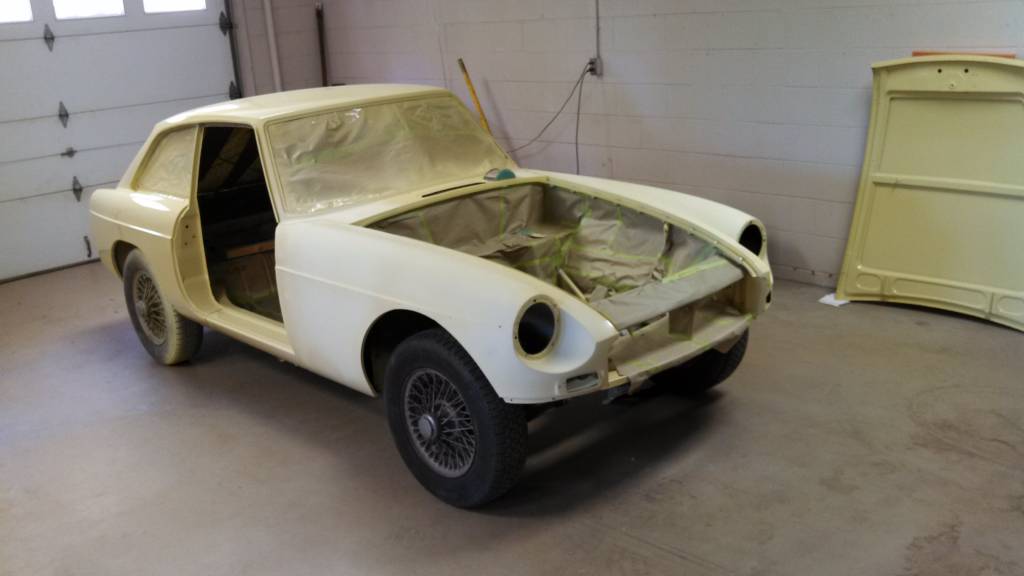
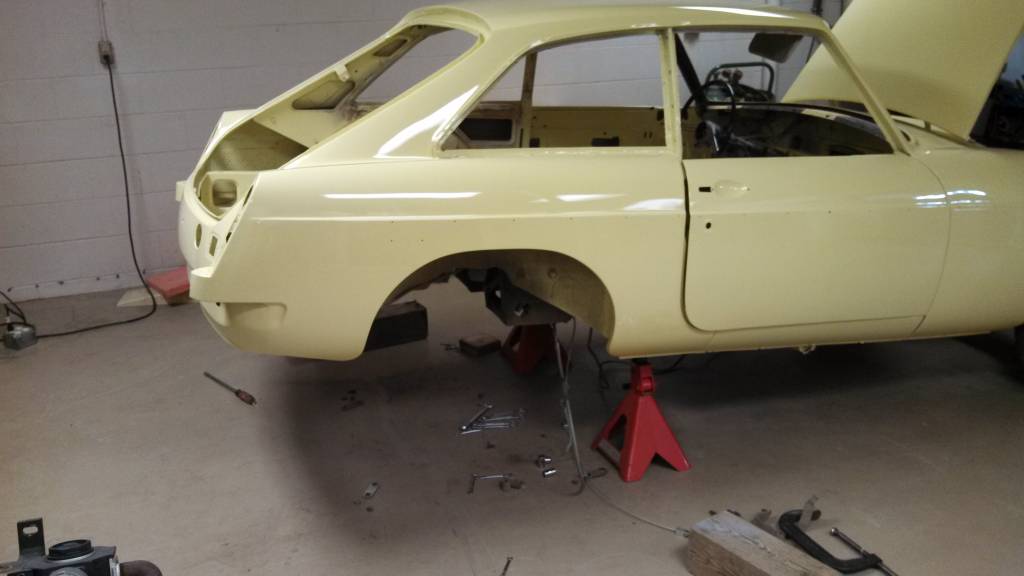
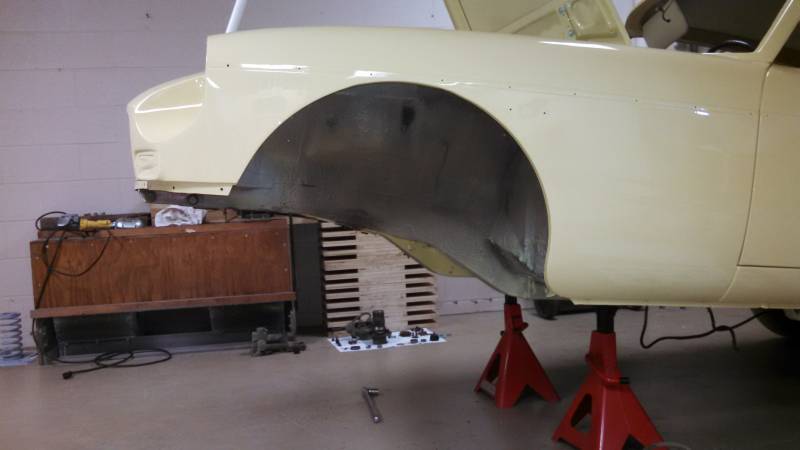
The original, damaged quarter panel has been removed, along with
the wheel well. These were damaged by the previous owner somehow, with the
damage being in front of the back wheel. Parking lot damage?
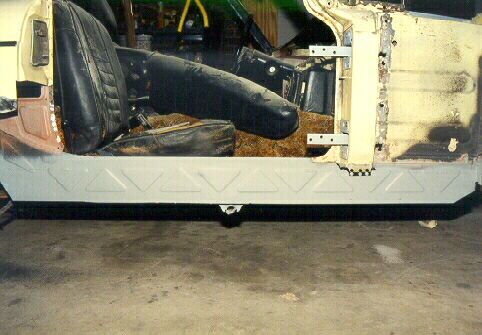
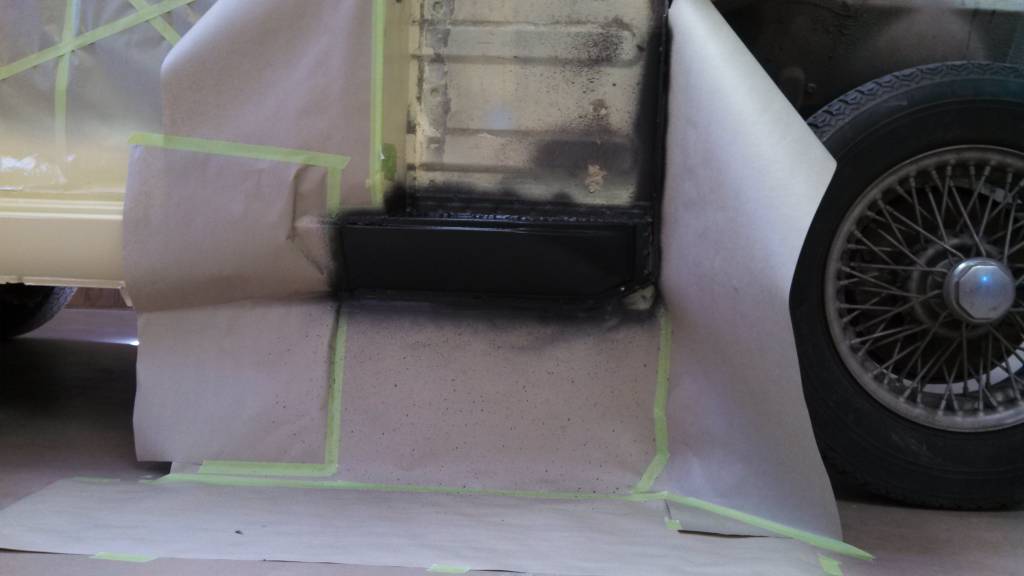
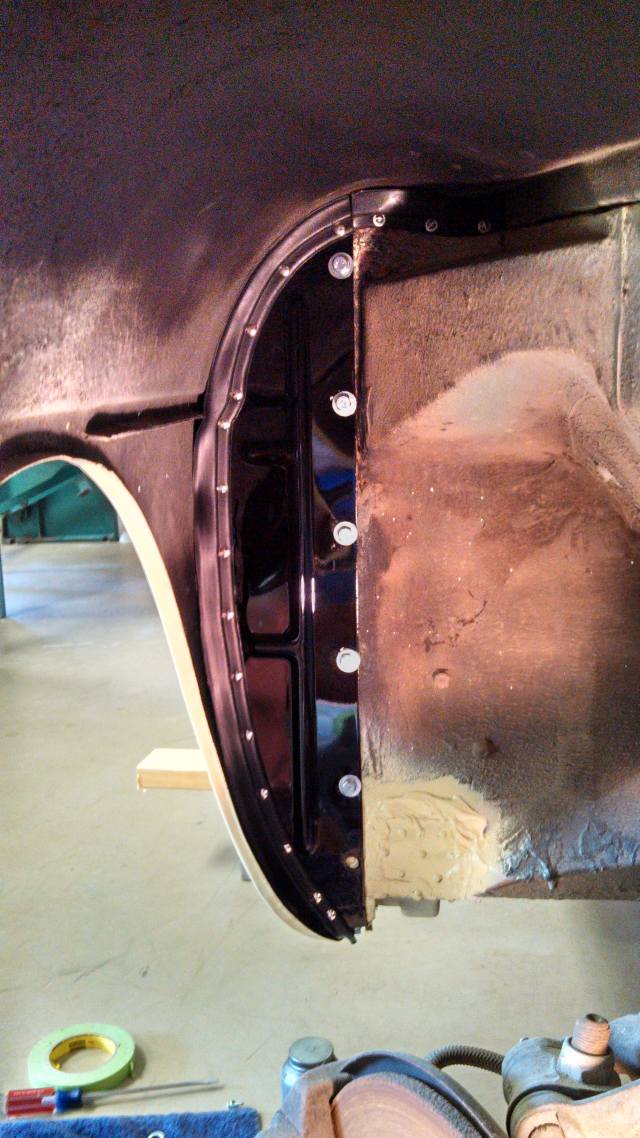
The new rocker panel, new wheel well, and new rear valence have
been welded in place.
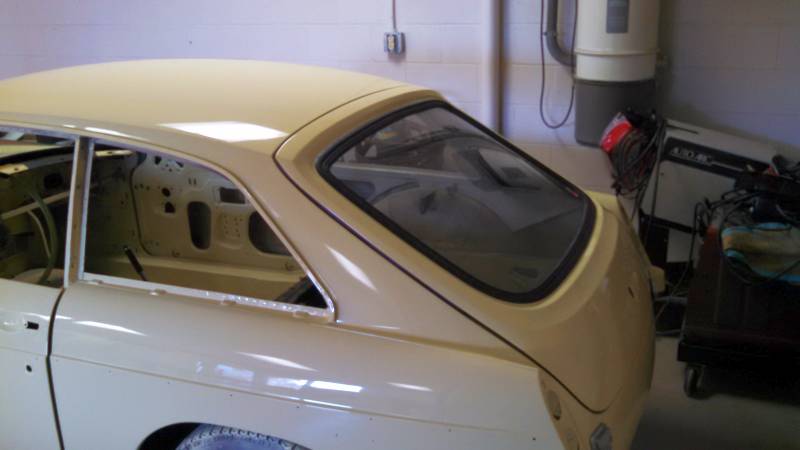
Next the new quarter panel from England was welded in place.
Looking good again!
Alignment looks great and is something I am really particular
about.
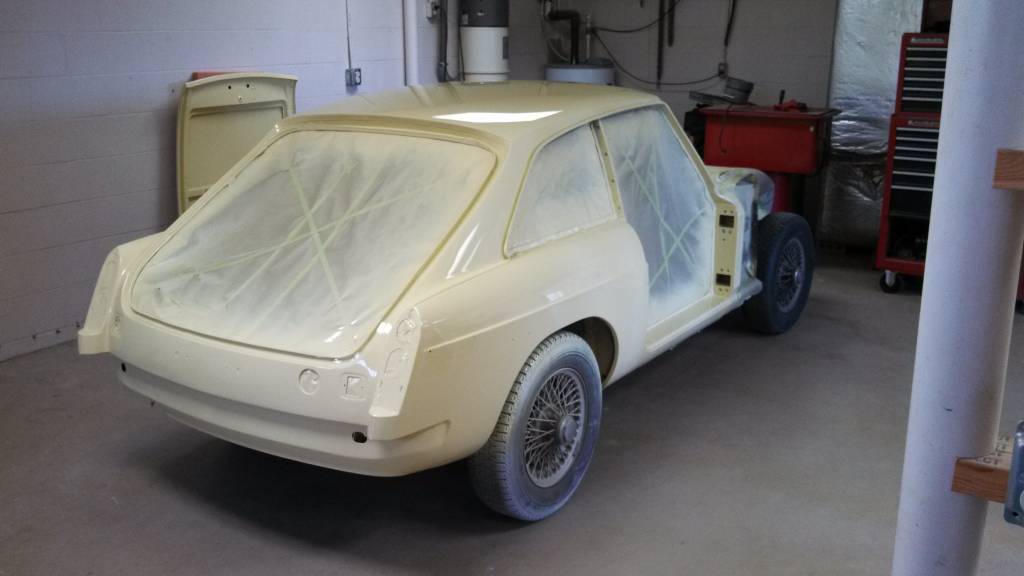
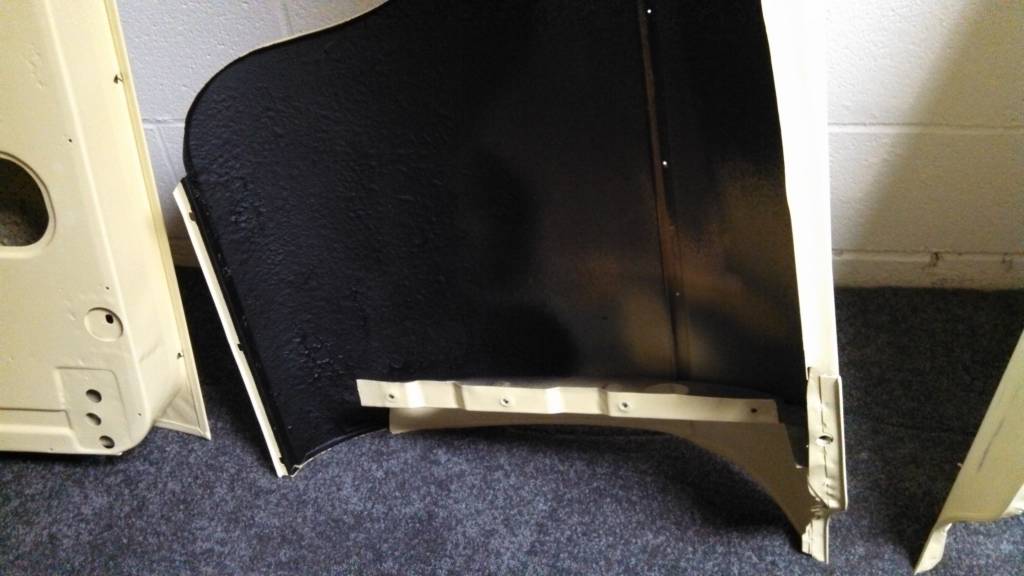
The same was done to the left side of the vehicle, except the
original quarter panel was fine. A dog leg patch was done, since this lower
section had to be removed to gain access to the rocker panel area for those
repairs.
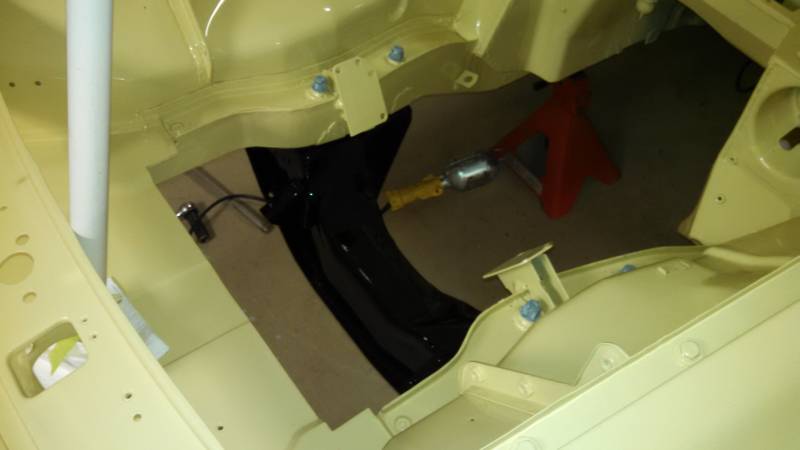
During this process, other blasting was done to remove any and
all rust in places such as the boot. Once the sand was cleaned up, self etch
primer and epoxy primer were sprayed in high risk areas such as this.
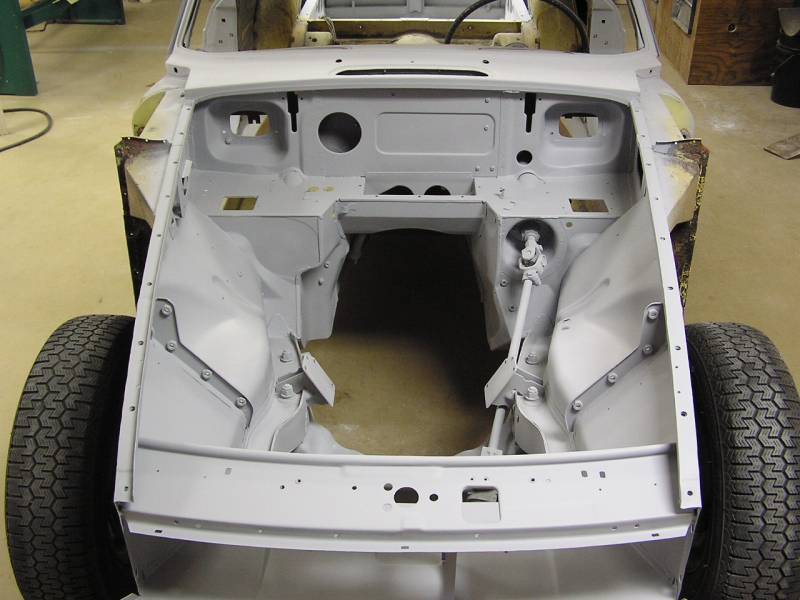
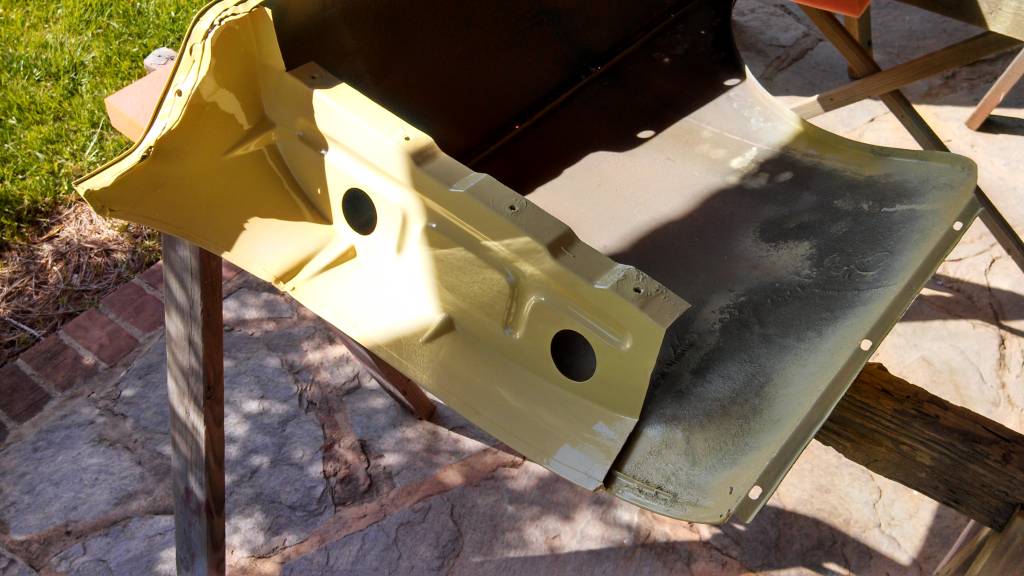
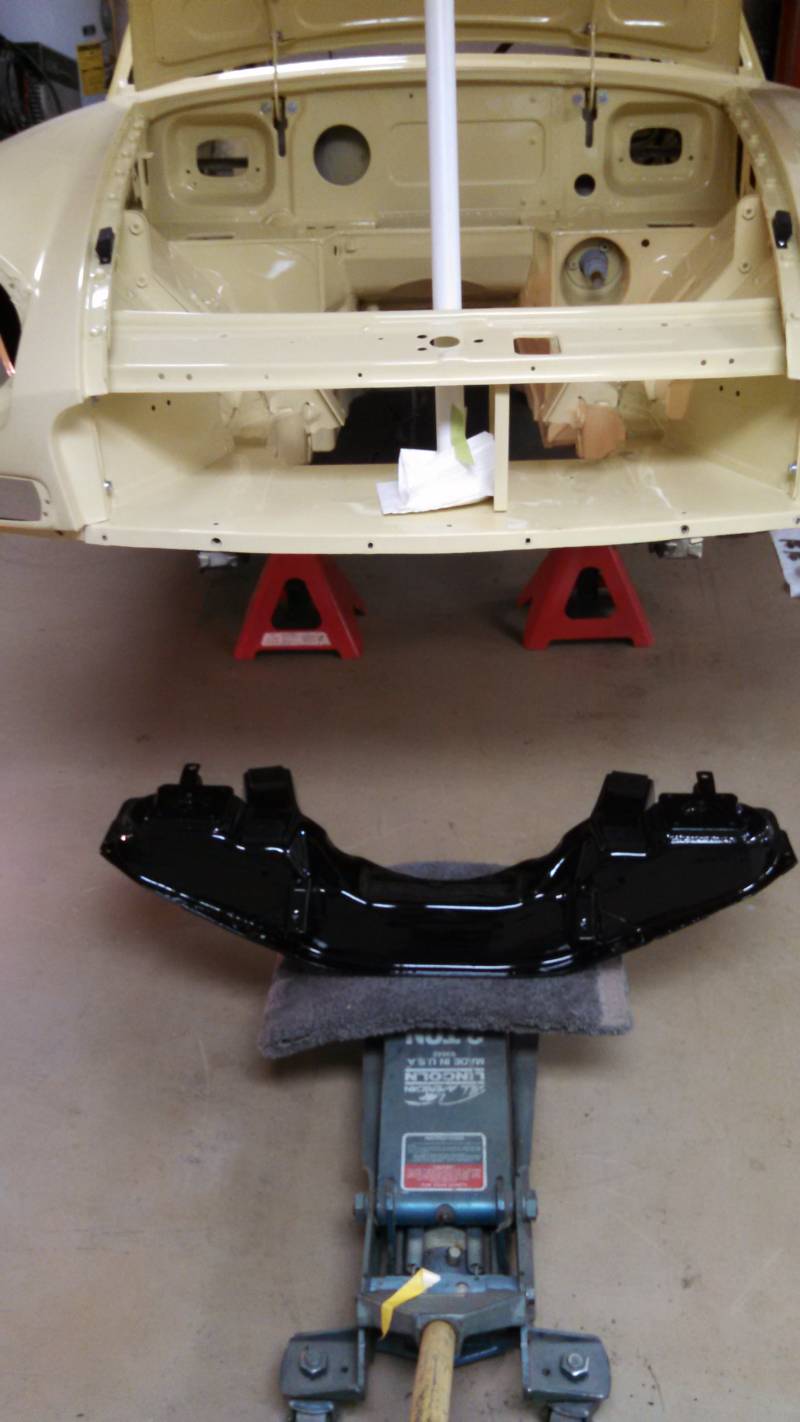
The engine bay was blasted 100% clean. The front pan was removed
to make a modification to this pan in front of the radiator. This modification
was made to allow a longer radiator to be installed and to allow fitting AC in
the future.

More of the engine bay blasted clean.
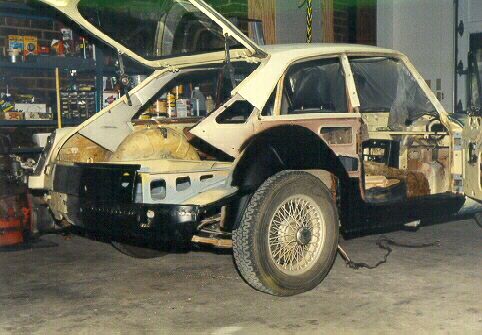
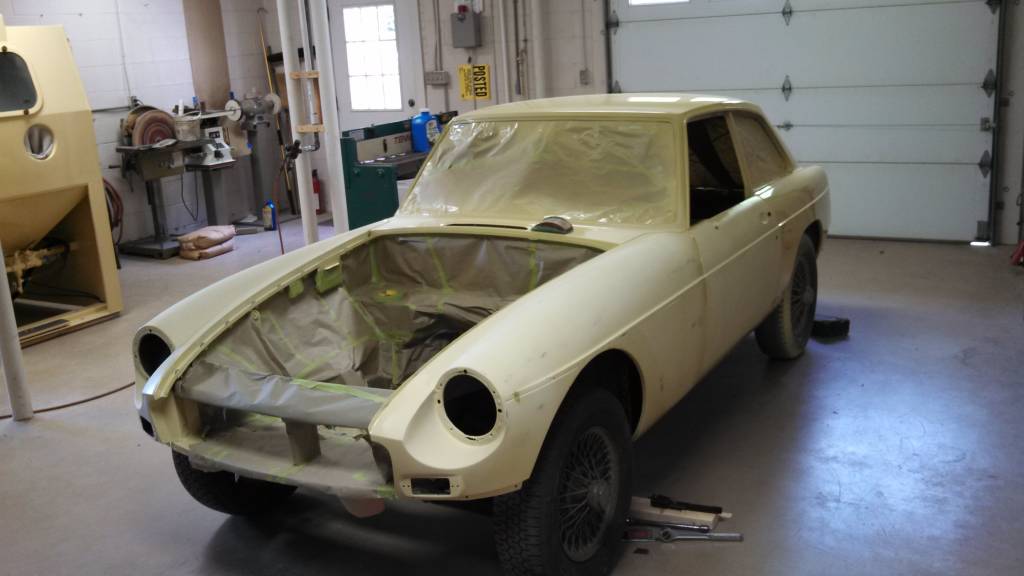
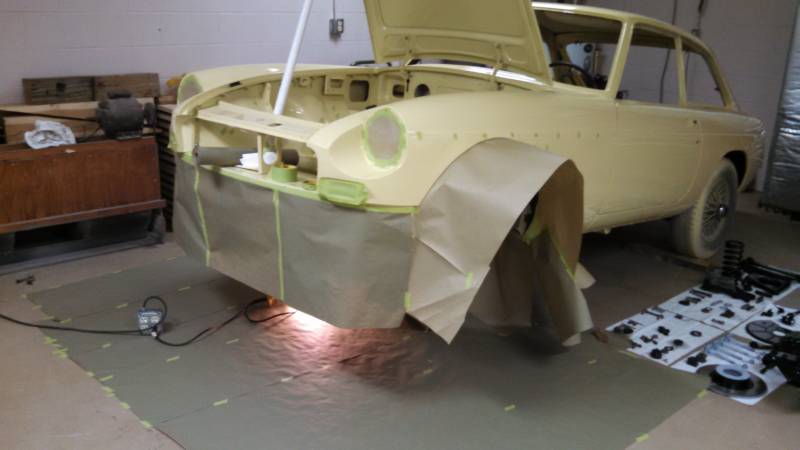
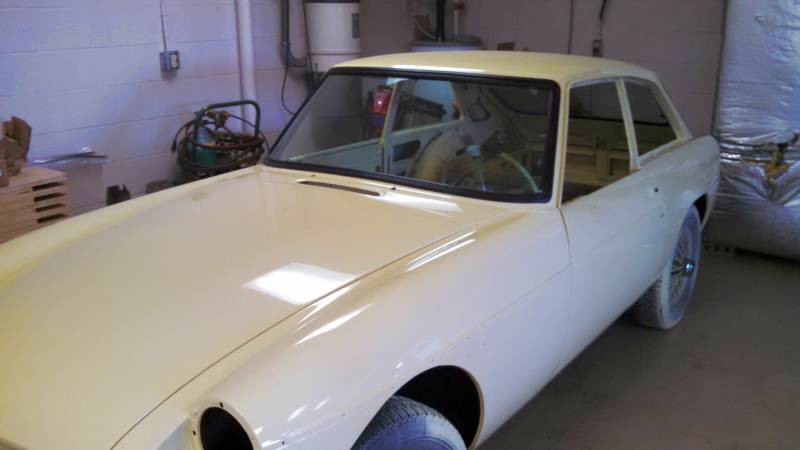
Final check of the fit of all the body panels, before taking
apart again for final paint.
I had outgrown the old shop and house, so in 2009 we moved to a
new house with a full length basement under the house. Much better working
conditions!
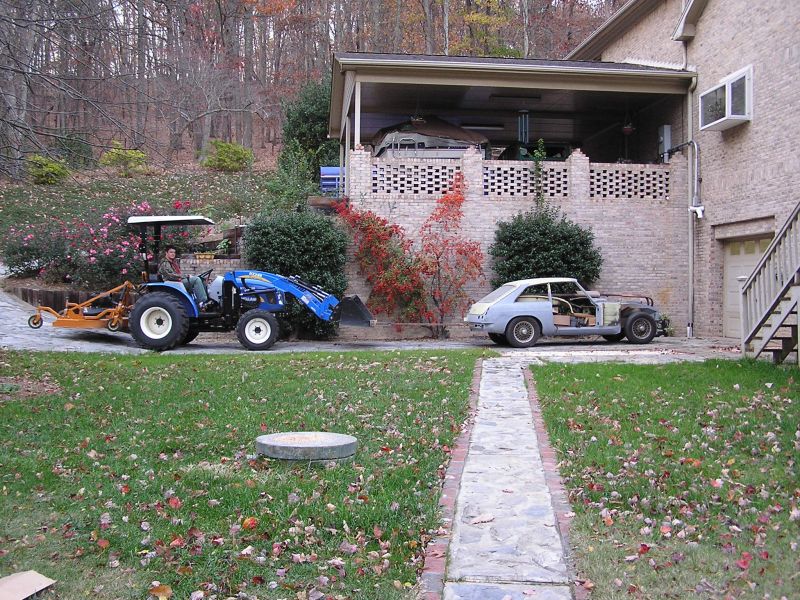
A tow/push bar was fabricated to move the MG from the upper
level garage to the working garage under the house. If you look closely you can
see the bar between the tractor bucket and the back of the MG. This was required
as the MG has no brakes at the moment.
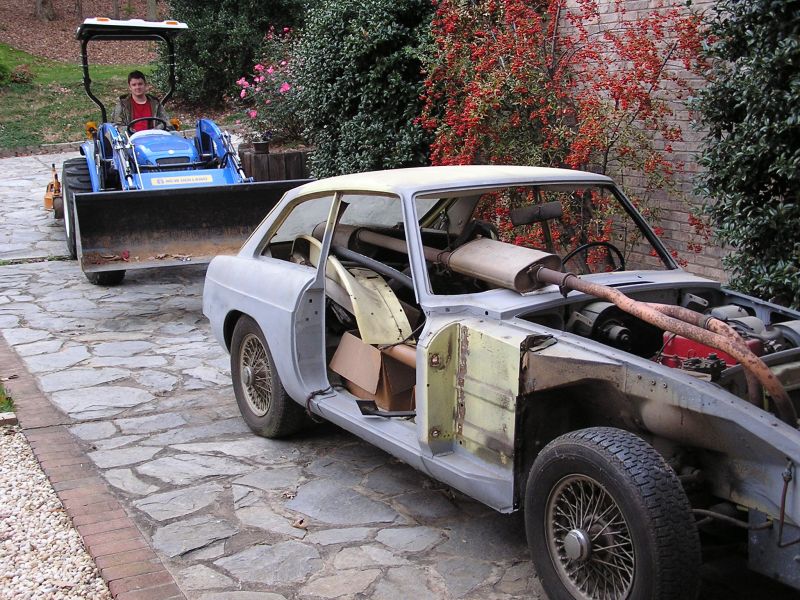
Son Devin drove the tractor while I steered the MG down the
steep curved driveway to the shop. How about the Dr. Kevorkian exhaust system?
:-)
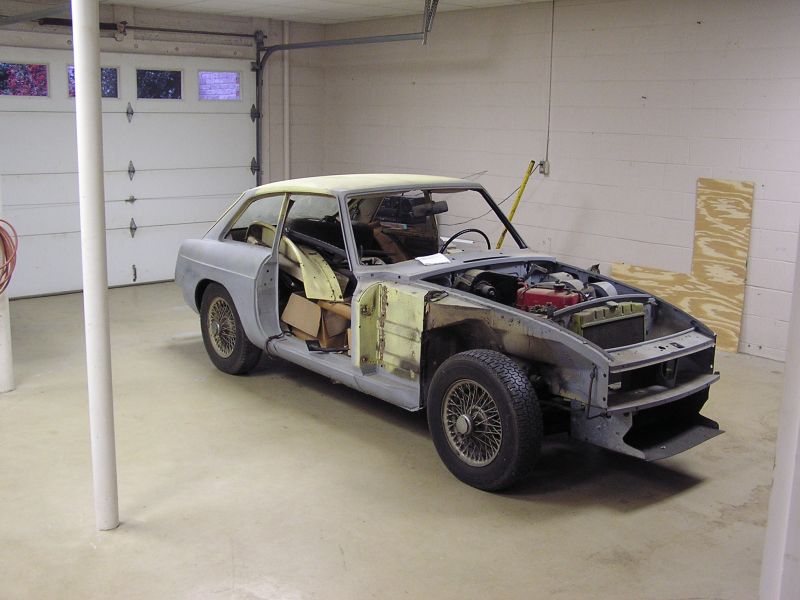
All safe in the new shop ready for work. First will be the task of
unloading all the boxes of MG stuff stored within.
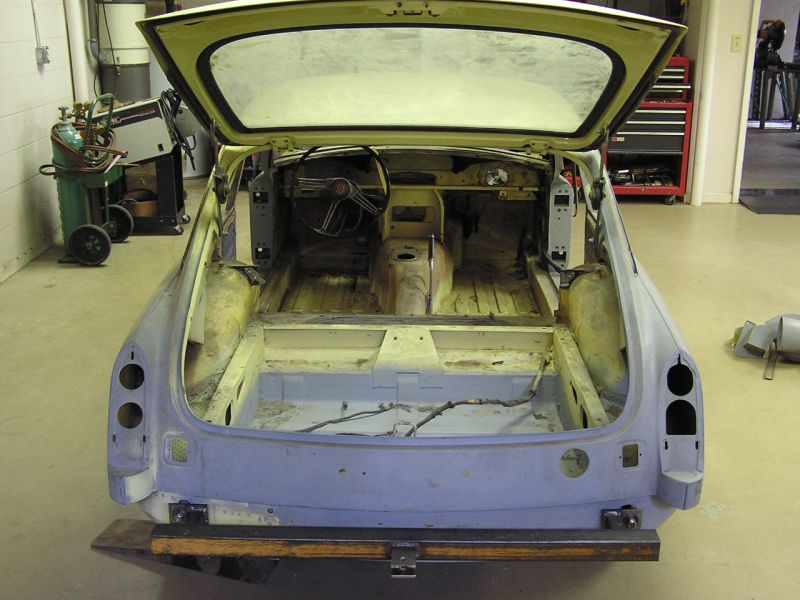
All cleaned out. Here you can see the tow bar attached to the
bumper mounts. It worked great.
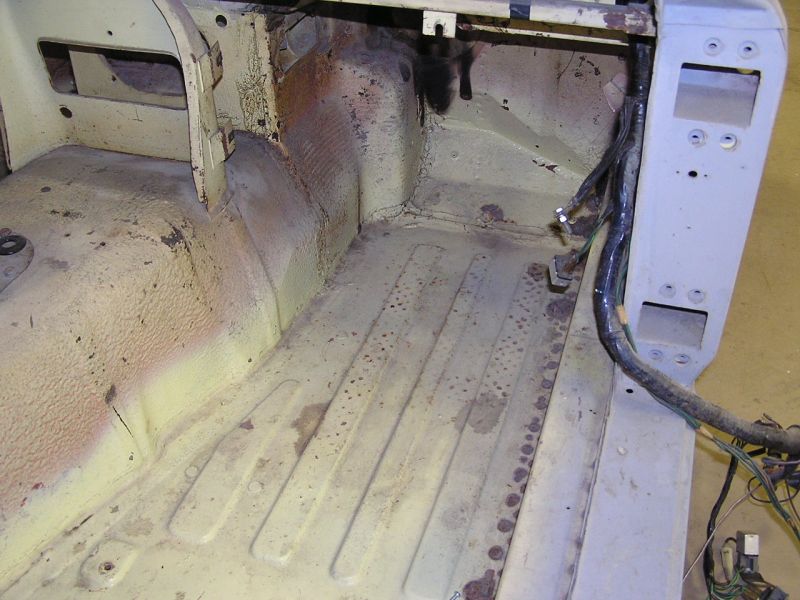
In the first photos you've saw the extensive work done
replacing the rusty rockers and sills. Despite all that, the floor boards are
essentially rust free. The advantages of a hard top vs. a convertible! The dark
spots along the right sill are the burned paint from where the new sill was
welded in from underneath. Soon this will all be blasted clean.
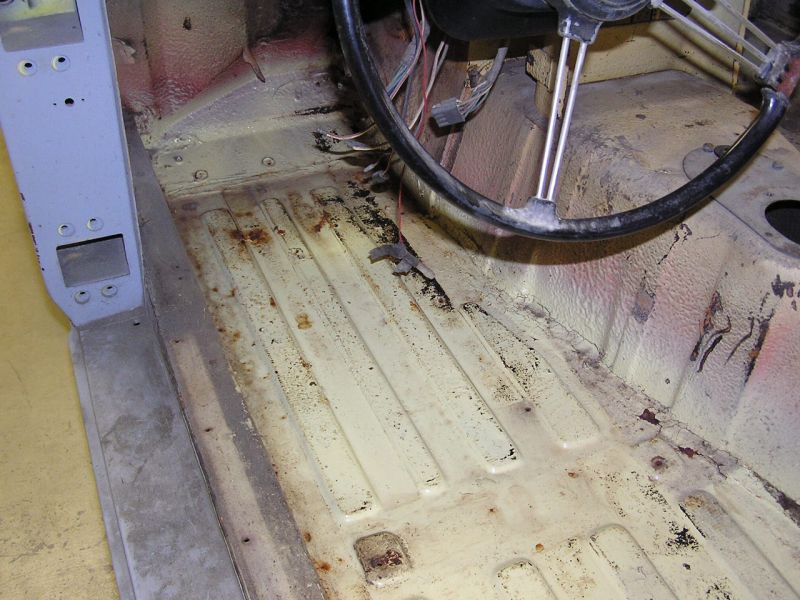
A couple of spots of surface rust on the drivers side. In
remarkable condition for a 43 year old car! Again, a little blasting will have
this all nice and clean soon.
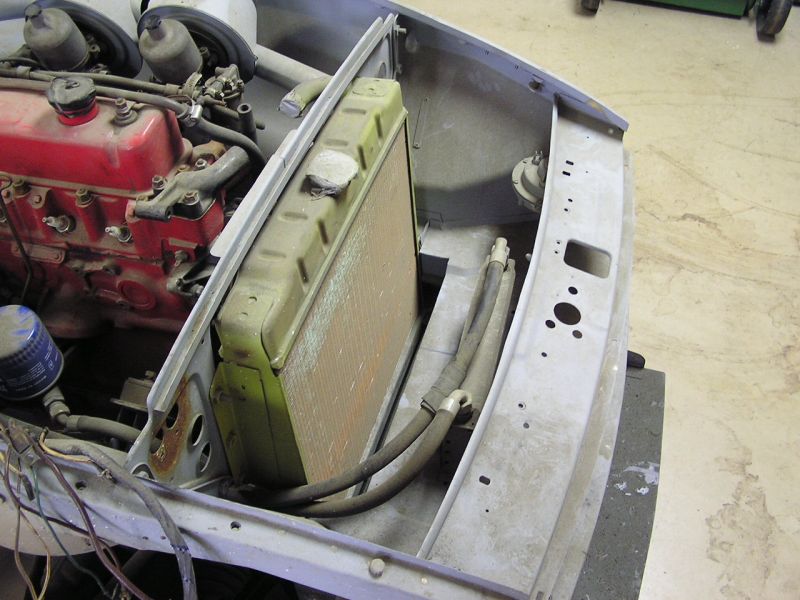
The new pan up front was
modified to accommodate the condenser of a planned AC unit. You'll notice the
radiator is canted back slightly (forward at the bottom). This allowed making
the custom radiator 14" tall instead of the original 10" tall. The 40% increase
in cooling capacity will be a much appreciated feature. We all know how hot MG's
tend to run in the summer. Particularly important w/ the planned AC addition.

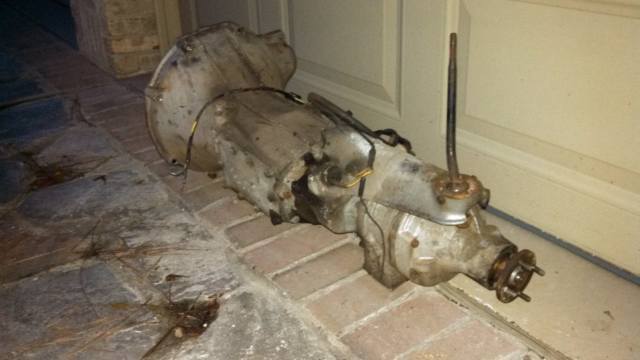
Engine and transmission are about out. It's nearly impossible to
pull both engine and transmission together on an MG. I surely wouldn't attempt
this on a nicely painted engine bay. In the past I've always pulled the engine
first and then the transmission.
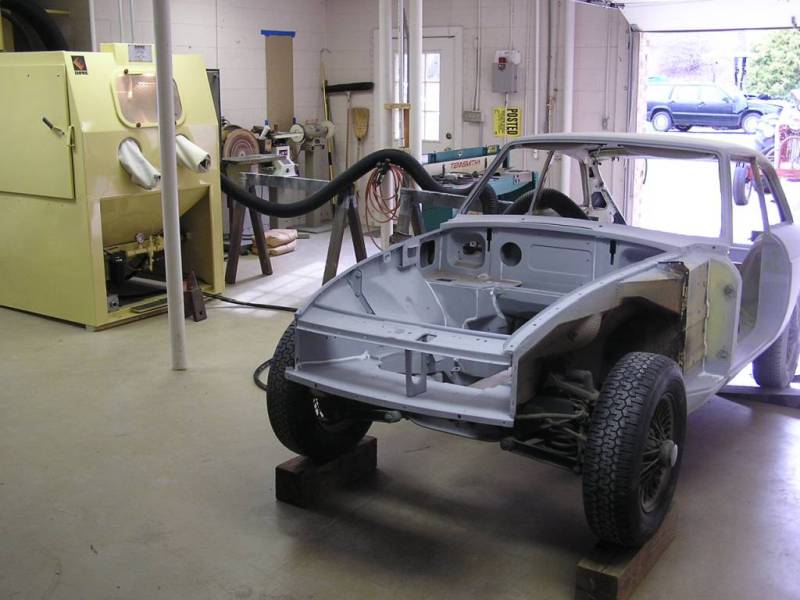
After cleanup up w/ KliksKril and a couple of sprayings of 2k
primer surfacer with block sanding between, the outer body is ready for paint.
The engine bay, boot, and floorboards will get attention next, before any color
is sprayed.
12/29/2012
Three applications of primer surfacer and a final sanding w/ 400
grit and the engine bay is ready for color paint.
Numerous applications of primer surfacer and final sanding w/
400 grit sandpaper and the trunk area is also ready for color paint.
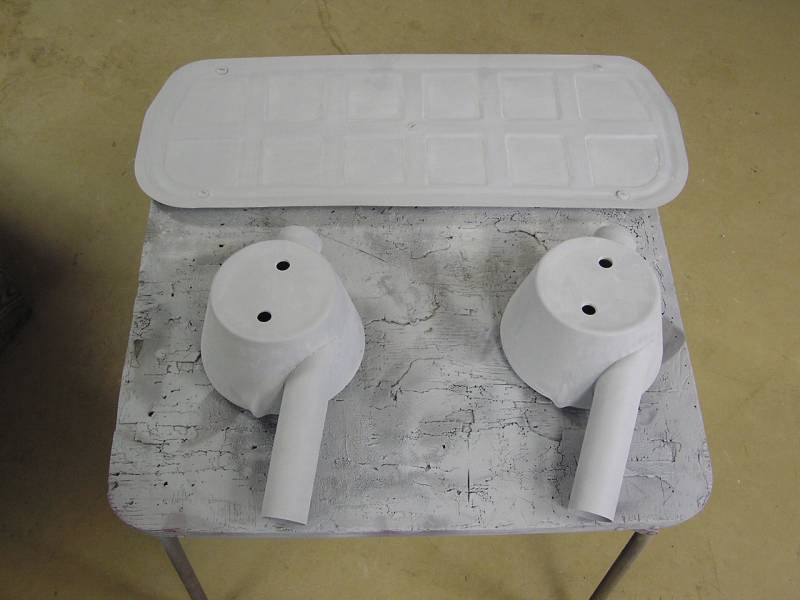
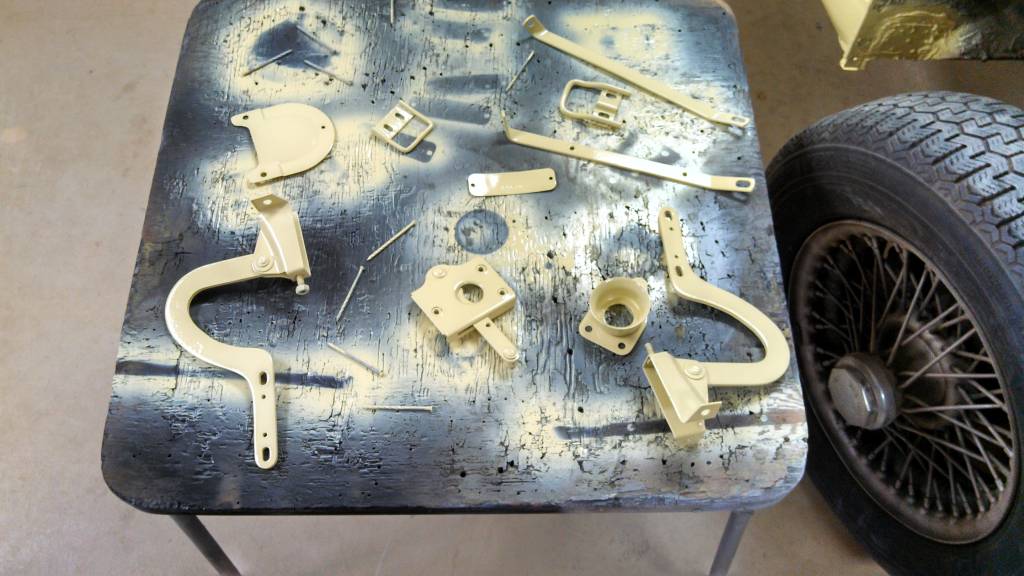
Some miscellaneous parts were also blasted, primed, sanded, and
readied for paint. These are the air filter boxes and the battery cover.
Also the defrost ducts, the defrost outlet grates, and the other
part of the air filter housing was readied for paint.
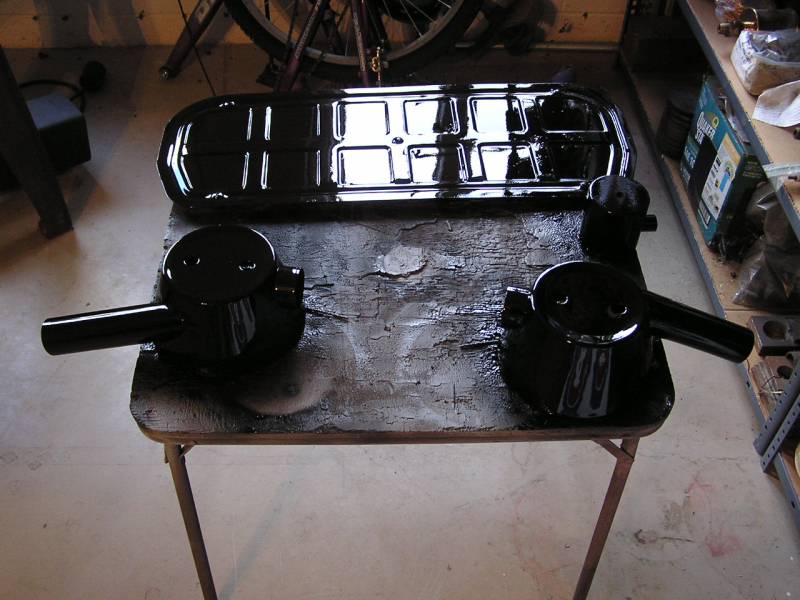
Dupont Imron has been sprayed on these...

and Imron these as well.
2/6/13
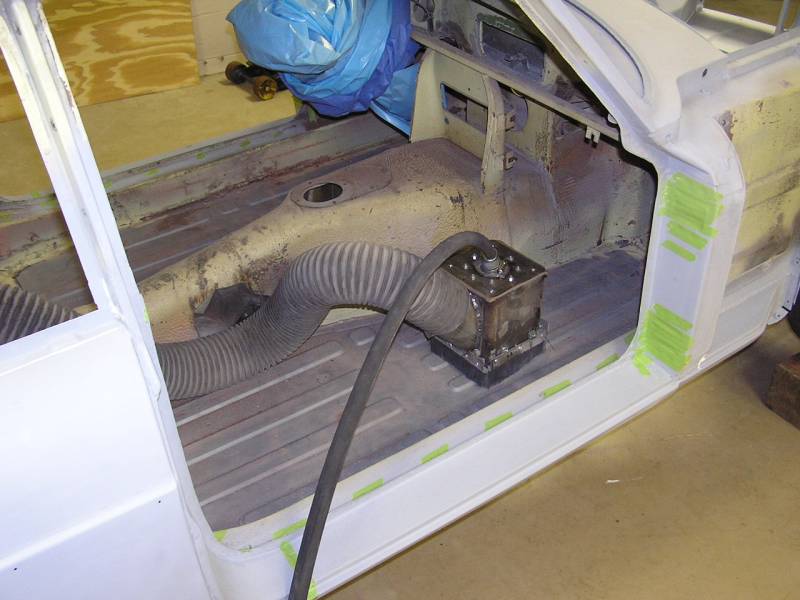
To allow blasting of the floor pans without making a mess, this
remote vacuum blast head was fabricated and it ties into the blast cabinet in
the shop. The floor pans were blasted right in the shop with very little mess. A
very handy little tool! It might not look pretty, but it does a great job.
The remote blast head's hoses tie into the blast cabinet suction
and pressure systems.
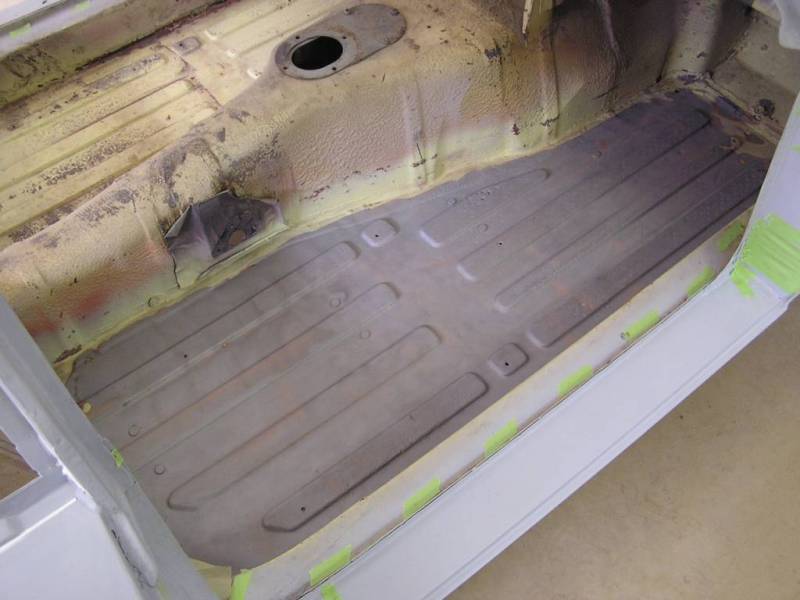
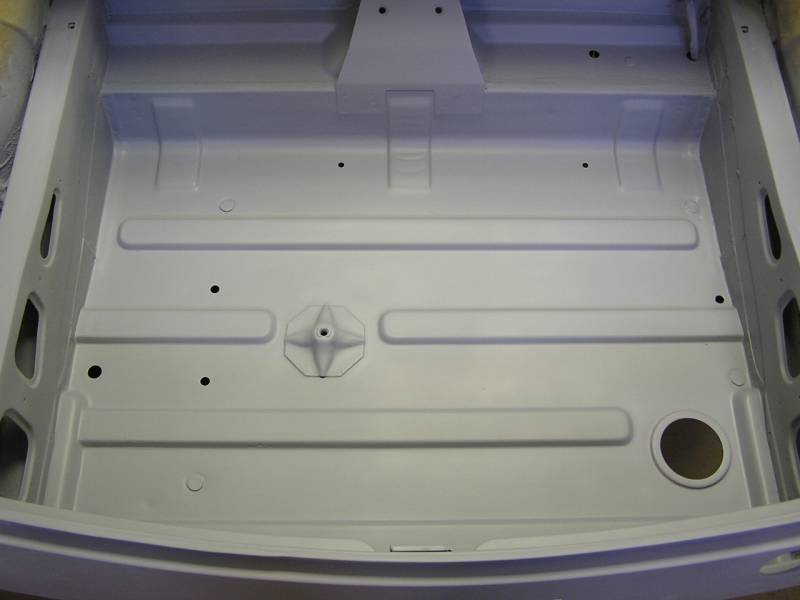
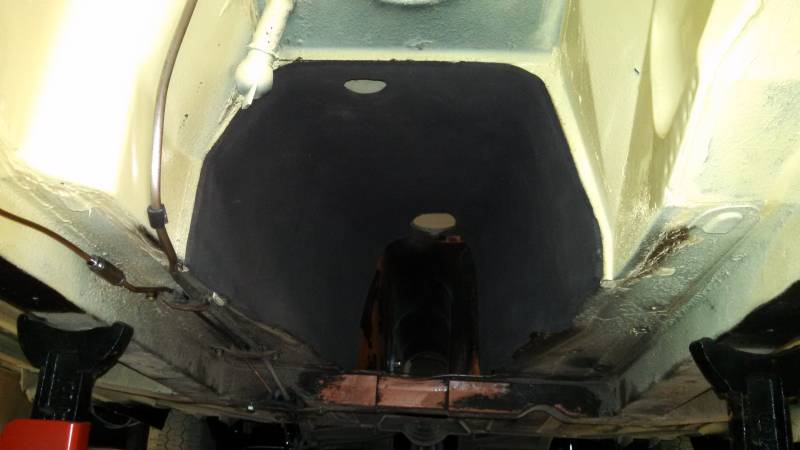
Passenger floor pan blasted 100% clean.
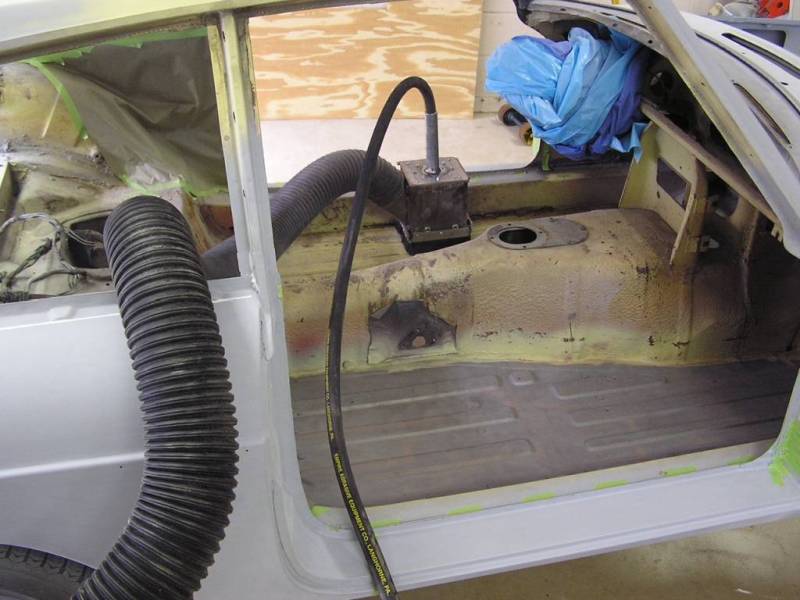
Preparing to blast the driver's side floor pan.

Close up of the front of the driver's floor pan. There is one
bit of rust through to contend with on the left that'll be easy to fix with a
little wire welding. This is probably where my
clutch heel rested. You can see a few other miscellaneous holes that have been
drilled thru the years to hang heat shielding at the front/right of the photo.
These will also be welded closed.
Other than this one small place, these original floor pans are
rust free! Pretty remarkable considering the age and how poorly sealed MG's are.
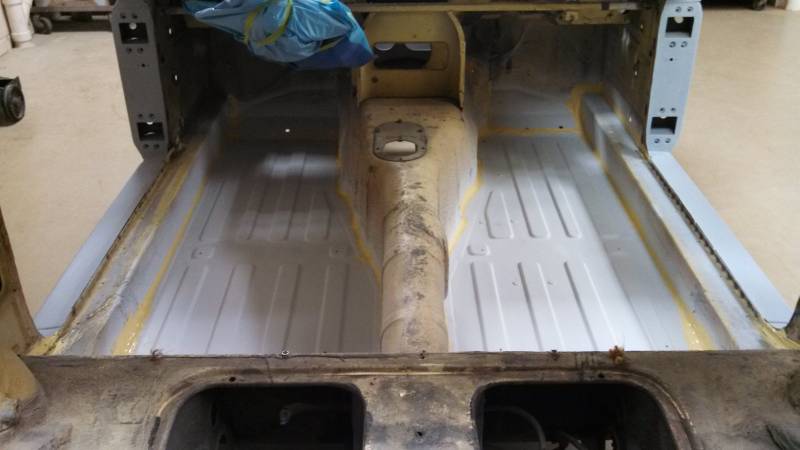
Once the pans were blasted and small welding repairs made, self
etching primer was sprayed followed with a coat of epoxy primer. This was sanded
once and a second coat of epoxy applied. Then all was ScotchBrite'd and readied
for color paint. Finally new seam sealer was spread around all the edges, making
all waterproof. Was lucky to find sealer in yellow nearly the same as the color
this will be sprayed!
3/16/13
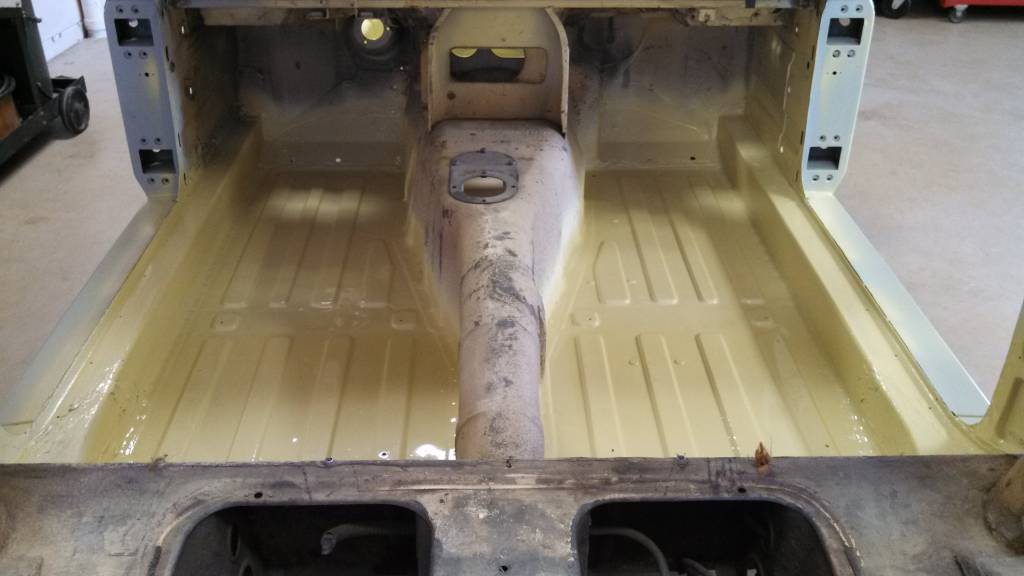
Here the first of the Glasurit paint in the original pale
primrose yellow has been sprayed on the floor pans.

The boot was sprayed at the same time.....
As was the engine bay. The new Glasurit is taking a little
getting used to after spraying Imron for 35 years, but it turned out well enough
for these areas. Glasurit sets FAST! It was dry to touch in an hour. Full cured
in 8 hours.
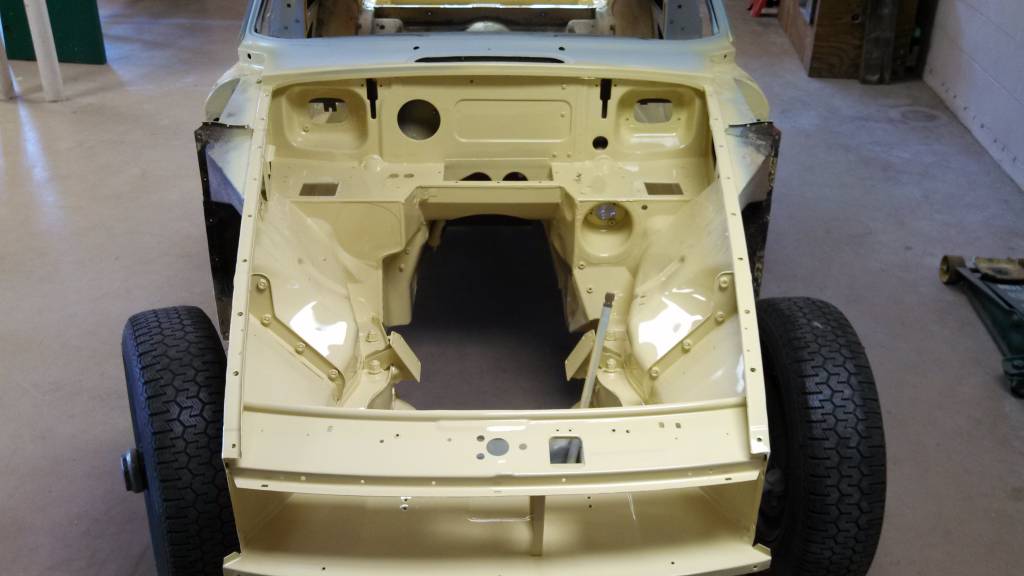
3/24/13
The underside of the hood was sprayed in the afternoon after
work. You can really see the shine of the Glasurit paint. The natural light
outside makes the paint look a different color from photos in the shop, but it's
the same color.
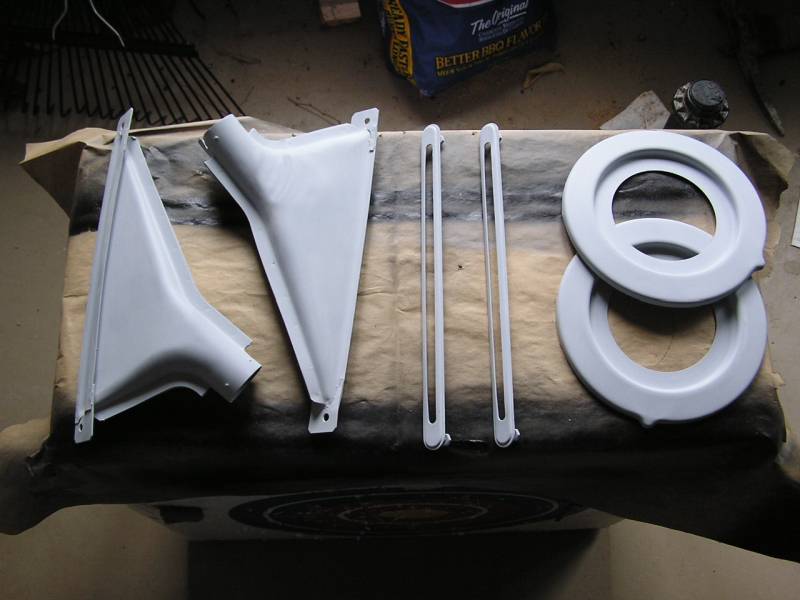
Some misc parts painted at the same time.
3/30/13
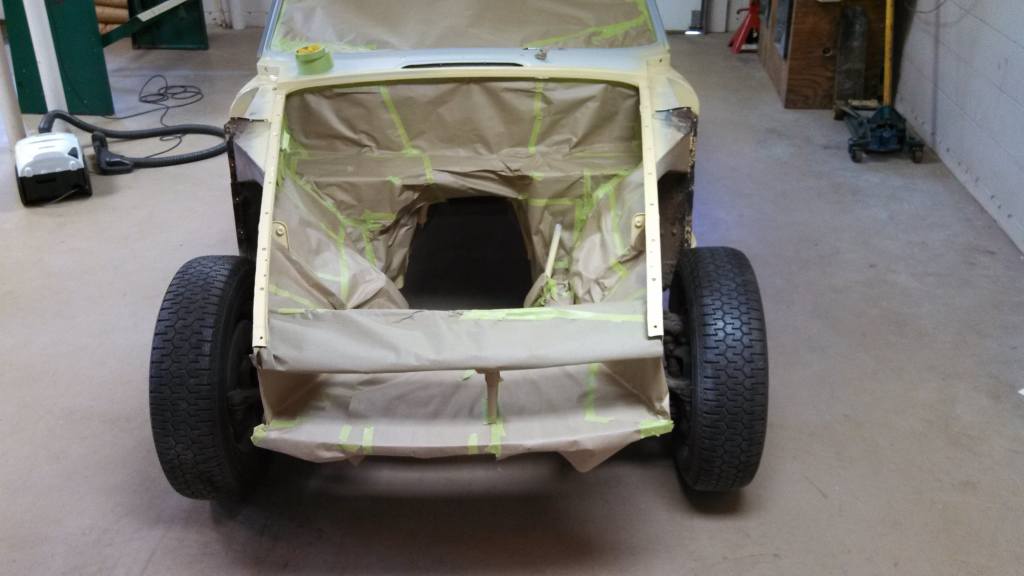
The very time consuming and VERY boring process of taping
everything up has begun. First the floor pans, boot, and engine bay were papered
and taped. Then all the window and door openings sealed. One, to keep overspray
off parts already finished, and two, to eliminate any potential particles of
dirt from coming from within the vehicle onto the paint when spraying. The hatch
and quarter window opening have been sealed. Notice the tail light openings, gas
filler, and others have been sealed. All to prevent any air flow into the inside
of the vehicle.
All the shiny paint in the engine bay has been papered and taped
to keep overspray off of it. Many hours spent on this.
Finally a cap of paper on the engine bay. Also the door openings
and windscreen opening papered, keeping all overspray out of the interior. Just
about ready to spray the door jambs, roof, and quarters.
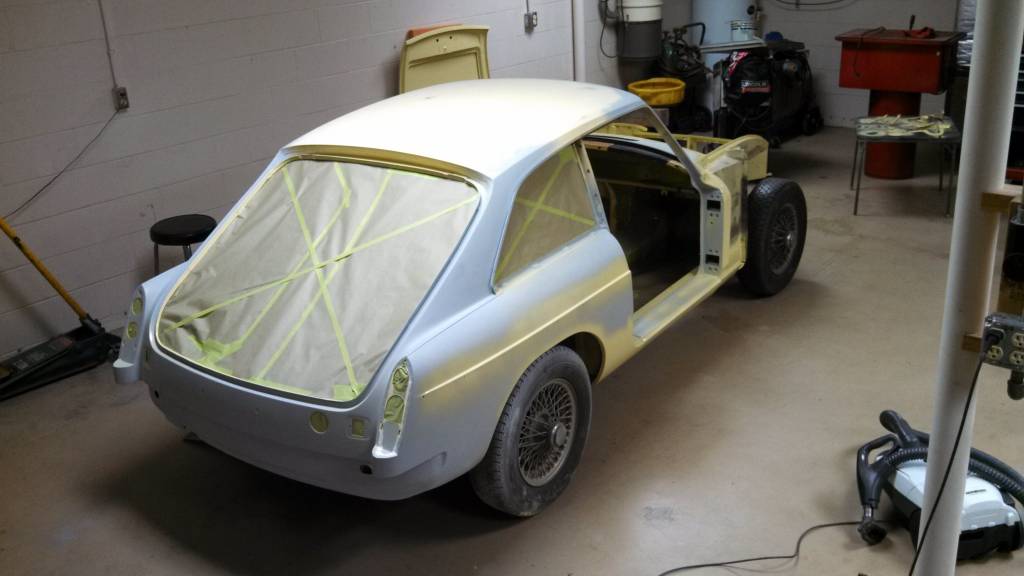
4/7/2013
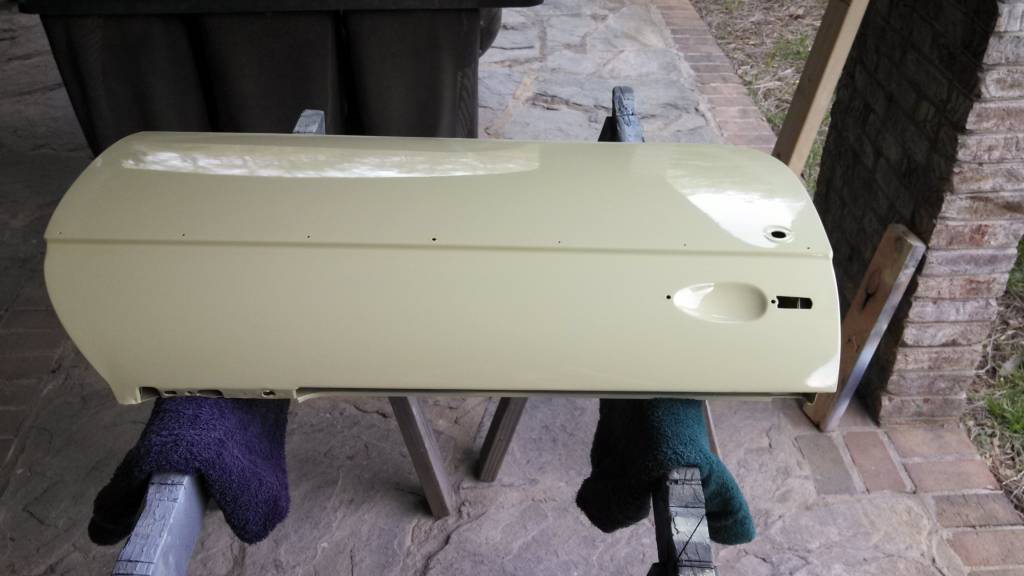
Got some paint sprayed on the main body on Saturday. Used new
Sata HVLP gun for the first time. That combined with the new Glasurit paint
system, means learning how to paint all over! It's an adjustment after spraying
Imron all these years. Not my best work, but still respectable. The plan always
has been to sand the first coat, assemble the body and spray all over again.
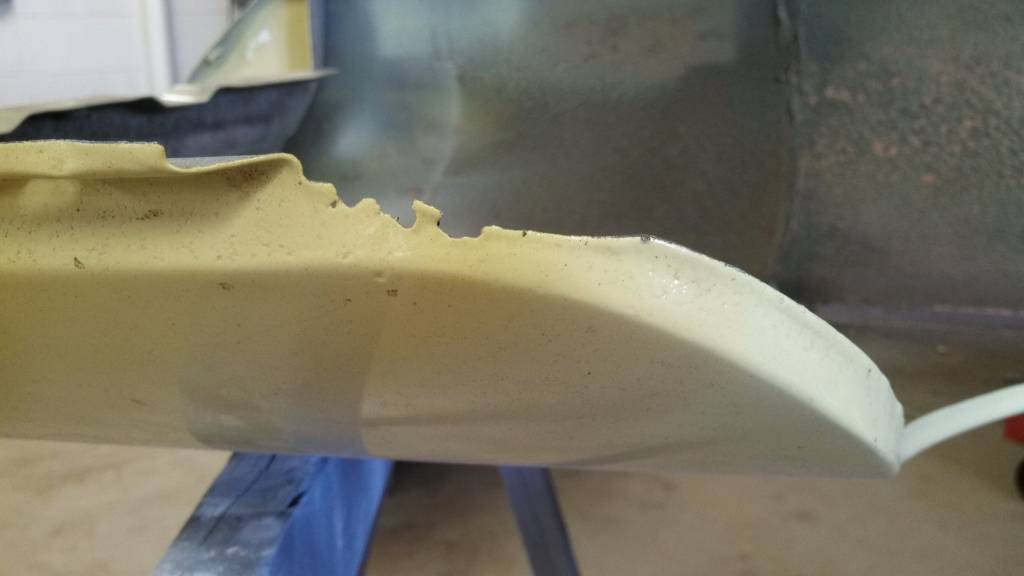
This beautiful original driver's side fender is perfect except
for this bit of rust right at the bottom. You don't see this, but it still
bugged me, so it'll be fixed. The area was cut out and a small piece made to
section in.
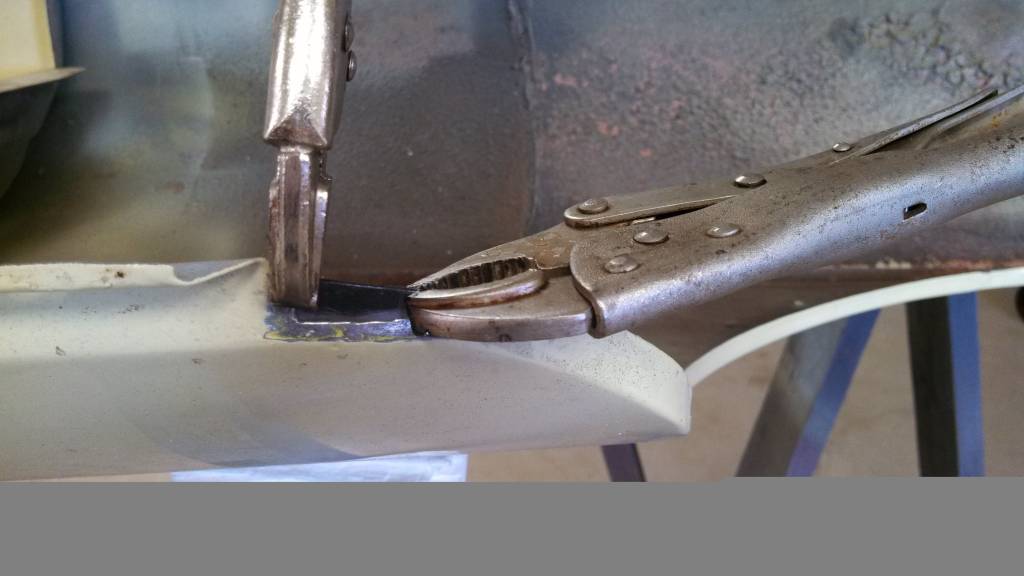
The little piece held in with a pair of vice grips for welding.

Welded and ground flush. Then the contour made to match the
other side which was undamaged. It's ready for primer.
4/16/13
Doors were sanded, both on the outer
skin and the inside edge in prep for new paint.
Inside edges of fenders and doors ready for paint.
Inside edges of the doors painted. Cranked the pressure up on
the new Sata HVLP gun and got much better results.
Inside parts of each of the fenders sprayed.
A good protective layer of paint along the bottom edges of the
fenders was done. This will be nearly impossible to do when painting the car, so
at least there will be this layer of protection.
To stop any future iron seeking termites, these rust prone areas
were taped off and sprayed with 3M rubberized undercoating. Between the modern
catalyzed paint and the undercoating, rust shouldn't occur again.
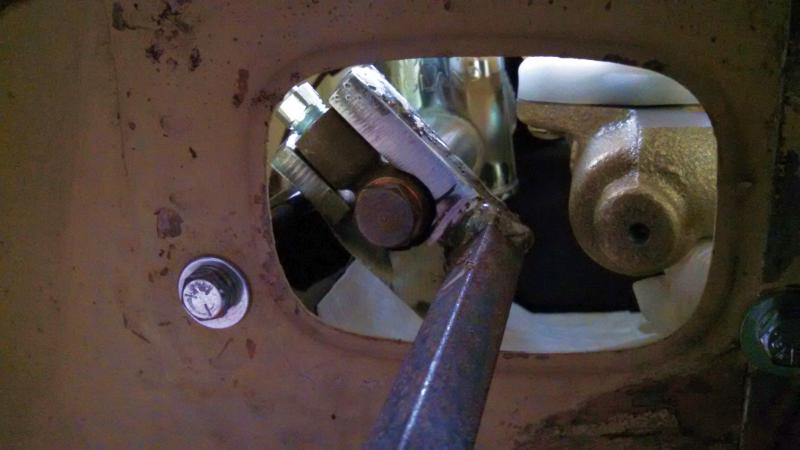
The front portion of rocker panel after undercoating.
The lower portion of the fenders received additional
undercoating.
3M strip caulking, or dum dum as some call it, was applied where
the wings will contact the body. Was hoping to find white, but the only color
available was black.
Saturday 4/20/13 was spent hanging the wings. No chips in the
paint, so I probably could have installed them after final paint, but this was
the decision....second coat of paint after assembly.
Most of Sunday was spent hanging doors and making endless
adjustments. The driver's door is about done.
July 2013
Meanwhile I ordered a BL Heritage front valence. I ordered the
later model version with the two rectangular openings to feed air to the
customized longer radiator. It may not be original, but this engine is going to
stay cool! Despite being a "heritage" part, I still had a LOT of work to make
this fit properly. About 40% of the mounting holes had to be welded closed and
re-drilled in a slightly different location. And each end, where they meet the
fenders, had to be cut, reshaped, and welded to make the contour correct. Can't
imagine how bad the aftermarket one would have been!
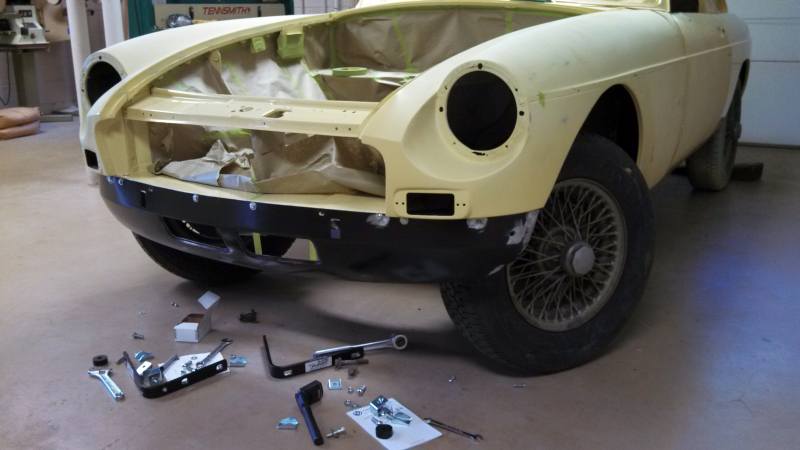
Next was a check of the grill fit and the new front bumper and
new bumper brackets. Considerable reshaping, bending, and slotting of holes in
the new bumper brackets was required. After all the hours of work, the fit is
looking very good.
Several coats of primer surfacer and a good coat of Glasurite
inside and out and the valence is completed.
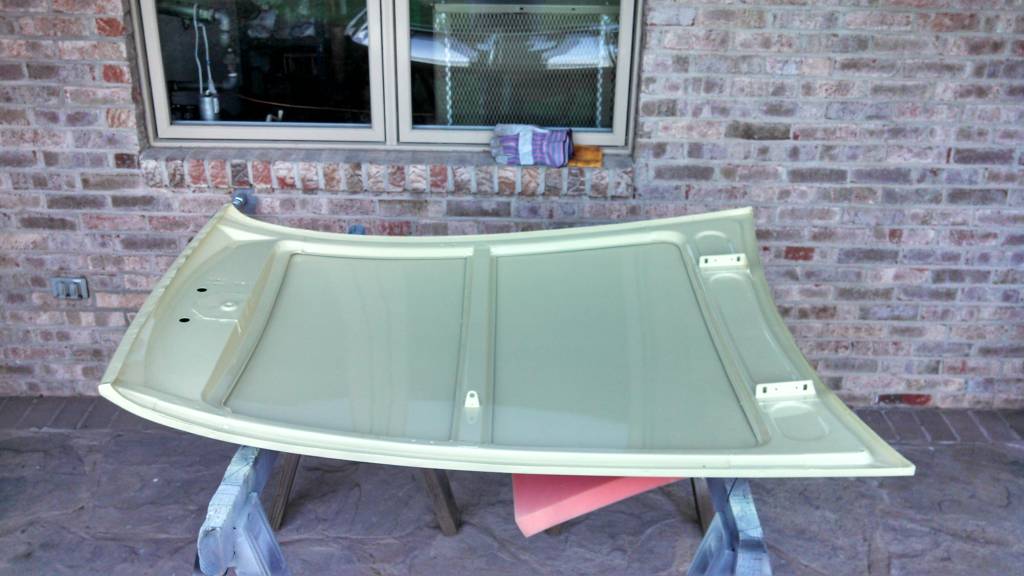
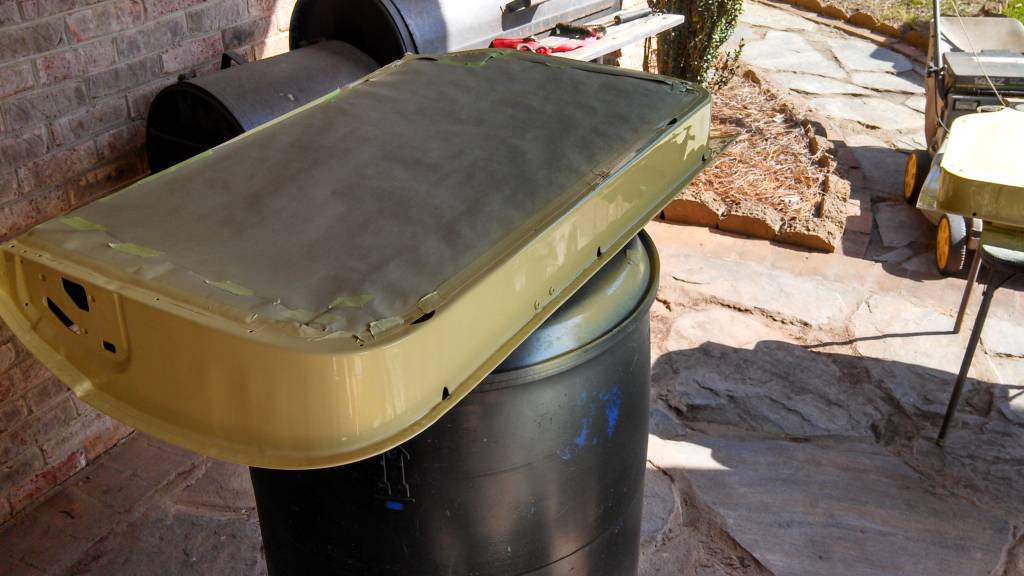
The bonnet has been fitted and it's starting to resemble an MG
again.
I've always liked the lines of the Pininfarina designed GT. About ready for final
sanding.
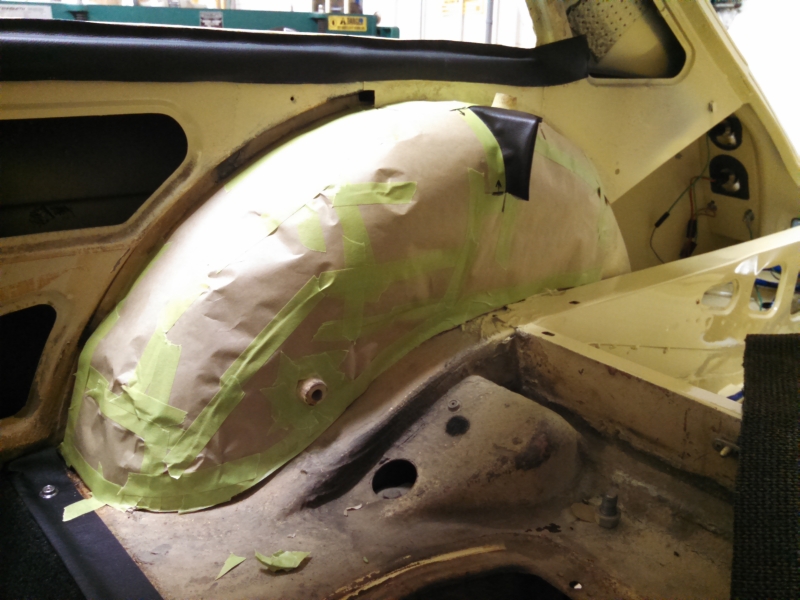
The splash guards inside the front wings were repaired at the
bottom, adding sheet metal back that long ago rusted away. A good heavy coat of
black Imron on both sides will protect this a lot better than originally. New
rubber seals have been fitted with the split tacks.
The RH inner splash guard fitted in place. Looks great. These
will all be undercoated eventually.
8/30/13
Since very little body preparation work remains other than final
sanding I decided to also work on some mechanical items.
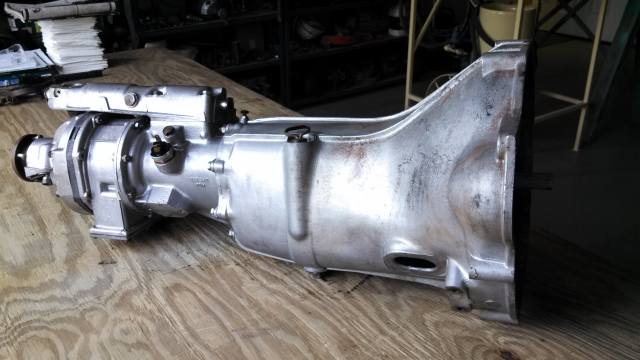
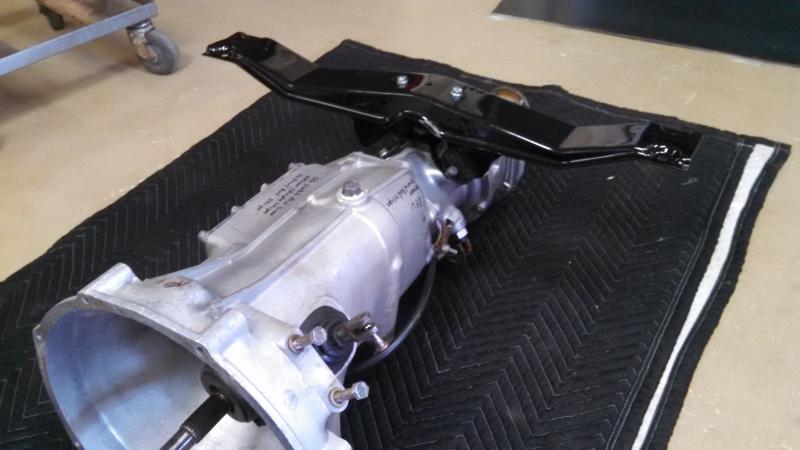
The first is the transmission. This MG had the standard 4 speed,
but I always wanted an electric overdrive version. One was located in
Georgia and fully refreshed.
Very low mileage transmission, but it'll be taken apart and
inspected anyway.
A few hours in the parts washer has the outside nice and clean again.
Everything taken apart, cleaned, and ready for assembly. New
seals, o-rings, and other miscellaneous items from Moss and Victoria British are
in the plastic bags.
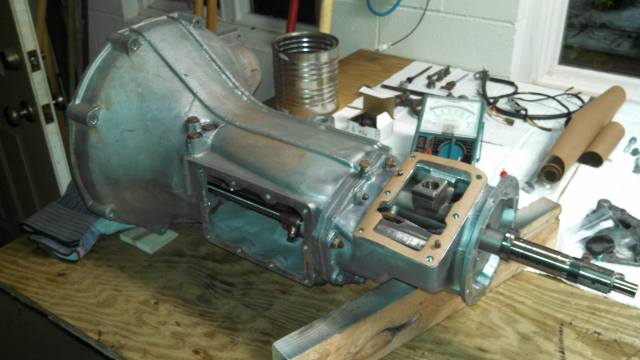
The 4 speed portion of the gearbox is all assembled now.
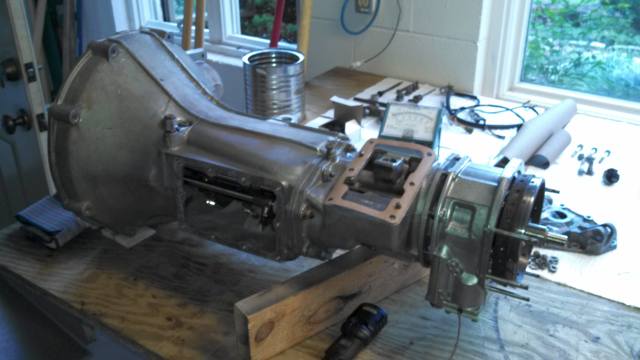
And now the overdrive parts are going in place.
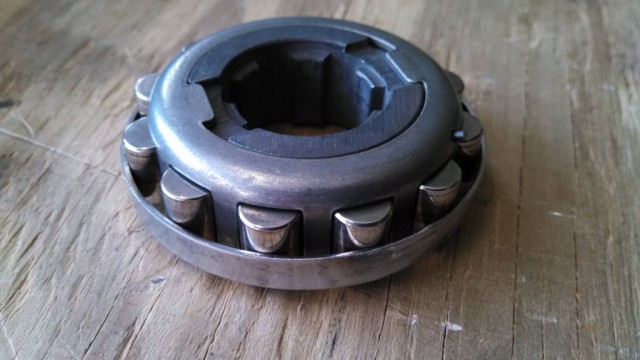
One of the challenges of the OD transmission is getting the one
way clutch rollers all in place and at a diameter small enough to fit in the
annulus gear. A small strip of sheet metal was cut at the correct circumference
and welded together. The rollers were populated into the clutch assy and....
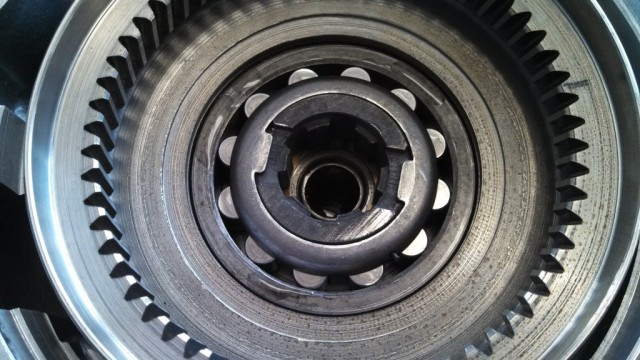
placed over the annulus gear and pushed right into place. Worked
slick! A check to make certain the inner section rotates counterclockwise
assured everything is good.
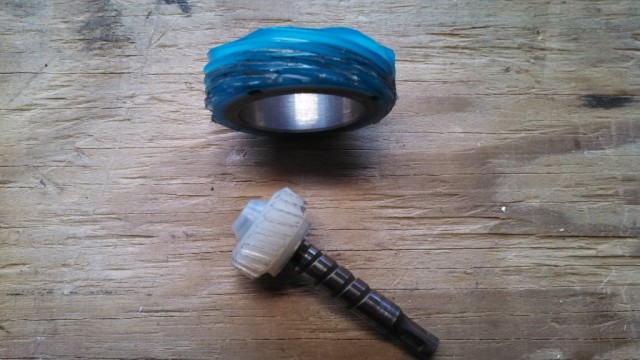
The last item needing attention was the original speedometer
gear set. Both being plastic assures neither lasts long.
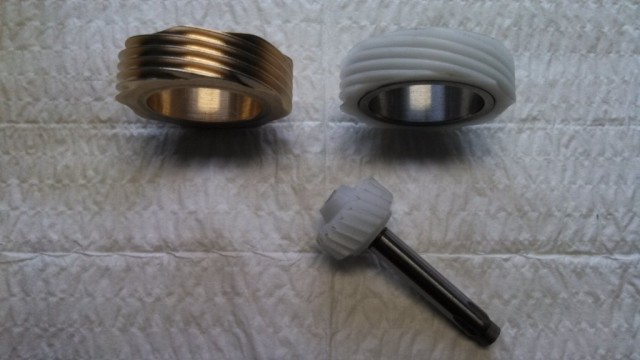
Replacements were ordered from Moss and sadly they too came in
plastic. Seeing as I have NO desire to have to go into this gearbox ever again,
I decided to make the larger gear in 660 bronze material. This is the one that
lives on the output shaft and requires complete disassembly of the transmission
to replace. The small gear that drives the speedometer cable is easy to change
w/o removing the transmission, so I'm leaving that OEM plastic and it will be a
sacrificial part. So the bronze gear was install and final assembly completed.
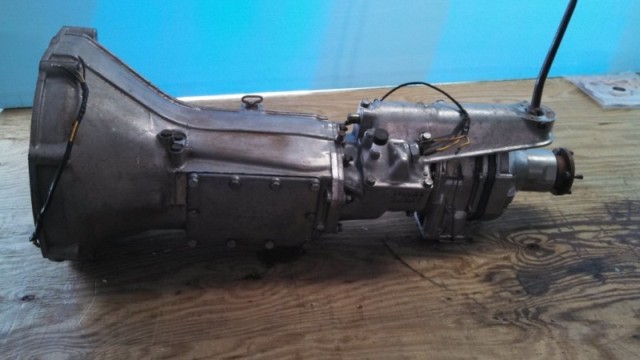
All buttoned up and ready for installing in the
car.
12/1/13
With the transmission all completed, it was time to start on the
engine. Saturday 11/30/13 the entire day was spent disassembling the all
original engine. It still had the original copper head gasket!
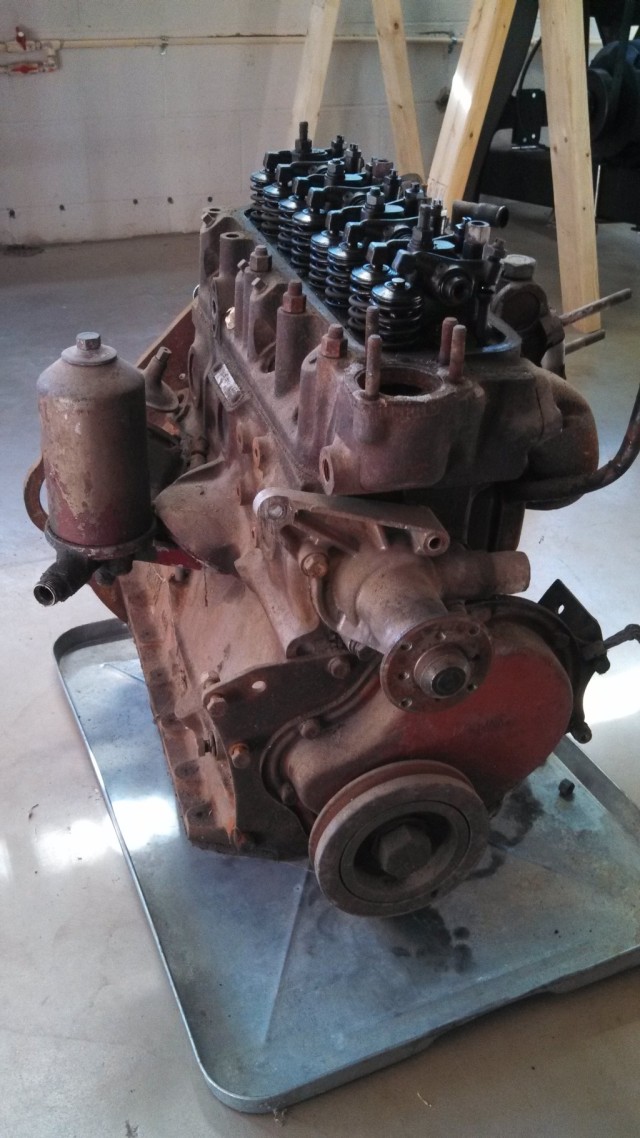
The original engine has over 100,000 miles on it and has been
sitting unused over 20 years. No telling how it will look inside! Gotta love the
original inverted oil filter canister. What a lovely mess when changing oil!
As many external parts have been removed as possible. Now
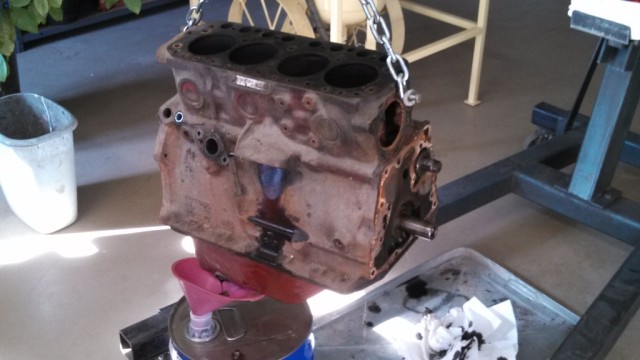
draining the oil from the short block.
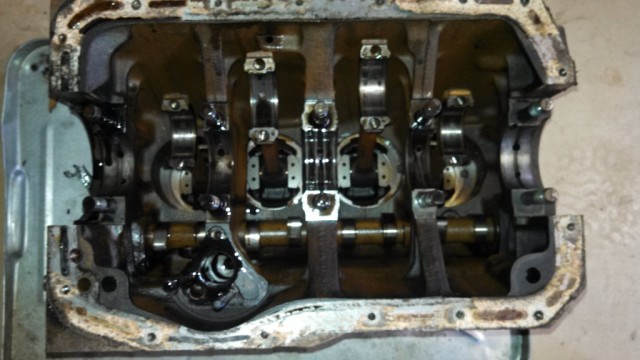
Pan removed and the engine turned over show a remarkably clean
engine. There was NO sludge even in the bottom of the pan! I changed the oil w/o
fail every 3000 miles and it paid off. This engine is in remarkable shape.
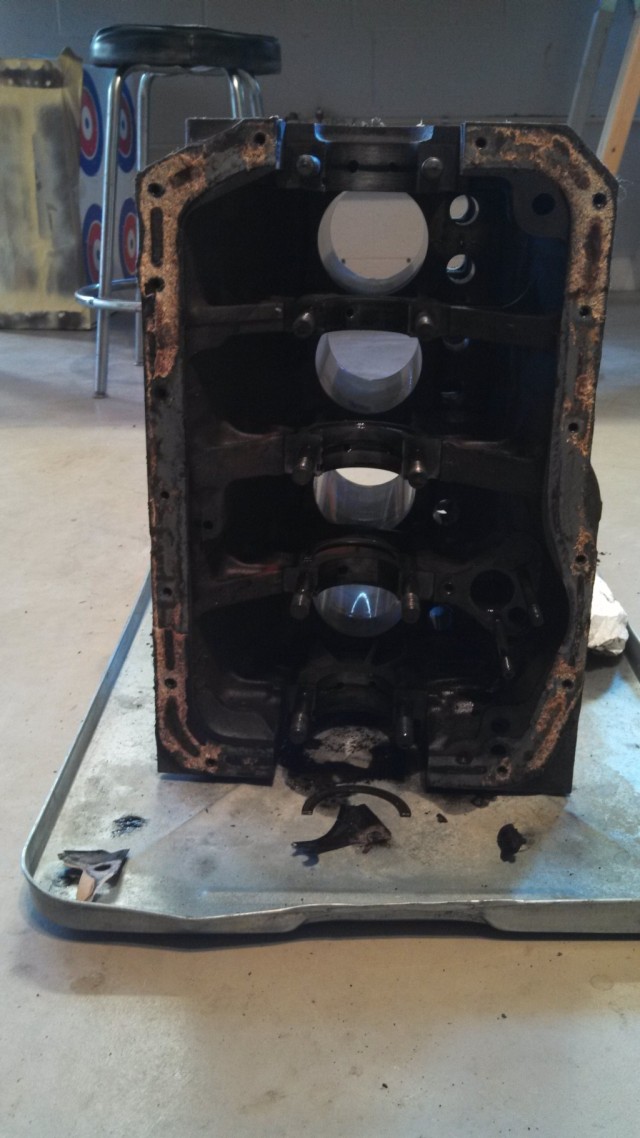
Block completely stripped now. Ready to go to machine shop and
have cylinders bored for oversize pistons.
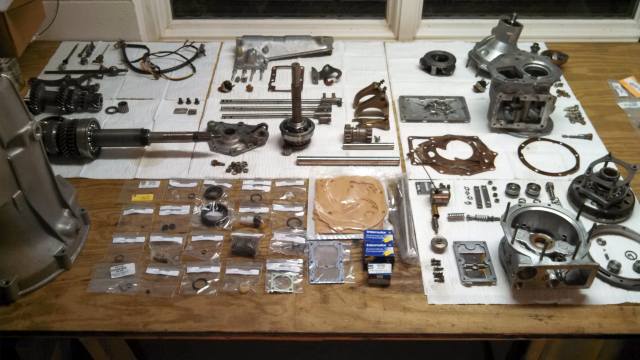
All the parts on the bench awaiting their turn at cleaning.
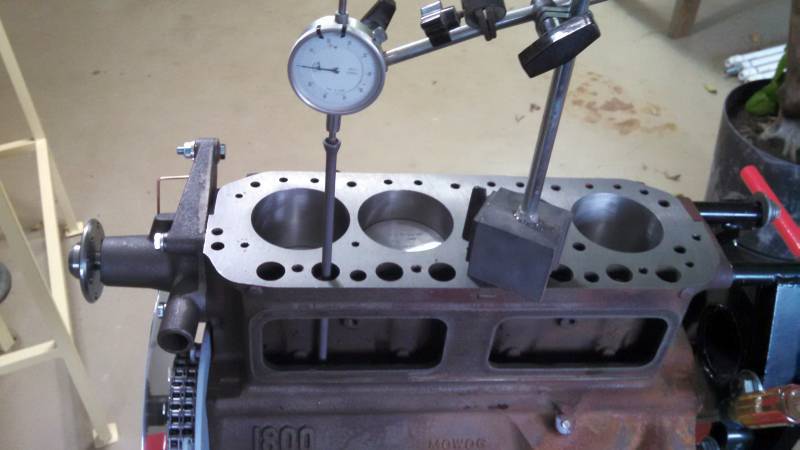
Close up of some of the larger parts. Soon it will be measuring
time to determine what gets reused, reworked or replaced. The block and cylinder
head go to the machine shop 12/3/13.
2/24/14
Small amount of body to the back hatch was completed. Stiffening
ribs added inside around the latch. This is a weak spot on GT's and the metal
tends to flex a little. The stiffeners solved that. Sprayed the inside surfaces
on Sunday 2/23/14.
June 2014, final paint.
Final sanding all done, the tractor was used to bring the MG out
of the basement and load into the horse trailer, ready for it's trip to the
rented paint booth.
I rented paint booth time and sprayed the final coat of
Glasurite on a steamy morning in June. Luckily to avoid any sweat drips in the
paint!
Once home and back in the shop, many hours were spent un-taping
and masking the surfaces. Some areas had been masked a year, but the tape came
off with no problems. That's why spending money on quality masking tape pays.
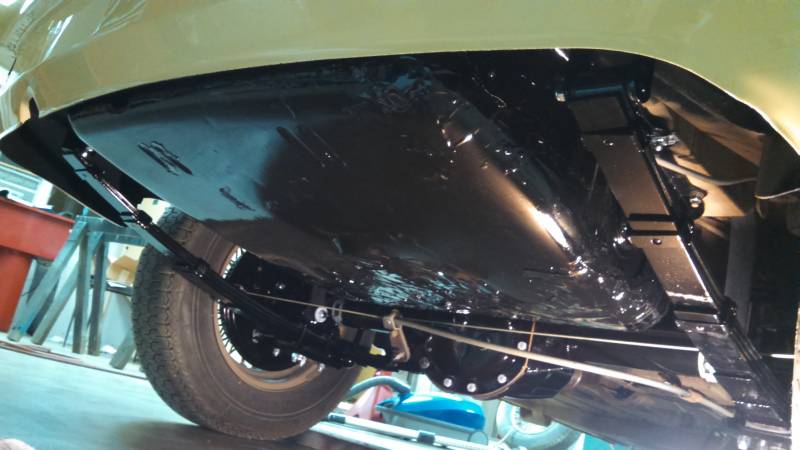
Differential work. Mid August thru mid Sept, 2014
Seeing as the car is 45 years old it was time to freshen the
differential, replacing all the seals and other PM work. Once on jack stands the
diff was removed.
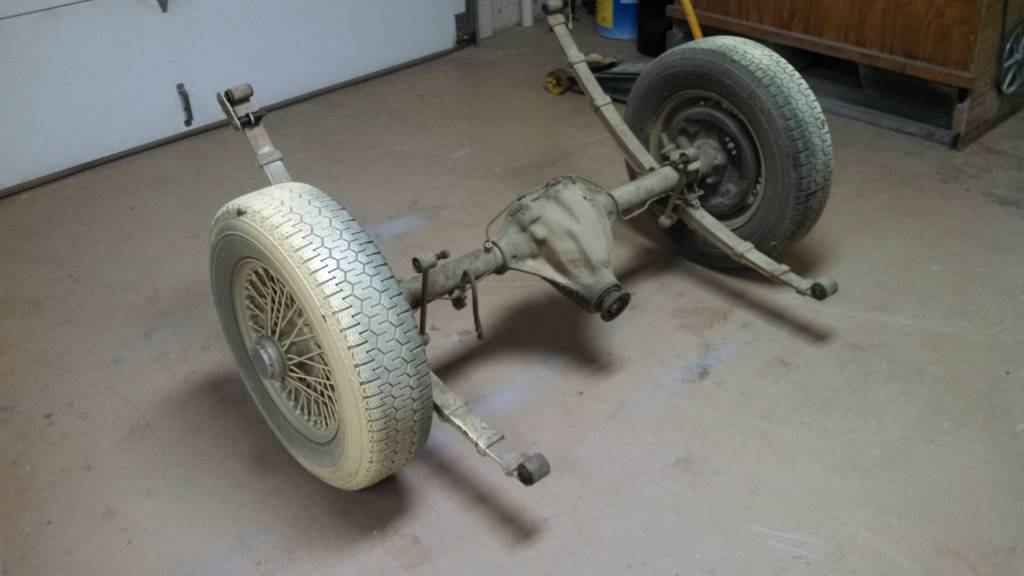
All out and ready for disassembly. Man it's dirty!
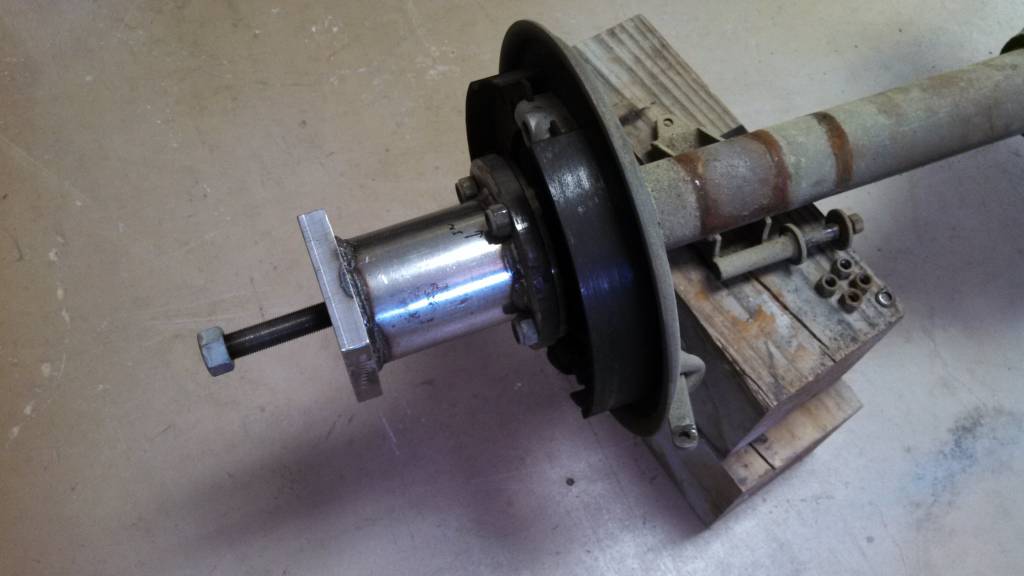
Several specialty tool had to be built to get things apart. This
puller is used to pull the axle end off the splined axle.

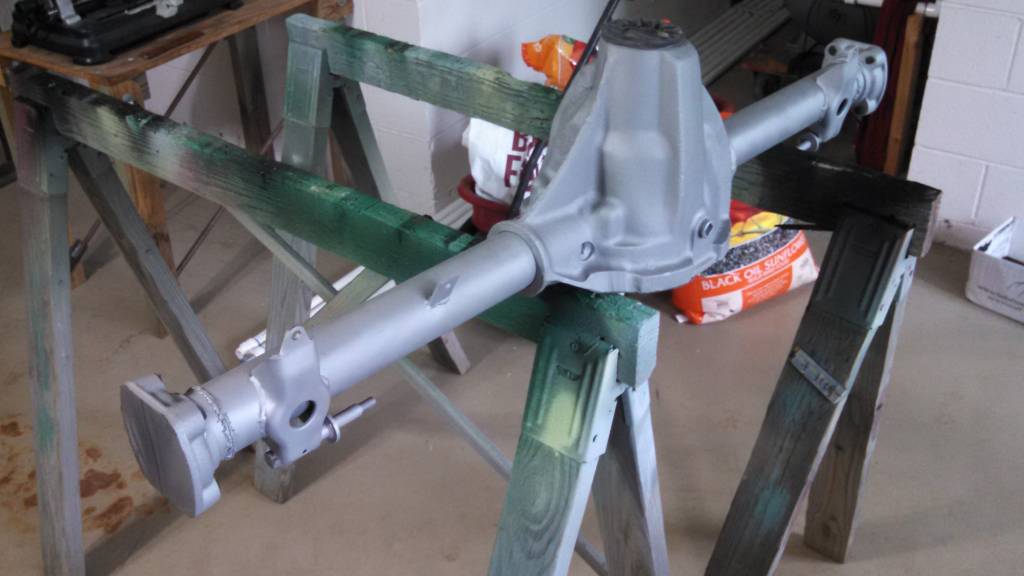
This case stretcher was fabricated to allow easy removal and
installation of the ring gear assembly. The preloaded bearings would be
impossible to reinstall w/o the use of a case stretching tool.
Once all apart and vigorously cleaned in the parts washer, the
openings were double taped with Gorilla tape to assure NO aluminum oxide would
get inside. Here the axle has been blasted 100% clean. This is not primed yet.
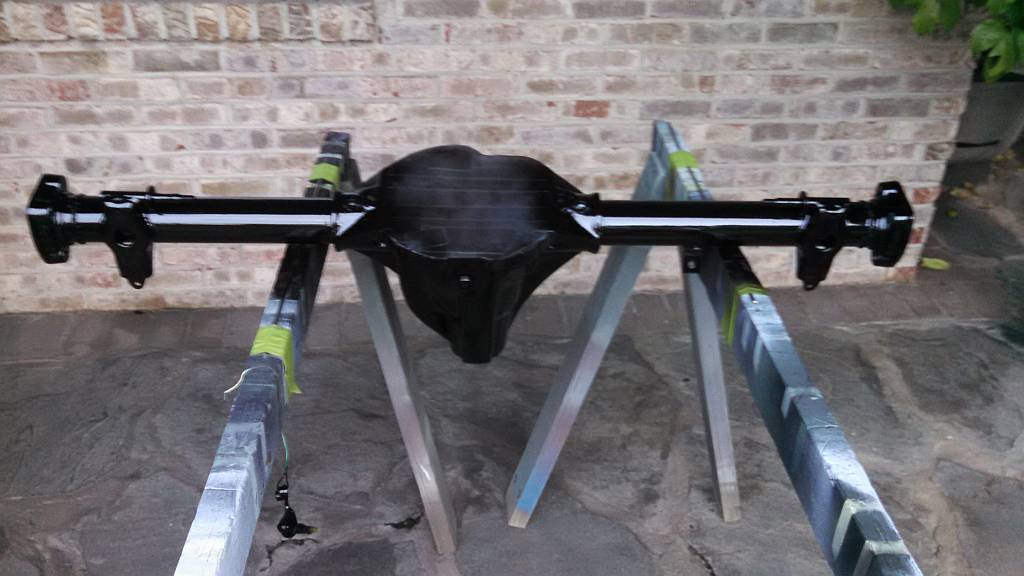
Self etching primer was sprayed and the next day a good coat of
Imron sprayed.
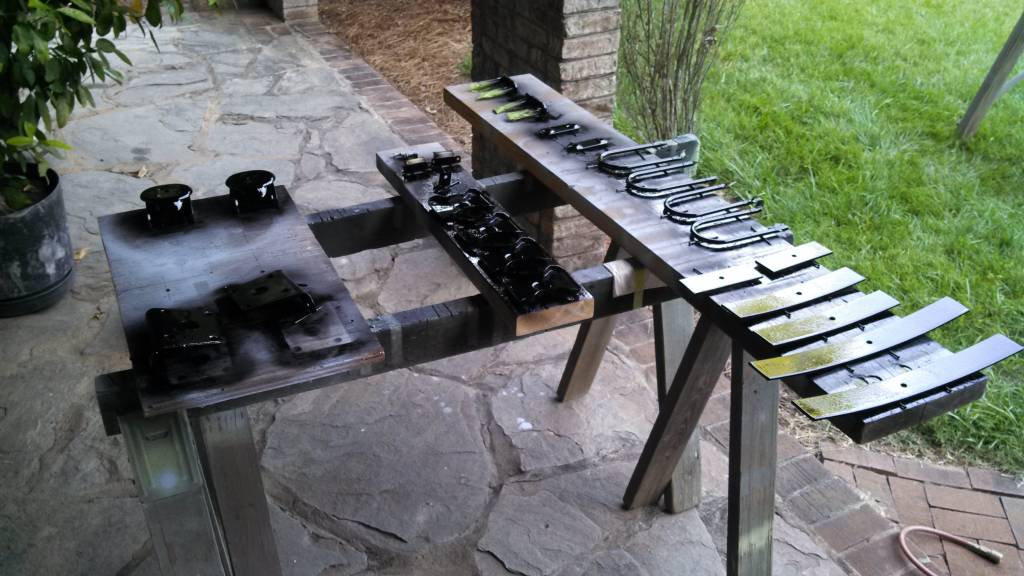
Same with the leaf springs and all the associated parts.
Reassembly began in early September. New thrust washers were
fitted under the differential gears to eliminate that annoying clunk MG axles
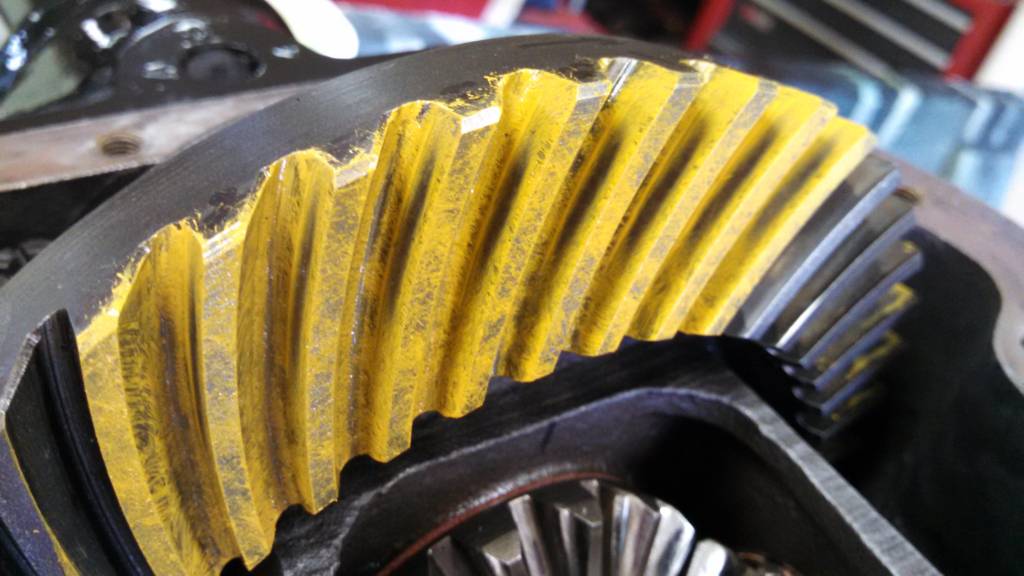
are prone to. Here marking paint has been painted on the teeth to check the mesh
pattern. Just about perfect!
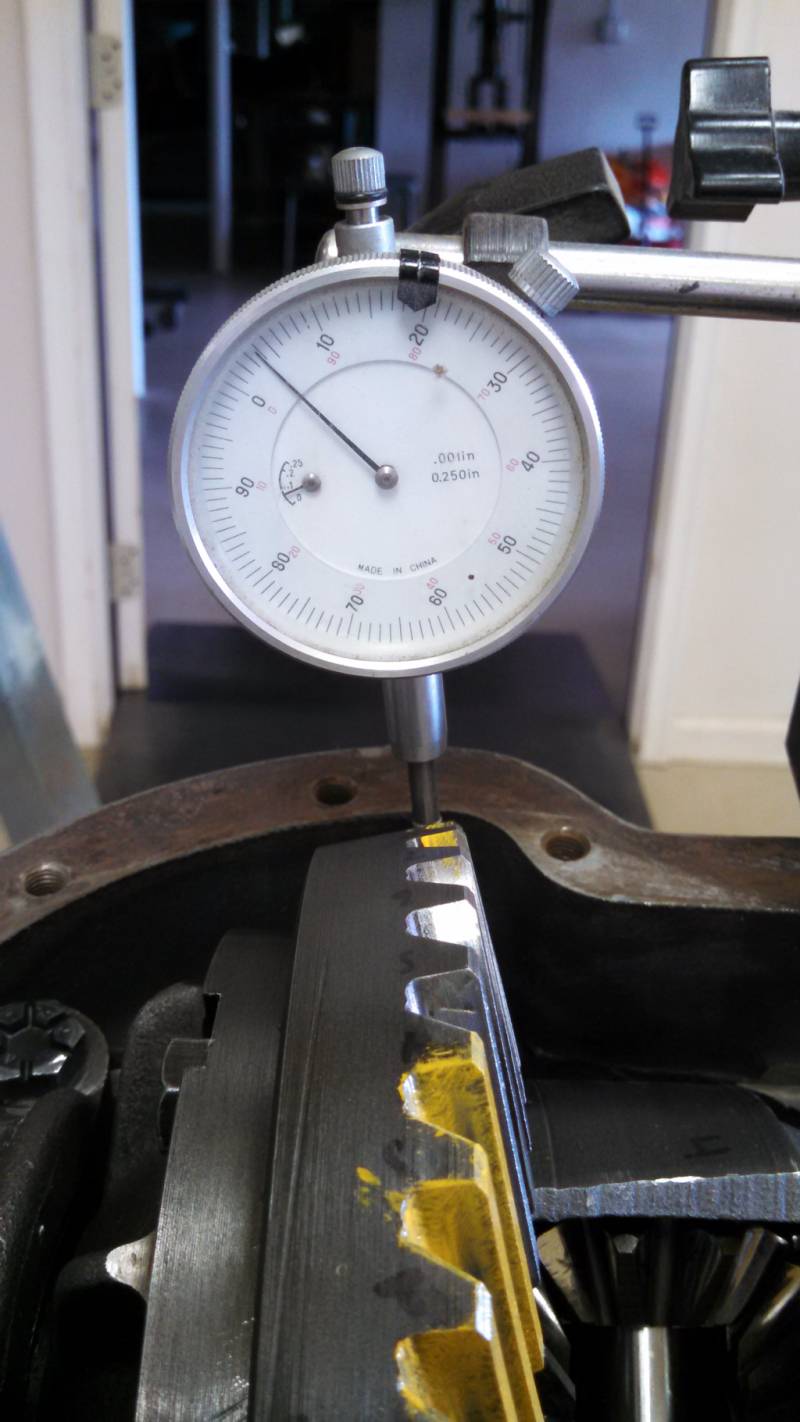
Final check is backlash. .0035 is the total backlash. Also
excellent and per spec.
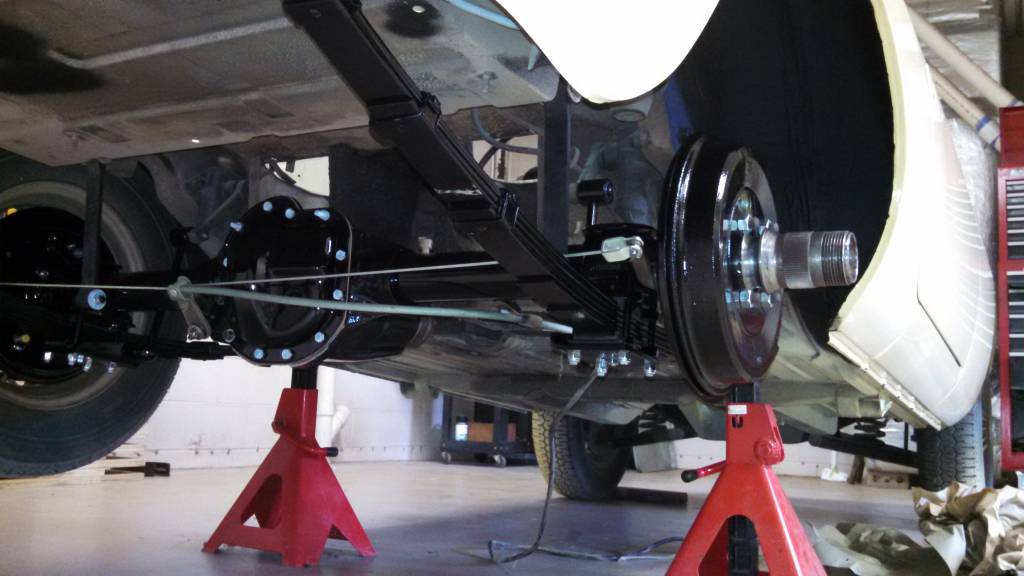
Sunday Sept 14th the differential was rolled back under the car
and installed. The black, freshly undercoated wheel wells look really good.
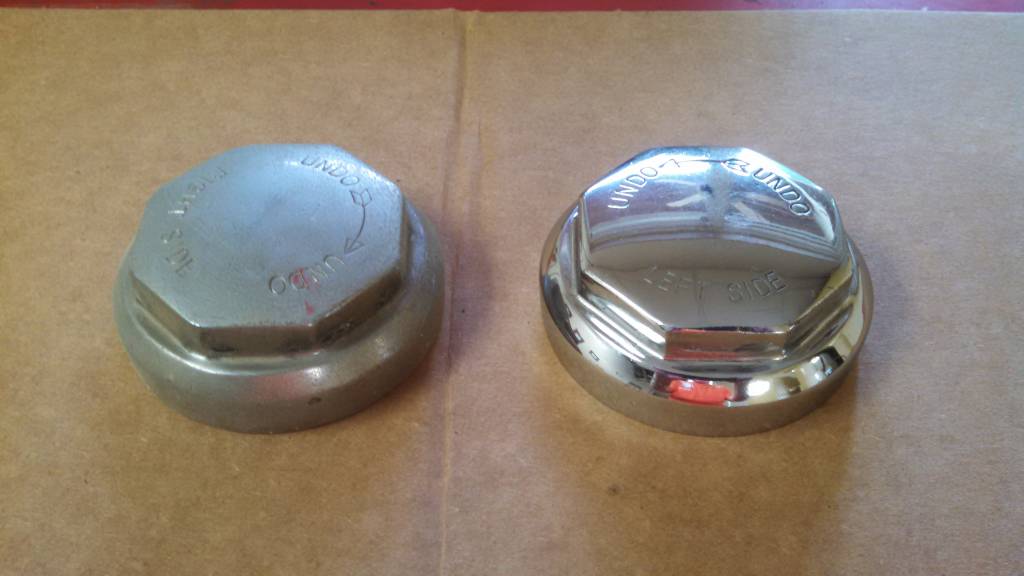
Finally the buffing wheel and ruge was used to clean up the old
dull chrome. Here is a before and after. Not too shabby!
Front suspension work, October and November 2014:
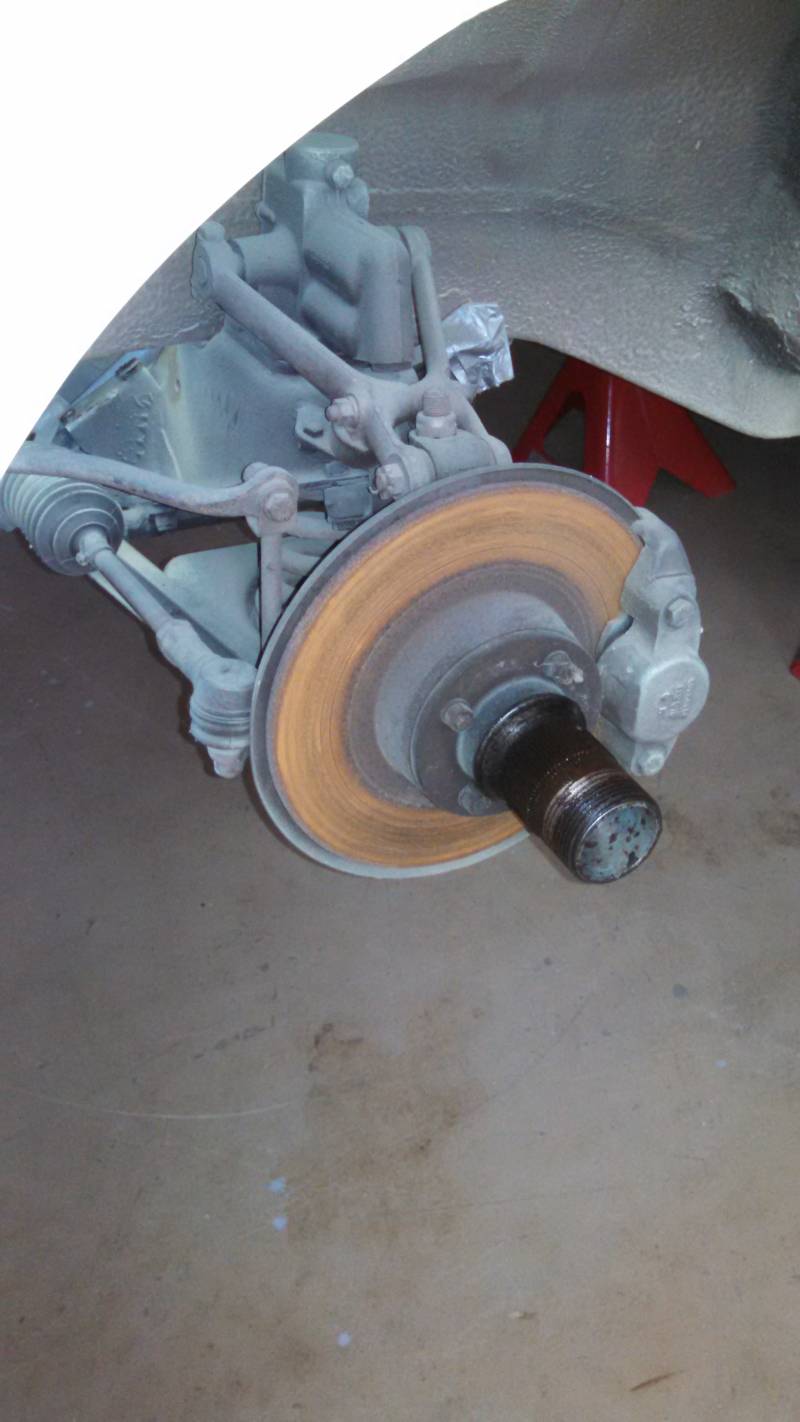
I put new kingpin bushings in years ago and very few miles were
logged since. All still in excellent shape, but it all needed to be taken
apart and good shiny paint applied after blasting all the parts.

Removing the front crossmember.
Everything out that can be removed!
The painted body and floors all papered and taped in preparation
for spraying additional undercoating.

Meanwhile I was blasting all the suspension parts 100% clean and
priming in self etching primer.
Front crossmember painted in Imron and going back in place.
Looks nice in the clean engine bay.
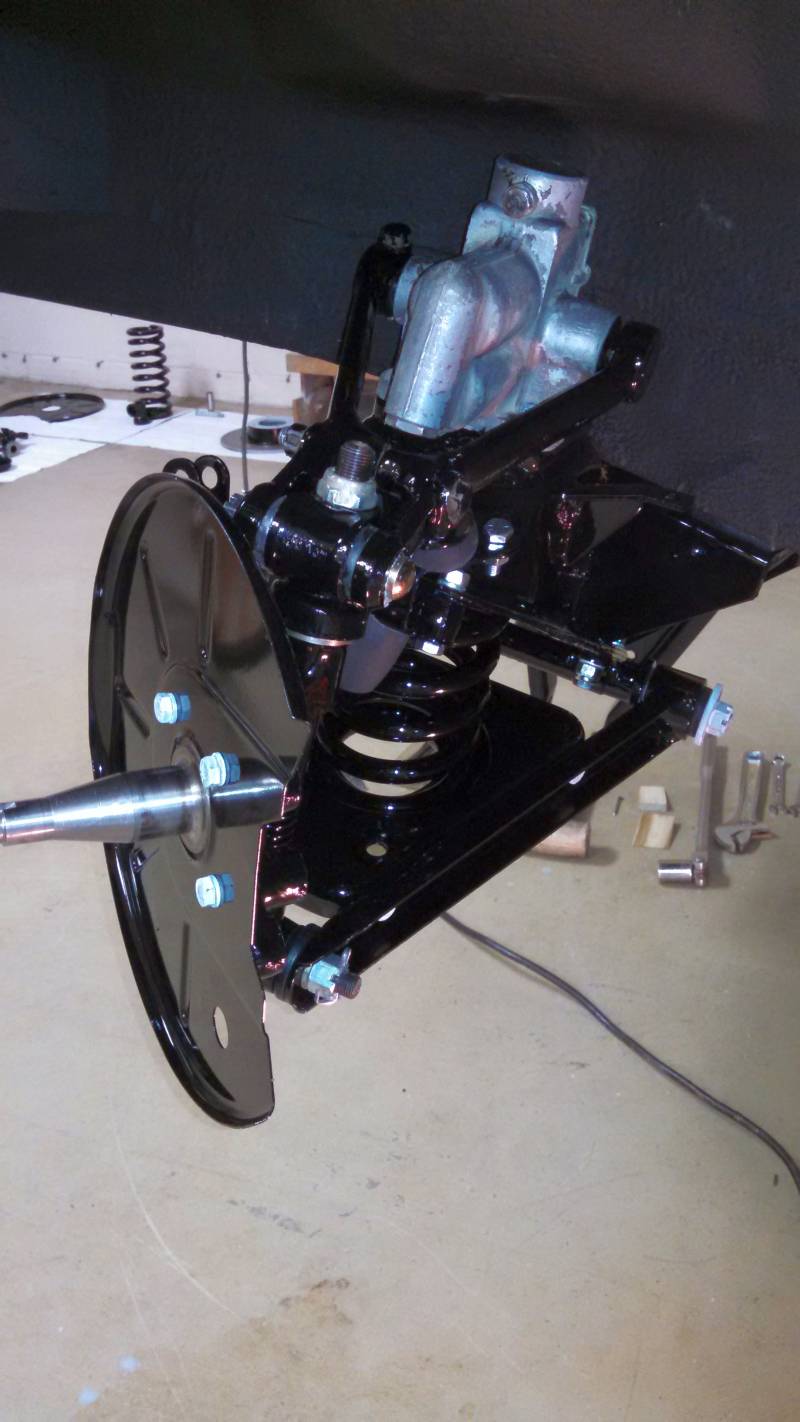
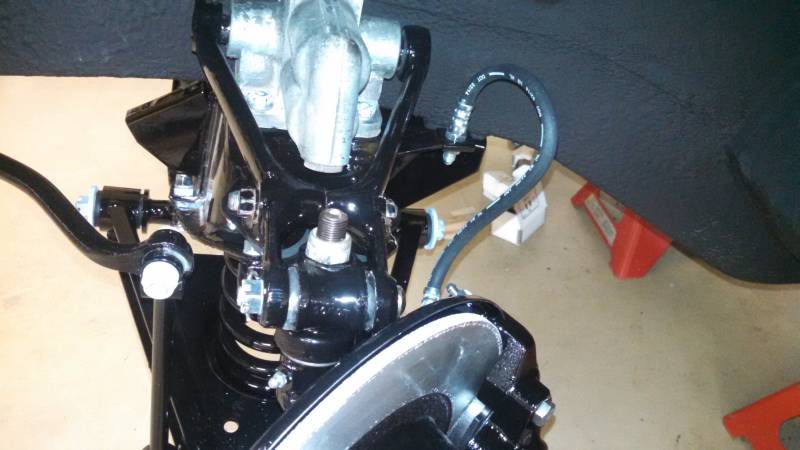
Starting to assemble the freshly painted suspension parts. All
new rubber bushings being installed along with new bolts and nuts. Yes the
unattached brake hose end is incorrect. I just turned it down for now to keep
any dirt out of the line. The shiny parts contrast well with the fresh coating
of undercoating.
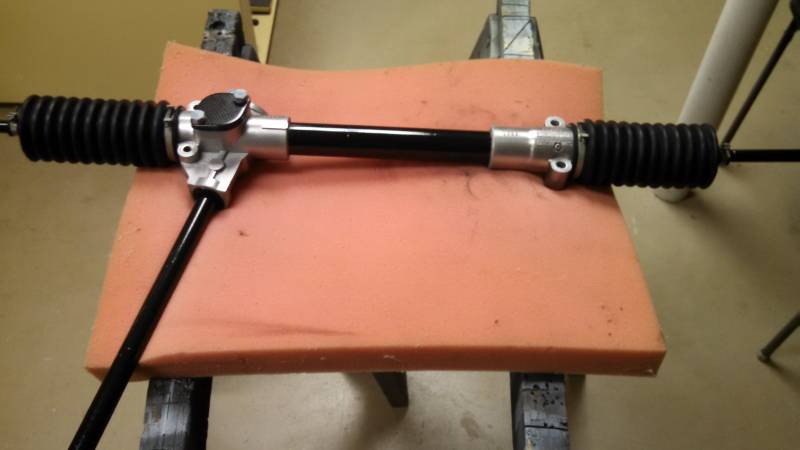
Next the rack and pinion was completely disassembled, cleaned,
and the aluminum parts glass bead blasted. The rest of it sprayed in Imron
black. New bellows assembles, and the assembly filled with 1 cup of 90wt hypoid
oil. There was about 3 drops of oil that came out when I took it apart. Over the
last forty years the oil had slowly leaked out. Glad I refurbished this to
discover that.
Brake lines and master cylinders, December 2014 & January 2015:
Given the age of the brake lines, and the unknown condition, I
decided to just bend up new ones.
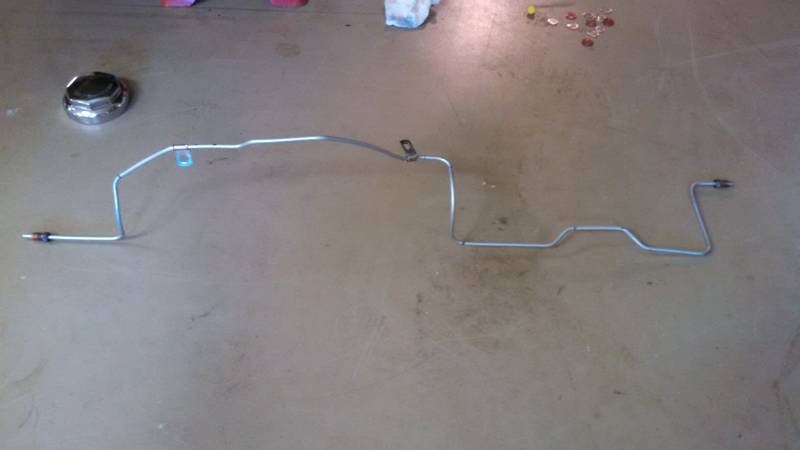
This one is for the left side of the differential. So many
possibilities to screw up! Thankfully it fit!
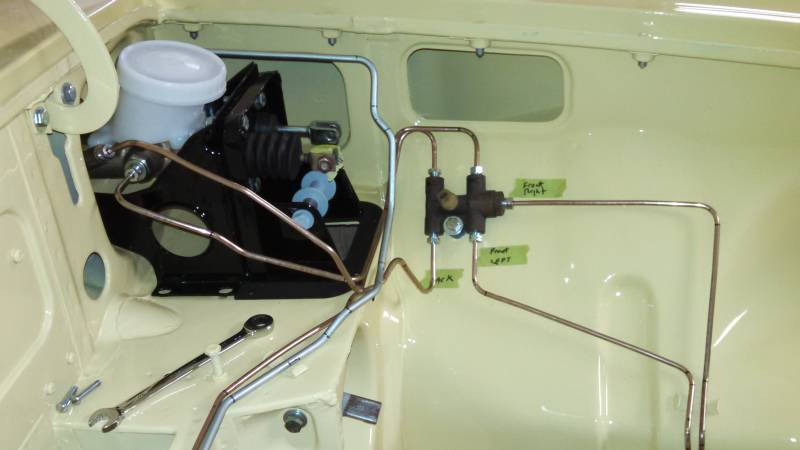
New clutch master and clutch master cylinder installed and new
cupro-nickel tubing on the brake circuits. Stayed with steel on the clutch
circuit. System was bled and all works well. Great to have brakes again!

Right side of engine bay showing the brake line serving back
wheels and the clutch line going to the slave cylinder.
Steering column January 2015:
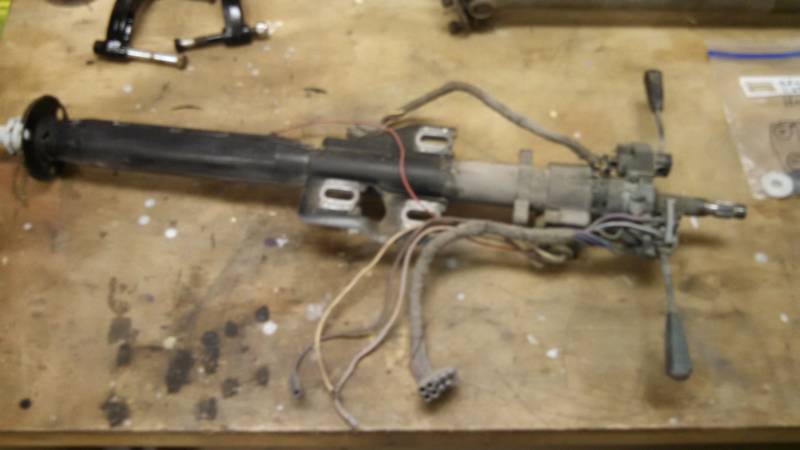
The steering column needed some cleanup too.

Old plastic grows some kind of mold. Some McGwyers polish
cleaned and restored the shine nicely to the turn signal and wiper/overdrive
arms. Each electrical unit was taken apart and cleaned and lubricated with
Lubriplate electrical grease.
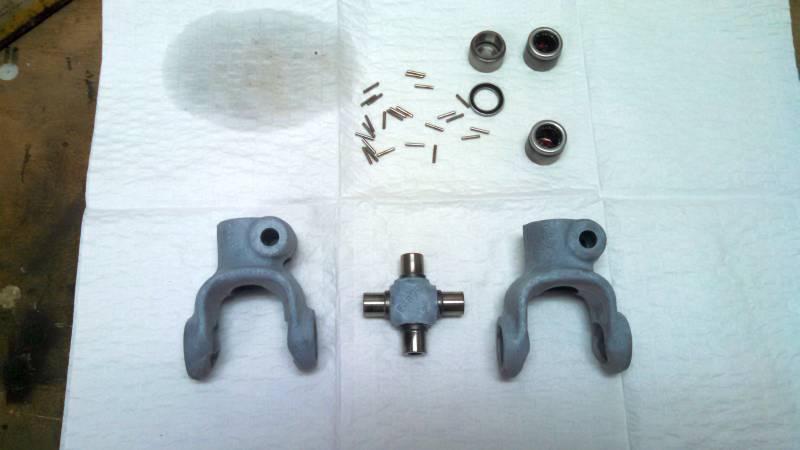
Didn't loose any needle bearings in the steering axle UV joint!
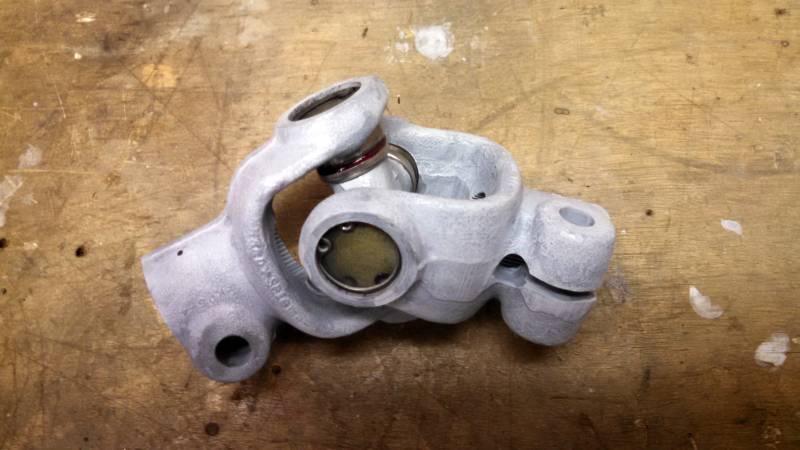
Ready for black paint.
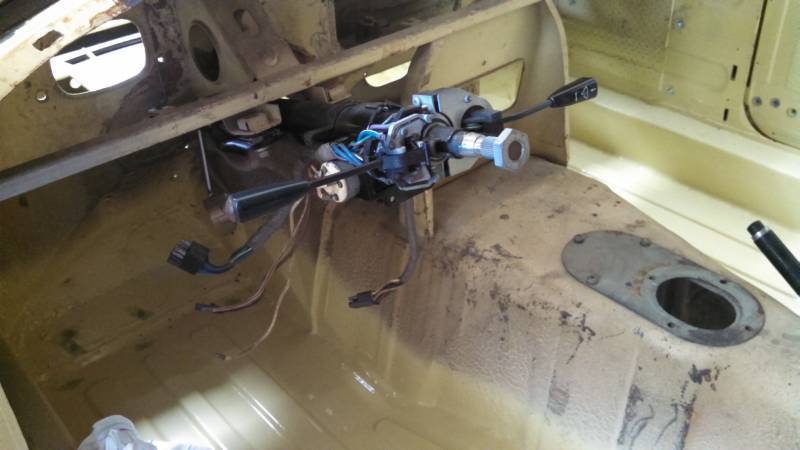
Column all cleaned lubed and reinstalled.
Fuel tank: Feb 2015
Fuel tank was painted and installed 2/10/15.
Engine assembly: February & March 2015
The engine was bored by Greg's Auto Machine. .010 cleaned it up,
but unfortunately only .020 pistons were available, so that's what was done.
Pistons, crankshaft, and new specialty camshaft from APT have been installed to
build the short block.
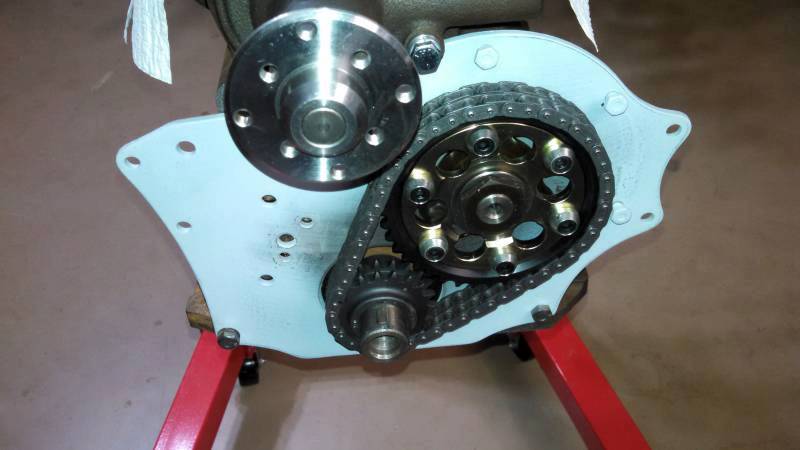
New water pump, front plate, crank and cam sprockets and chain
fitted. This is a vernier cam sprocket to allow precision dialing in of the
camshaft timing. This was purchased from APT also.
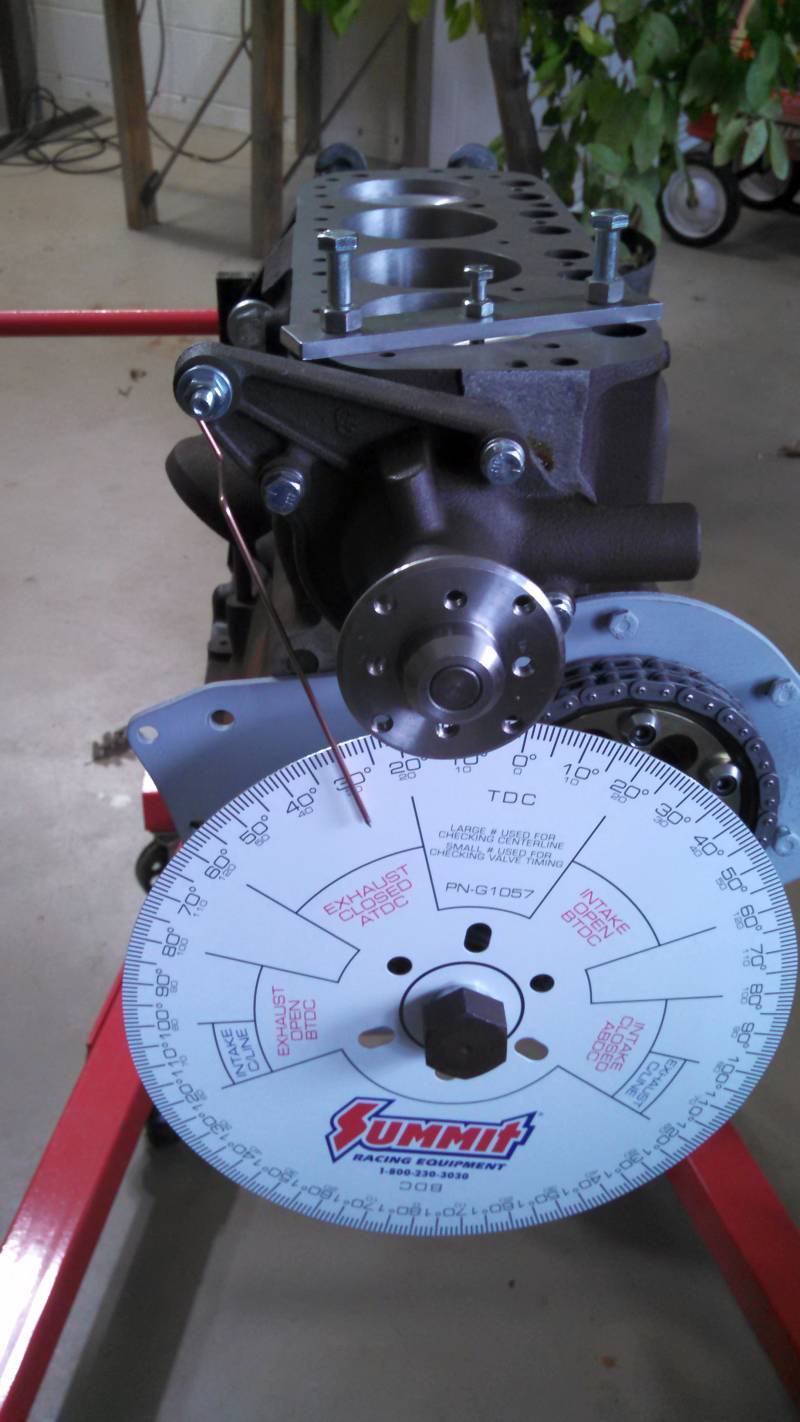
11" degree wheel was fitted and strap across #1 cylinder being
used to find exactly TDC and set the wheel on 0°.
The the dial indicator was set on #1 intake and the lobe
centerline was set for exactly 106° ATDC. Lift at TDC was also measured. Vernier
sprocket bolts tightened very tight.
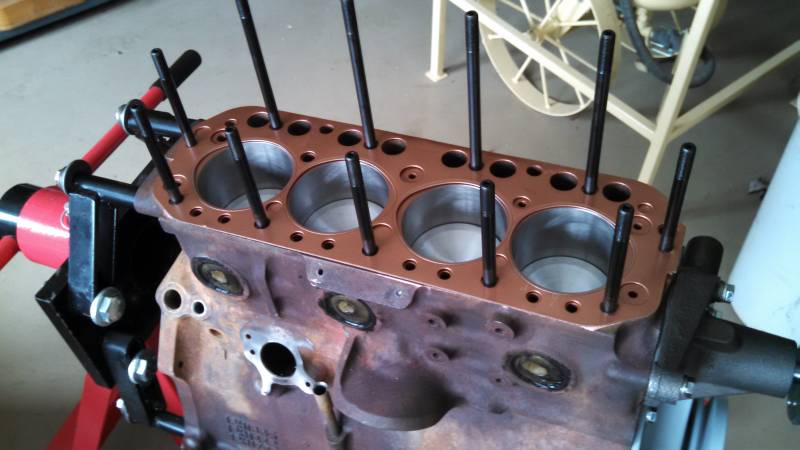
Copper bearing gasket sealer sprayed on block and both sides of
copper head gasket.
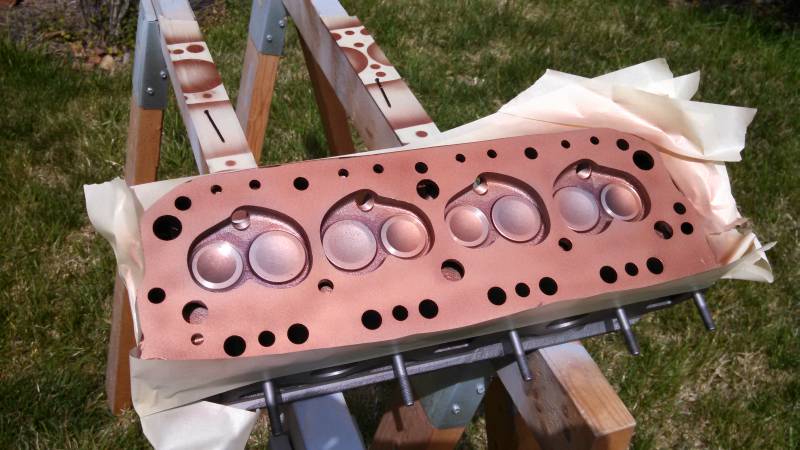
The same sprayed on the freshly worked head. Was able to reuse
the original valve guides. All were still in spec!
Decided to not use the original stamped sheet metal oil pan and
sprang for this nice cast aluminum unit from Moss. The flange is a full 1/2"
thick! Maybe this will stop the normal oil leak on both ends of a B engine!
All bolted together with new ARP studs and nuts. Now taping,
readying the engine for paint.
4/1/15

Painted in the correct Canyon Red. Painted in PPG urethane. Will
see how it holds up.
Everything untaped. Then welded and bolted this lifting fixture
to safely lift the engine w/o touching any paint.
A test fit of the OD transmission to the engine. The
transmission was then removed as the transmission and engine are installed separate.
Also in March I got a couple of pieces of glass put in.
The original windscreen was micro chipped from over 100,000
miles of driving. I also wanted tinted glass for my sensitive eyes, so
ordered a new windscreen from Moss. I think the color looks great with the
yellow. Since I could not handle the glass by myself, I had a fellow from Binnswanger glass help with the installation. The vacuum pad to handle the glass
and the lock strip installation tool are key tools for this job.
The back glass new was terribly expensive, so I opted to have
tint material added to the glass before installing it. This shade is called NC
legal, and as the name implies, is the darkest shade permitted in NC by vehicle
inspections. The contents in the back of a GT tend to bake, so this should
really help.
4/6/15
Over the Easter weekend the transmission was fitted to see what
kind of room around and under the tunnel there is for some insulation. Turns out
there is lots of room.
In the years I was driving the MG daily, both the noise and the
heat were at times unbearable. I am focused on reducing both, and the underside
of the transmission tunnel was scrubbed clean and sprayed with heavy duty
upholstery adhesive. Then this piece of 5/16" closed cell foam rubber was glued
to the inside of the tunnel. Cutouts for the shifter and dipstick can be seen.
Lets hope it helps with the heat and noise.
4/13/15
Anyone who has ever tried to install an MGB cross member knows
what a PIA these bolts can be! I decided to try something different and turn the
transmission over (no oil in it yet) and pre-install the cross member. WOW much
easier! The turned the transmission right side up, added the 3 quarts of oil,
and tried to install the transmission with the cross member already on it. It
worked! When installing, just hook the tail shaft over the frame cross member and the jack the
front of the transmission up until the 4 cross member bolts can be installed.
Very slick method that eliminates this normally frustrating step.
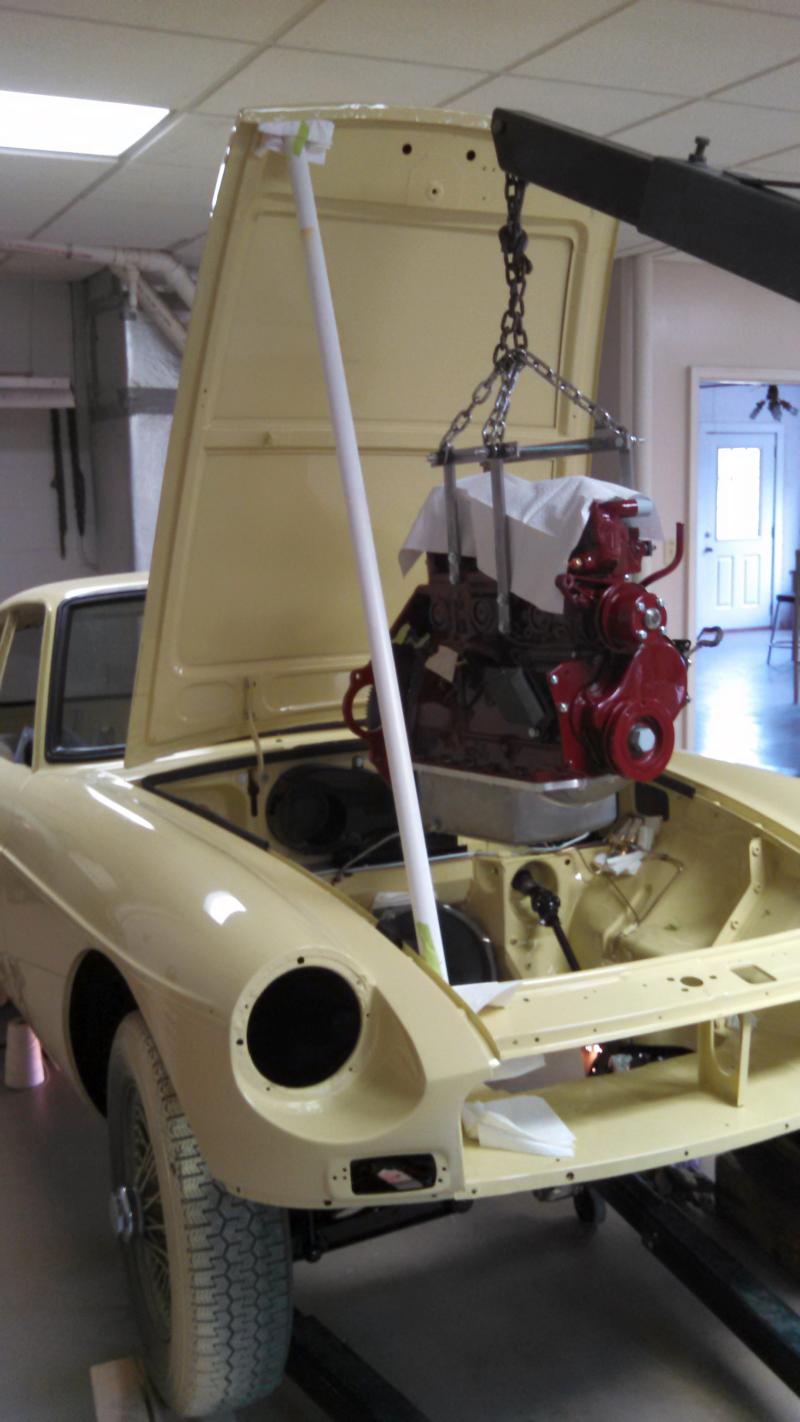
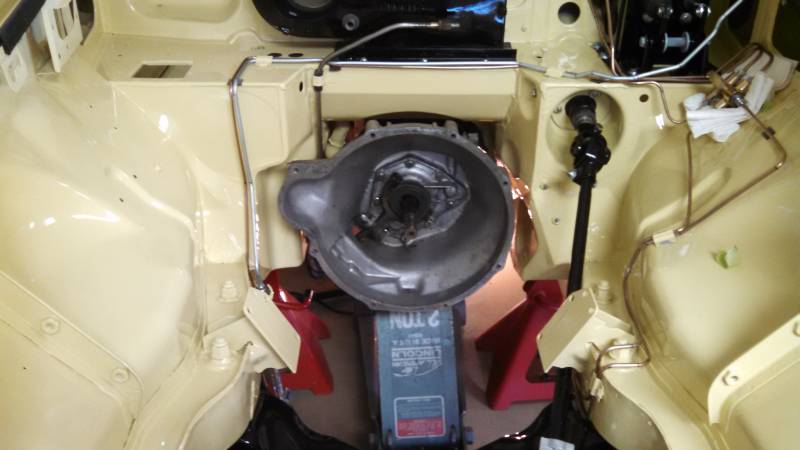
You can see the transmission is already in place. The engine
being carefully moved into the engine bay to fit to the transmission.
Installed and the engine hoist and lifting fixture removed. Very
pleased with the day's work.
4/24/15
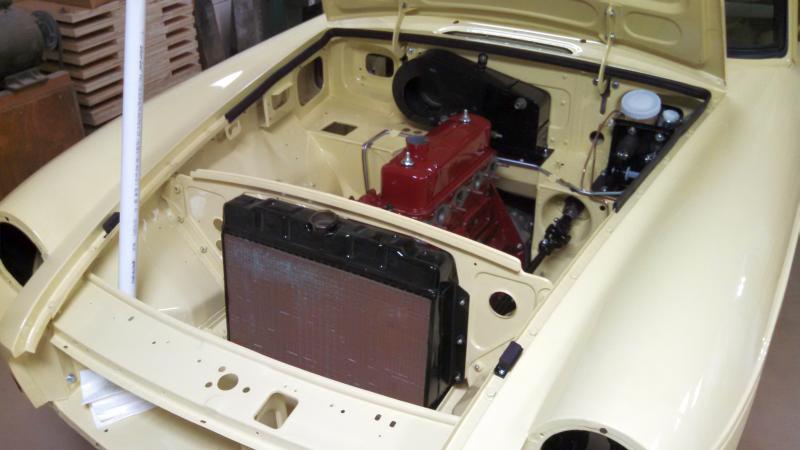
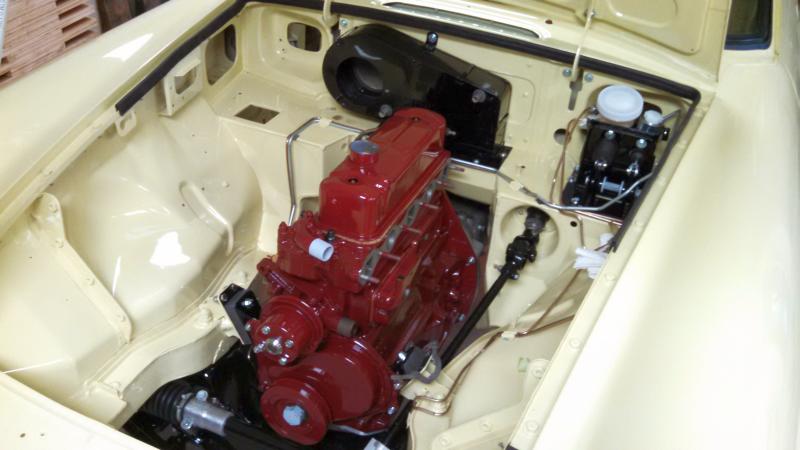
Radiator assembly goes in. Yes the panel the radiator bolts to
is supposed to be black, but I just think it looks better in yellow for this
color car.
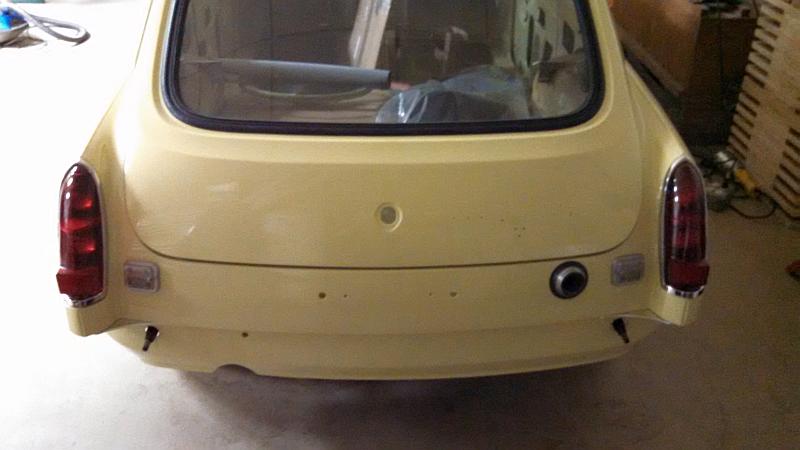
New complete tail light assemblies were purchased and installed
with additional gaskets to make them actually watertight. Also the small
aluminum trim pieces in the corners were installed and the bumper mounts
installed. Since the original bumper has no dings, I've decided to send it to
Knox Chrome to make shiny again.
5/27/15
Many small items have been worked on the last month including
rebuilding the carburetors, the distributor, and installing the manifolds and
new wiring harness.
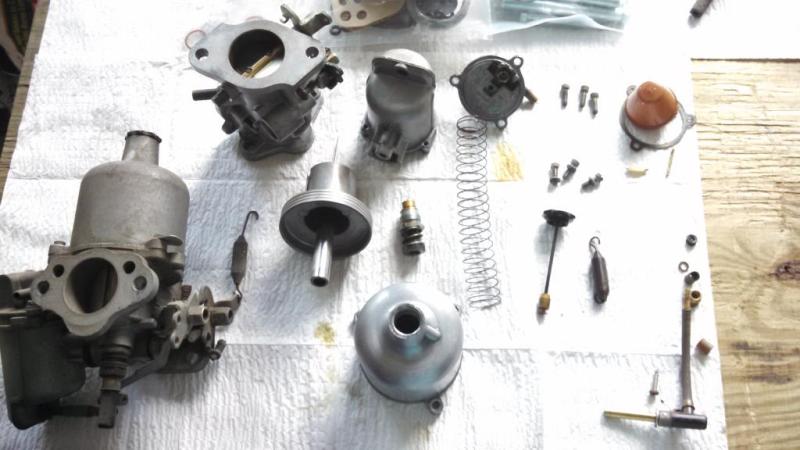
The carburetors were taken apart, one at a time and cleaned and
polished a bit. New rubber bits and gaskets installed along with new jets and
needles. I had rebuilt them in the late 80's, including reaming and installing
oversized throttle shafts, so they were in really good shape.
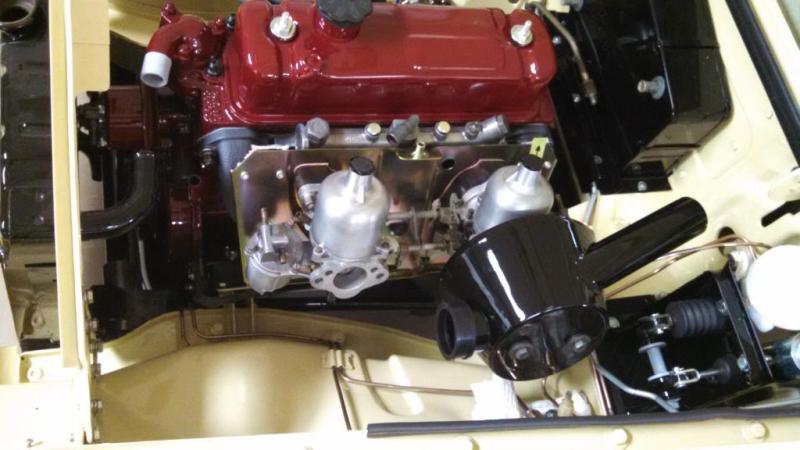
Both rebuilt and installed along with one air cleaner. You can
also see the grey, ceramic coated exhaust manifold, and the polished aluminum
intake manifold. It's all coming together nicely.
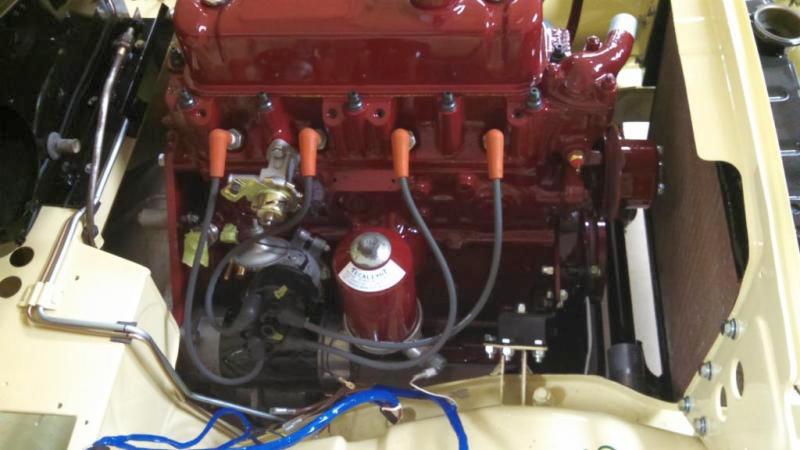
On the opposite side is the freshly rebuilt distributor along
with cleaned up spark plug wires. The Tecalemit oil filter is painted the same
as the engine. There was no paint left on it, so I have no idea the color it
came from the factory with. There was a strange blue/green ring of paint under
where the bolt sits on top. I think it looks good enough in the burgundy color.
This little specialty tool was made to hold the banjo fitting
while the bolt was tightened to keep the clutch pipe in the correct position.
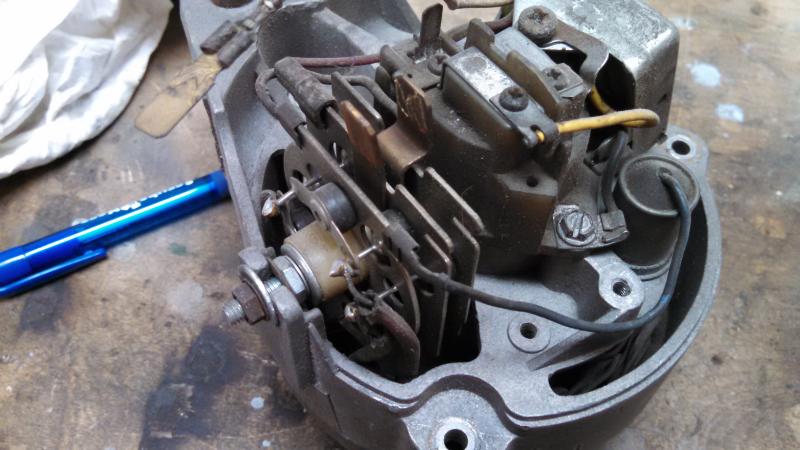
The alternator was completely taken apart, bearings lubed,
brushes checked, and the 6 diodes of the full wave bridge rectifier checked. All
was good, thank goodness, as there are NO parts available for these anymore.
Time to work on the dashboard.
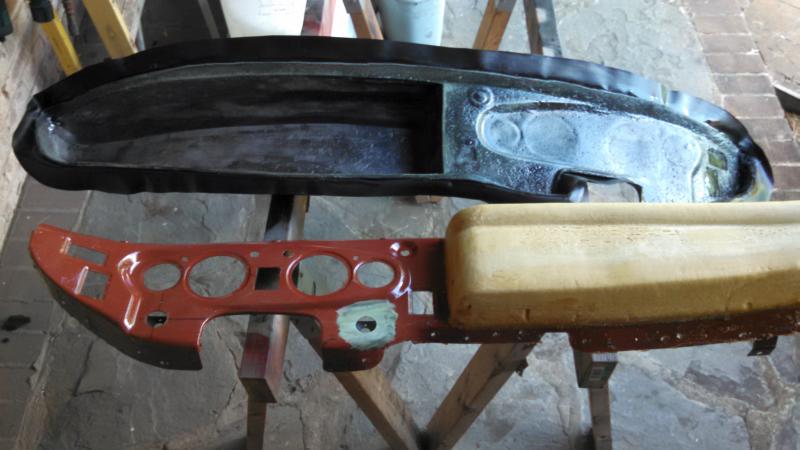
The old cracked dash cover was removed and the steel dash
cleaned up and readied for the new cover. The contact cement was brushed on the correct surfaces of both
pieces and left to dry for about 15 minutes. The new dash cover is from Moss and
we'll see how well it fits!
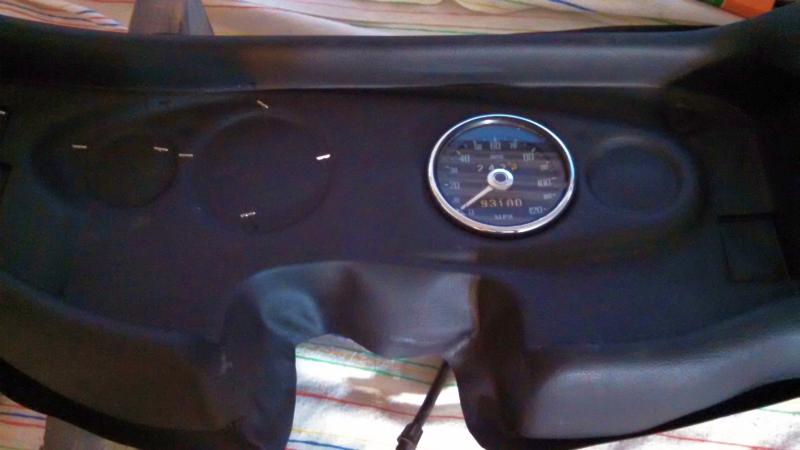
Once placed, the first cutout was made in the vinyl and the
first gage installed and it looks great. The pins were part of a guide scheme to help
with aligning the new pad to the steel dash. This worked well.
Before the dash assy could be placed, the cowl behind the dash
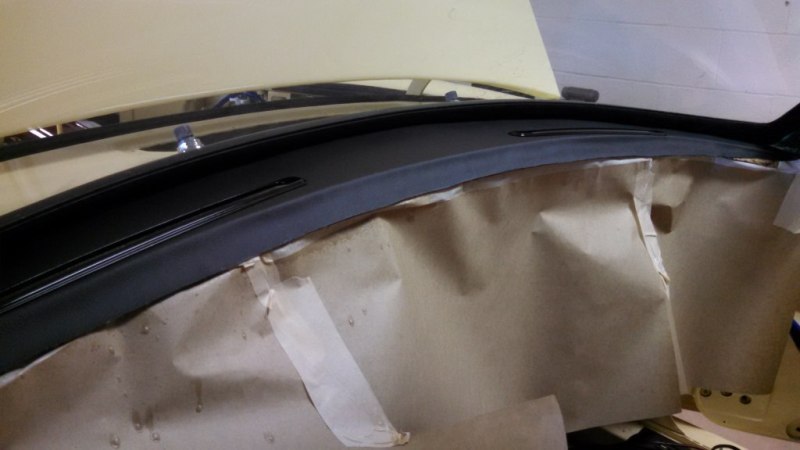
was covered in new vinyl. The defrost vents have been installed too.
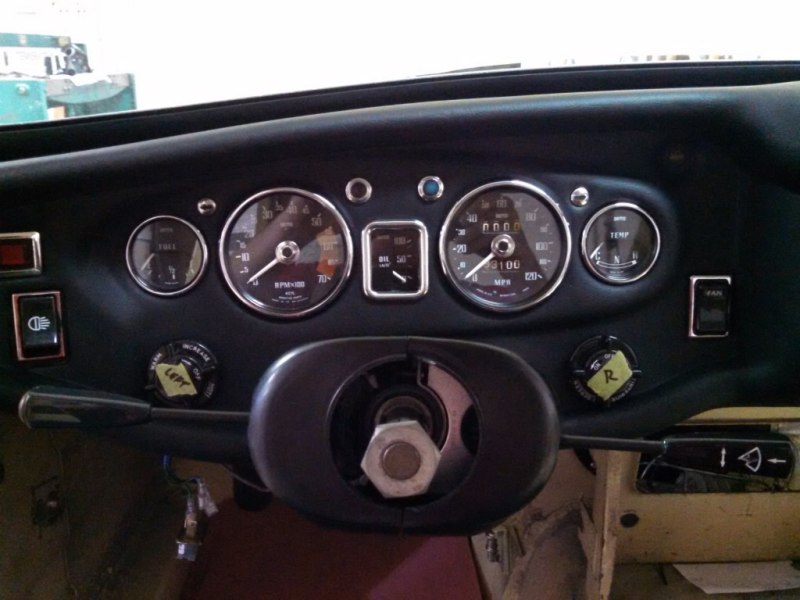
All the gages have been installed in the dash and here it is
being test fitted. The wiring harness will be installed next, and then the dash
can be final installed.
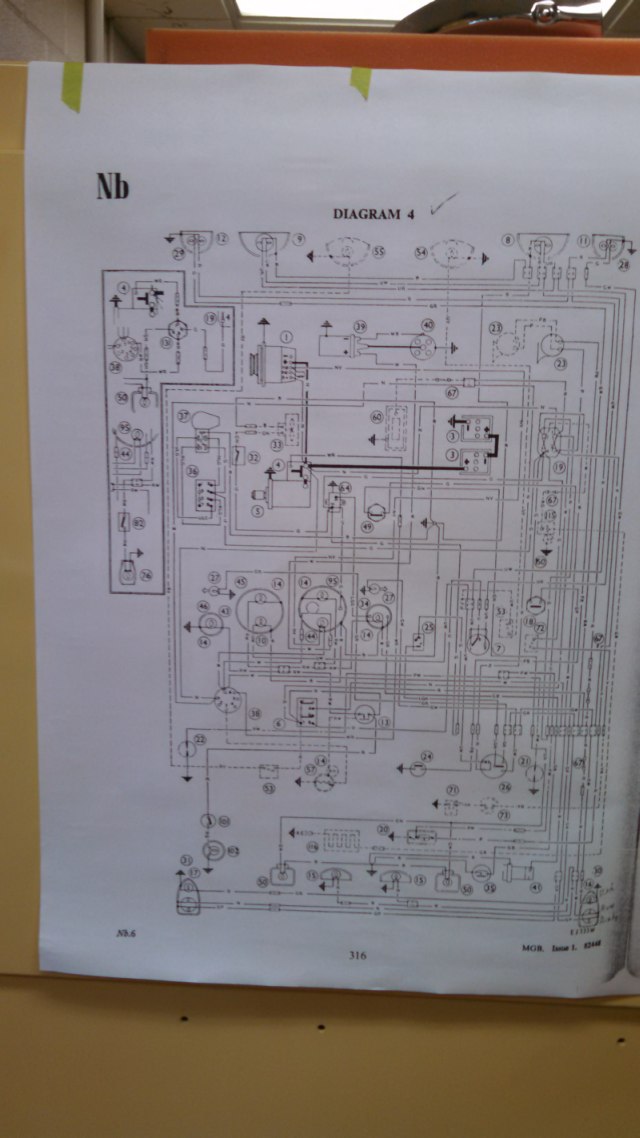
The schematic in the book was scanned and plotted E size to make
easier for older eyes to read!
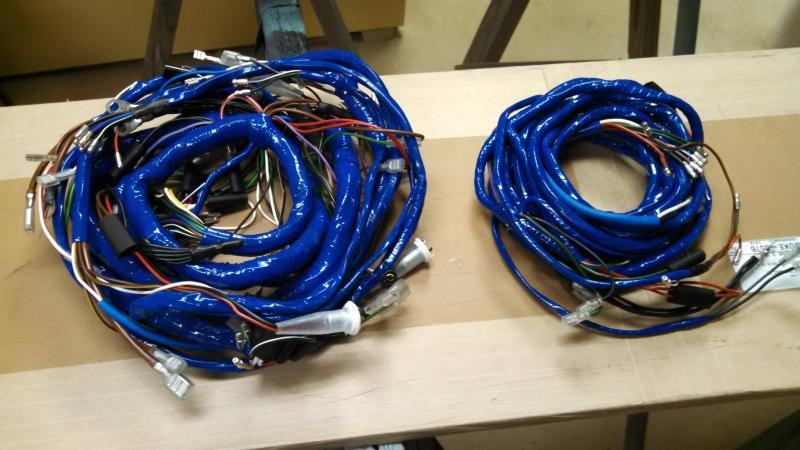
This is the new wiring harness from Moss. Moss supplies all with
this "period correct" blue tape. However, my original harness was taped with
black tape. A black taped harness is not available, so this is what will be
installed.
The beginnings of the wiring extending into the engine bay.
Have power to the back! I used a 12v, 2.5amp power supply for
initial testing, to assure no wires would be damaged if I had hooked anything up
incorrectly.
And power to the front!
New stainless side trim was ordered and installed. Seam sealer
was put under each trim button to prevent the normal MGB rust that grows from
under these.
Sept 2015
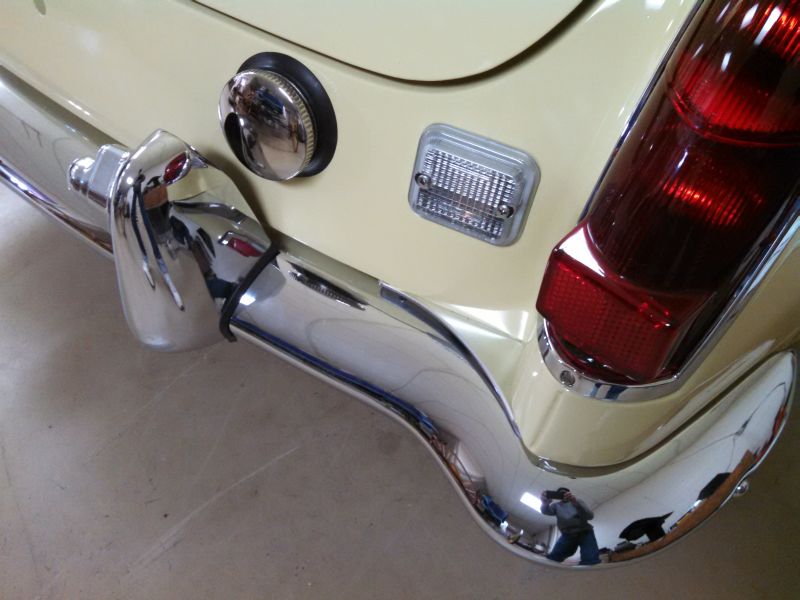
While vacationing in Ireland in September, Knox Chrome completed
the chrome work to the original back bumper and over riders. They do exceptional
work! This corner of the car is complete!
Left hand drive MGB's are notorious for roasting the driver's
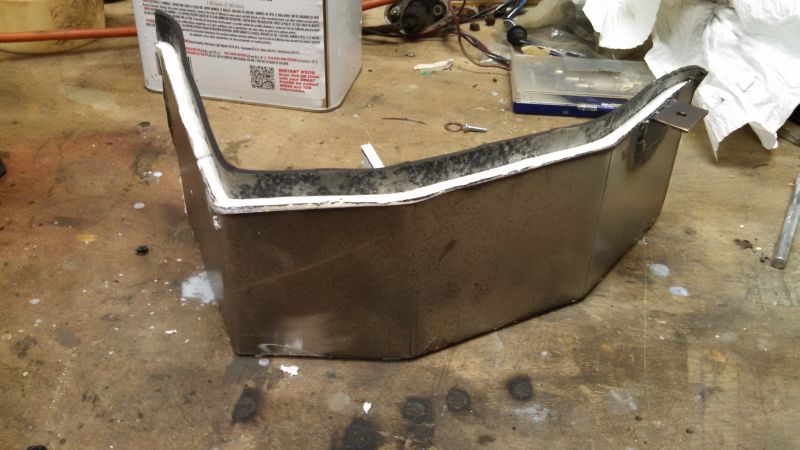
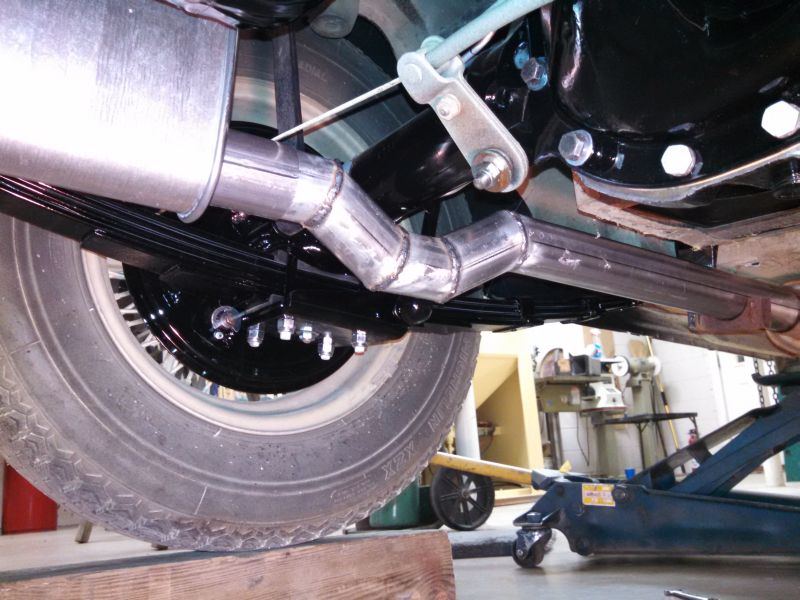
feet, due to the exhaust pipe being directly under the throttle pedal. Before
the exhaust pipe was installed, this composite heat shield was fabricated. It is
a composite of 18 ga steel, 1/4" ceramic blanket (Fibrefrax), and 1/8" closed
cell foam.
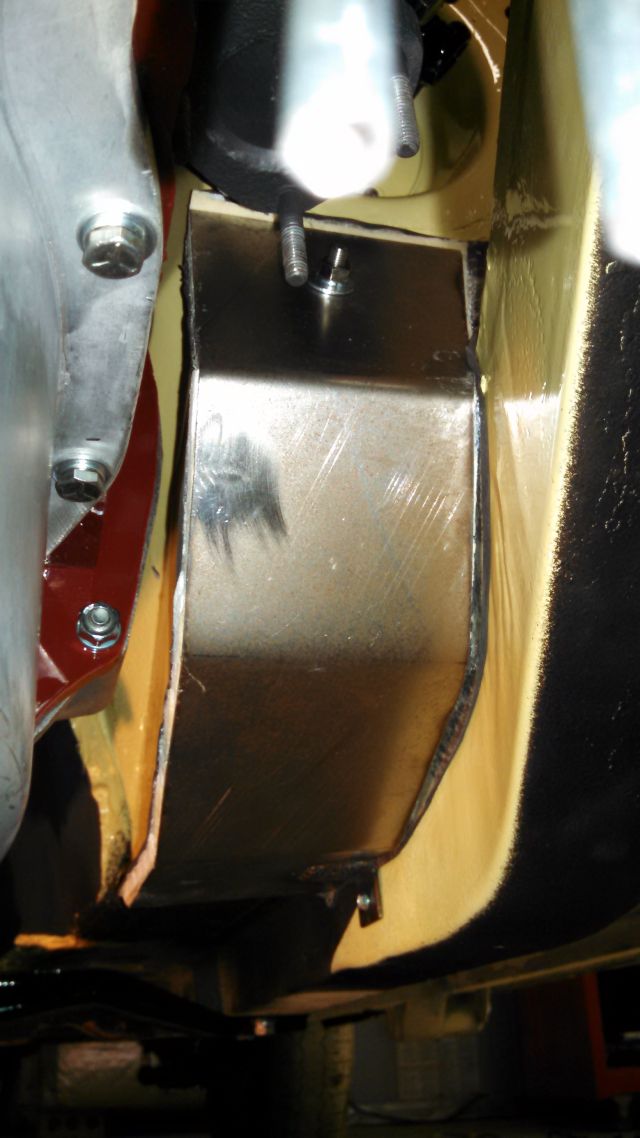
This was bolted to the floor pan where the
radiant heat would impact.
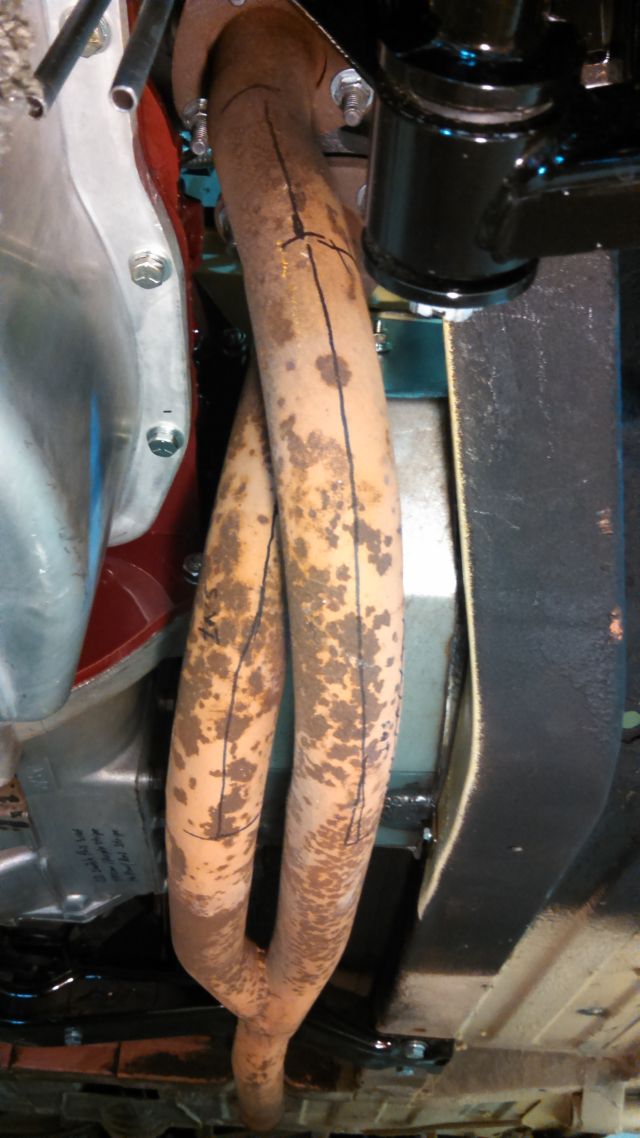
The exhaust pipe installed with the heat shield in place above
it. Hopefully this will solve the hot feet problem.
Nov 2015
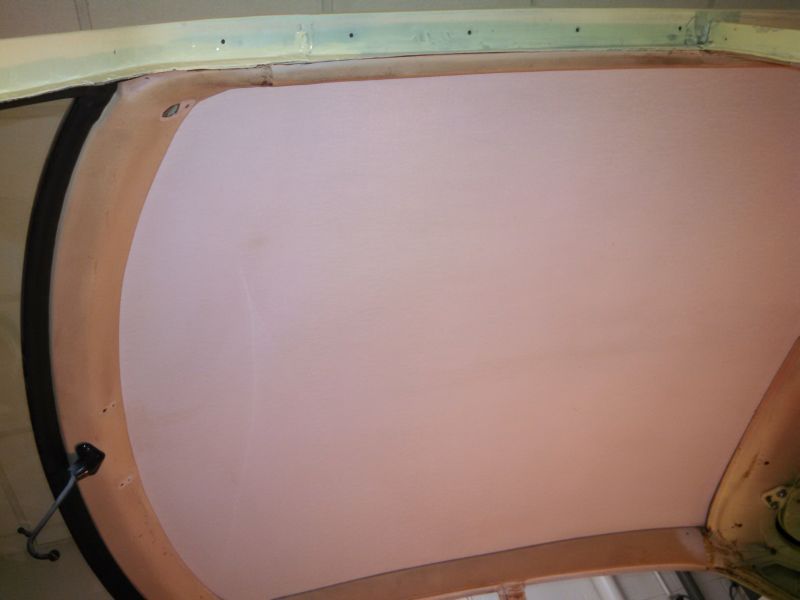
The original headliner was still in excellent shape, as was the
plastic trim just beneath. However that trim had yellowed badly over 45 years.
This is after tremendous scrubbing. Rather than replace, I decided to try the
SEM vinyl trim paint.
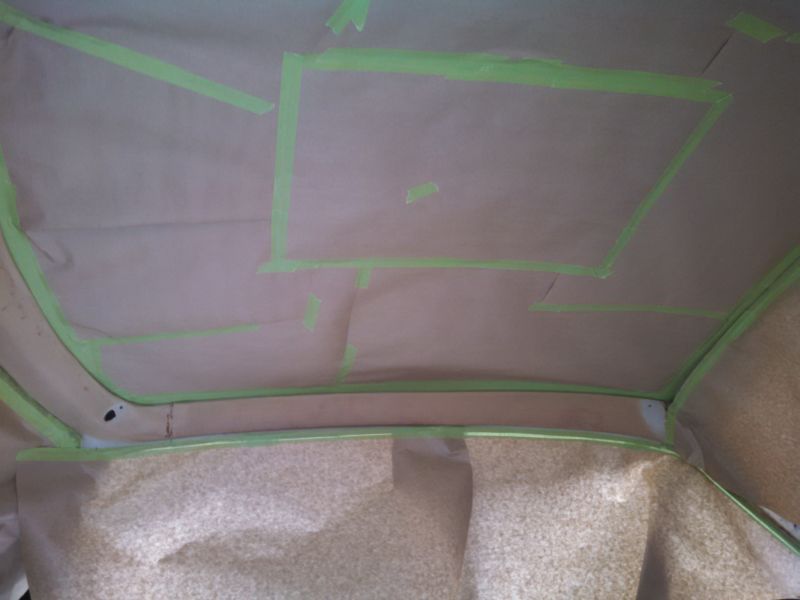
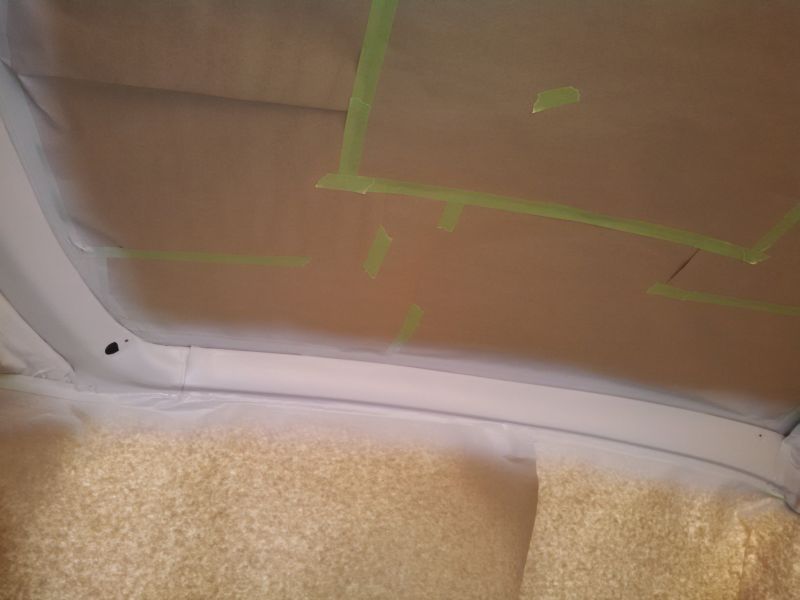
The trim was isolated from the headliner, cleaned with several
solvents, and then sprayed.
The end result is very impressive. After drying I tried to chip
some of the trim paint loose and it is impossible. I am very impressed with
their product!
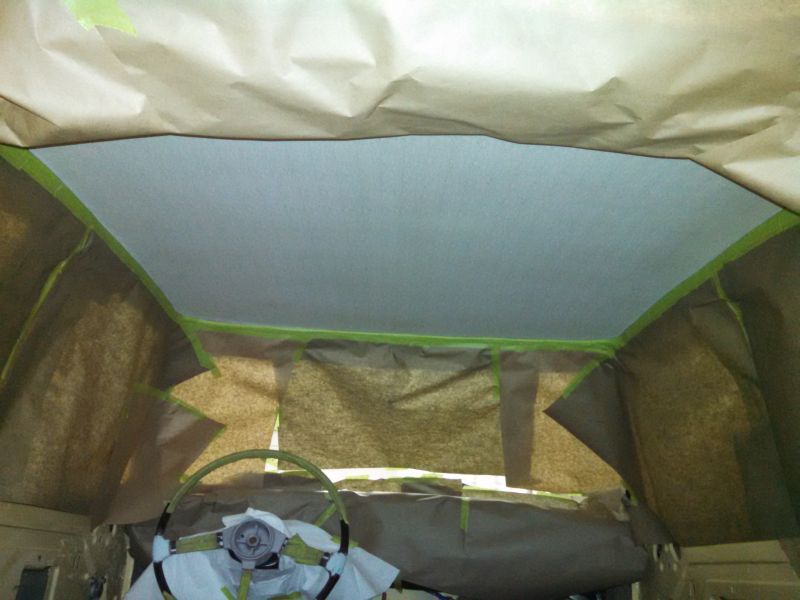
The perimeter trim turned out so well, it made the headliner
look dingy. So everything else was papered and taped again, and now the
headliner was sprayed with the same. This completes the first bit of interior
work.
Dec 2015
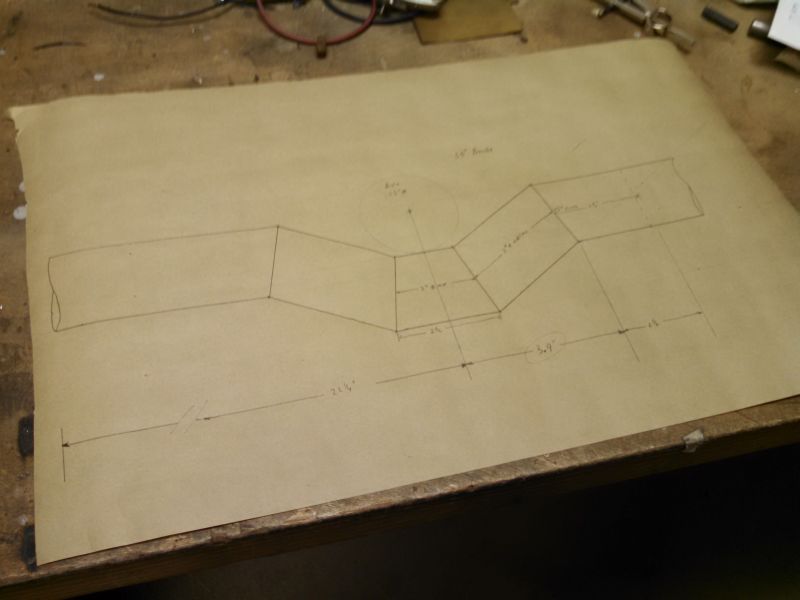
Yes layouts can still be done the old fashioned way w/o CAD. This drop
was designed and fabricated to provide more than OEM clearance between the
exhaust pipe and the back axle.
The 2" muffler pipe was cut on the angled and to the lengths
from the layout, and then welded. This is how you do it when you don't have a
pipe bending machine. The stock pipe was 1-5/8", and so increasing to the 2"
size will eliminate any losses from the bends.
The original round muffler with offsets never fit well, so
another oval muffler with an offset inlet and centered outlet was purchased. To
get the exit pipe up to the correct elevation, this jog was made. Finally a
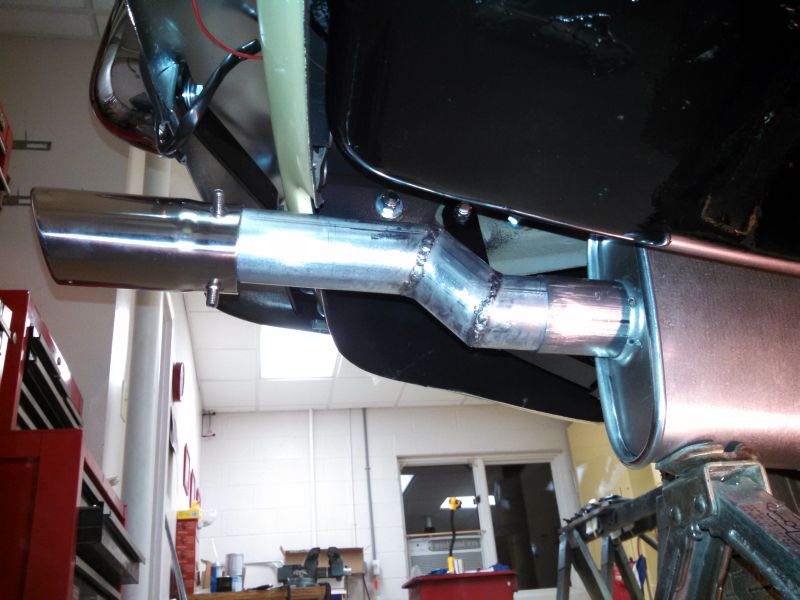
decorative polished stainless exhaust tip was added.
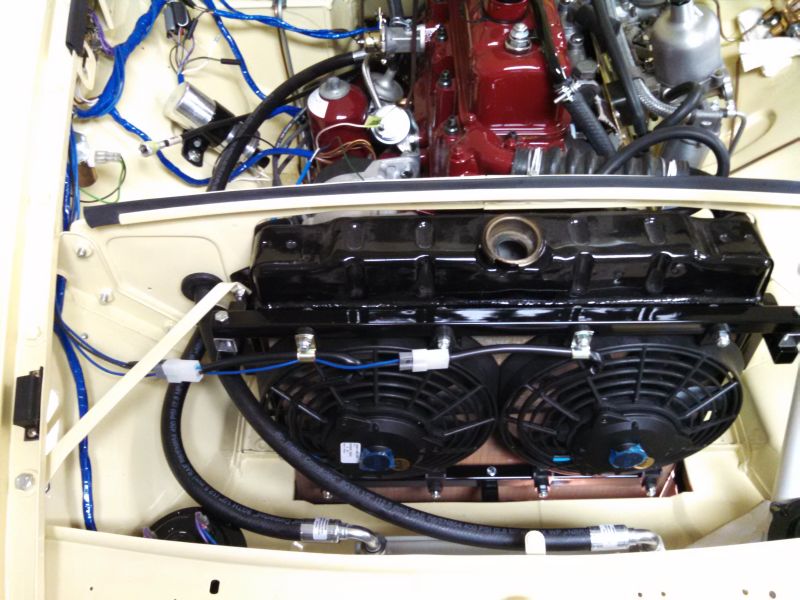
The original engine driven fan never pulled enough air across
the radiator during hot weather to keep the engine sufficiently cool, so I'm
trying something different to see if it helps. The engine driven fan has been
removed. This may make the engine quieter too. These 2 modern 9" fans have been
fitted to blow air across the radiator as needed to cool the engine. The
brackets have been fabricated from thin wall 3/4" square tubing. Eventually air
conditioning will be added, but for now I'm just assembling with fans and the new
oversize radiator. The fans will be tied into a thermostat to automatically
control them.
Jan 2016
<photo>
New Years Day was the day to start the engine! Bob Cabiness
joined me for the big event and to be another set of eyes watching for leaks or
any other problems. Did experience a few fuel leaks related to crud in the float
needles, but that was quickly resolved. The engine was run at a spirited rpm per
the instructions from APT for conditioning new camshafts. Apparently successful
break-in occurred during it's first 30 minute run. Temperature seemed to be an
issue, but was later traced to a poor ground of the new solid state instrument
voltage regulator. Once resolved the temperature gage is dead centered with a
165°F thermostat installed.
Wheels and tires.
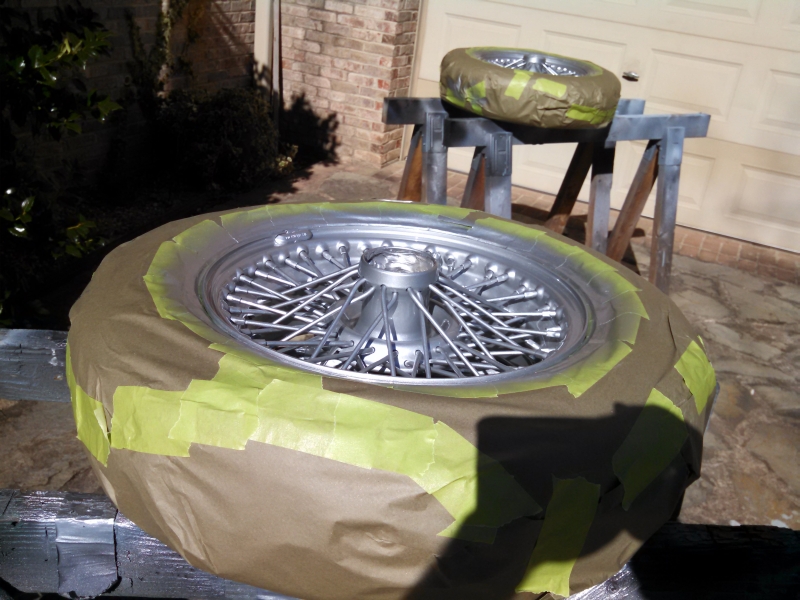
With the engine now running it was time to replace the 25+ year
old tires. Longstone Tyre in England seemed to be the only source for vintage
14" tires and I settled on reproduced XAS Michelin tires. 5 were ordered and was
surprised when they showed via USPS. The old tires were removed at Hendricks Wire
Wheel in Greensboro and a preliminary tune and spoke replacement done. I then
blasted the wheels, primed with self etching, and spot painted the inside of the
rims and the area where the wheel weights would live. Then back to Hendricks
they went, along with the new tires, where he mounted, tuned again, balanced,
and ground the tires for no OD run out. I'm told the results will be impressive.
Finally each tire/wheel was taped and painted with catalyzed paint for long term
durability and shine.
With the inside end of the spokes sealed with silicone caulking,
and the splines well greased, the wheels were installed, and she is resting on 4
new shoes.
Feb 2016

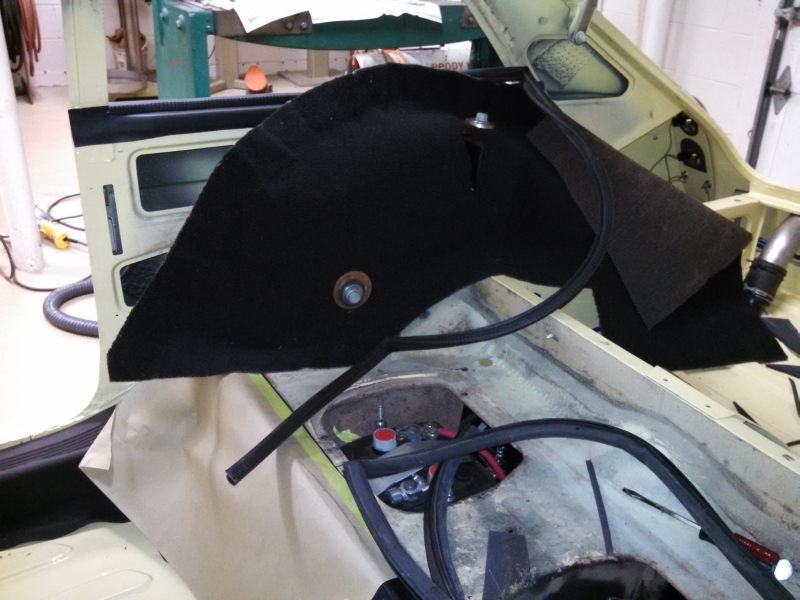
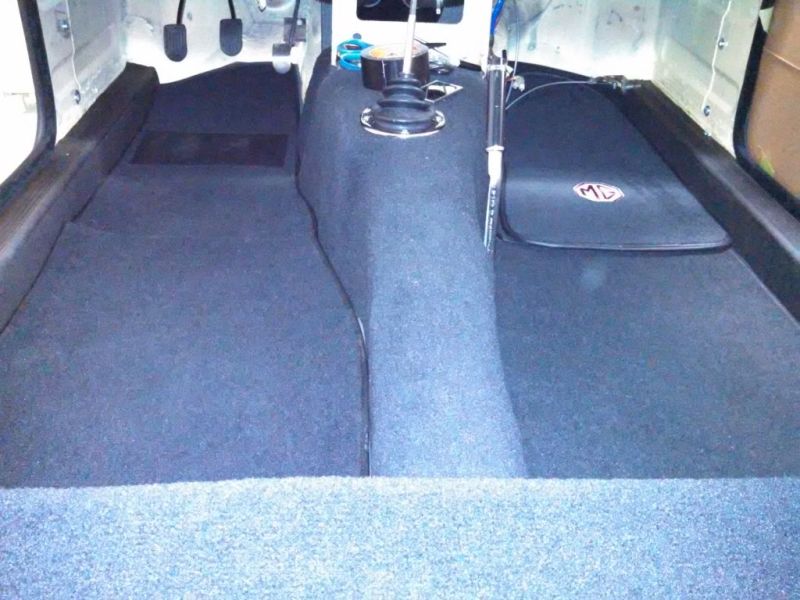
Interior installation has begun. The first piece of carpet on
the back bulkhead has been installed. I opted to use original style ribbed
rubber sill covers than more modern carpet as sill cover. The rubber should be
more durable.
This paper template was made to assist where to cut the slot and
holes in the molded carpet pieces for the back wheel wells.
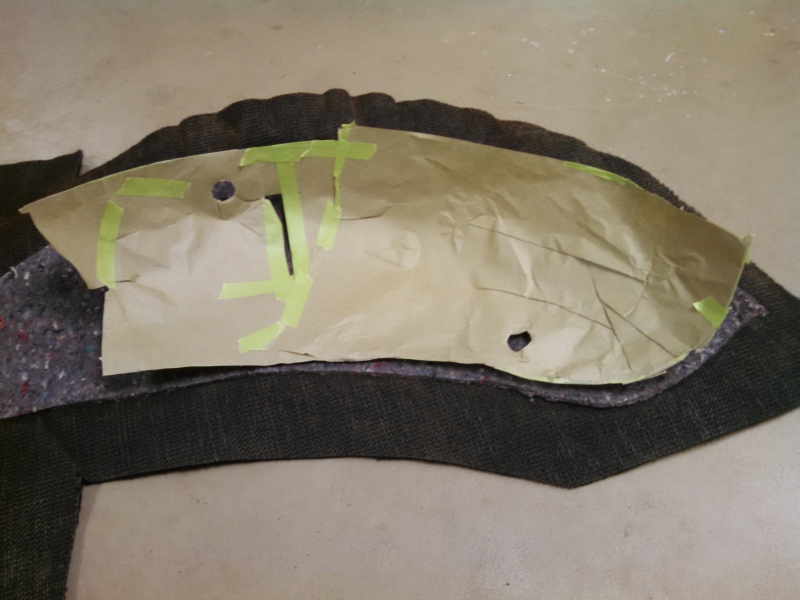
This was laid on the inside of the carpet and insulation and
marked.
Slot and holes turned out to be in the correct location! Now to
force it into position and glue it in place.
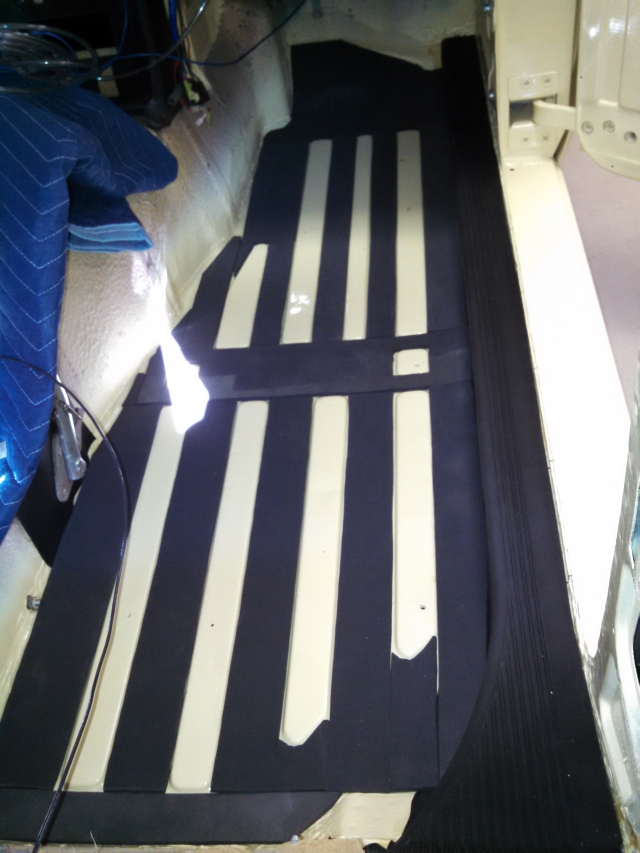
This is an attempt to reduce cabin noise thru the floor pans.
Higher density closed cell foam rubber sheet was cut into strips to fit down
into the corrugations of the floor pans.
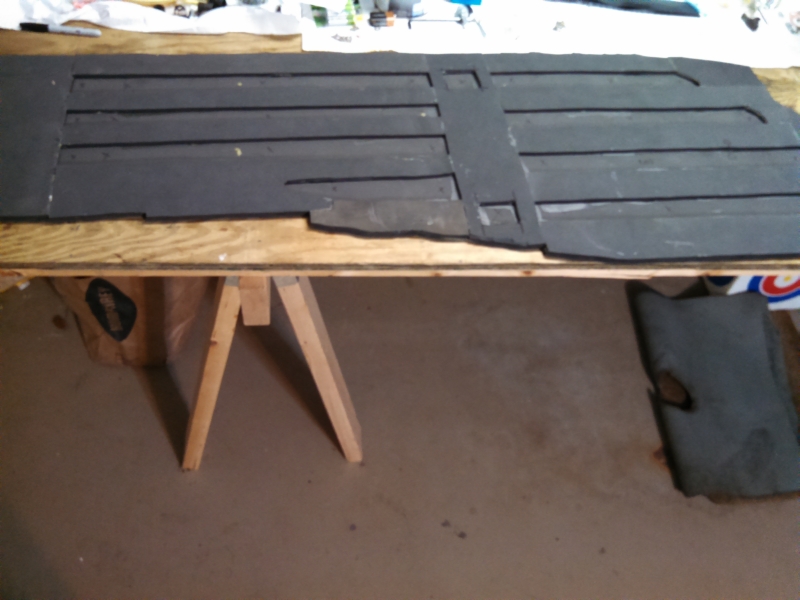
These strips were glued to a once piece upper sheet, to create a
composite that is 1/2" thick. This is the underside of the driver's side.
The largest pieces have been fitted.
Still need to fit sound insulation and carpet pieces in the foot
wells against the firewall.
March 2016
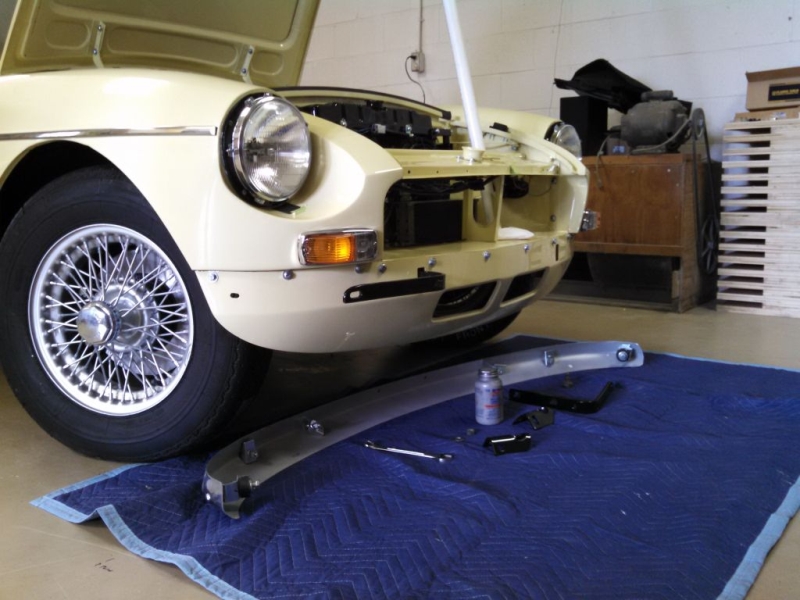
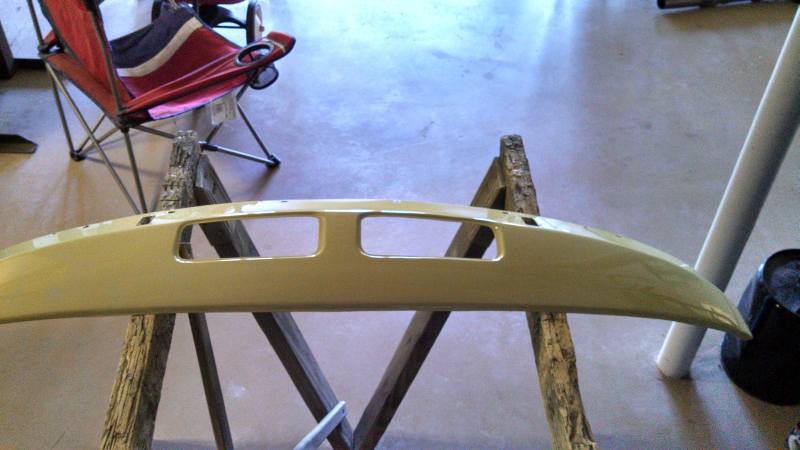
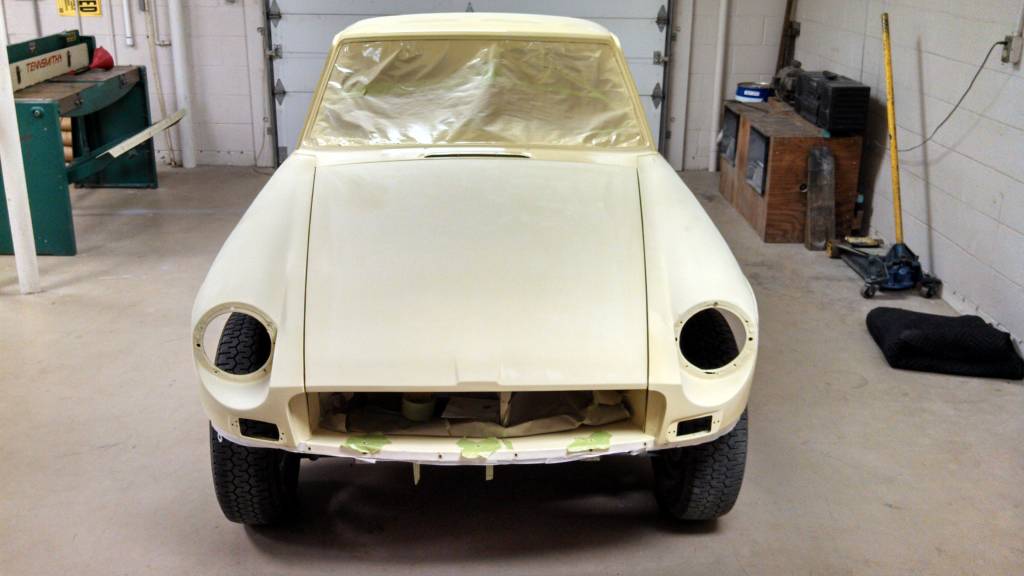
The front valance panel installed with the bumper to follow. All the bolt heads with be brushed with yellow paint next.
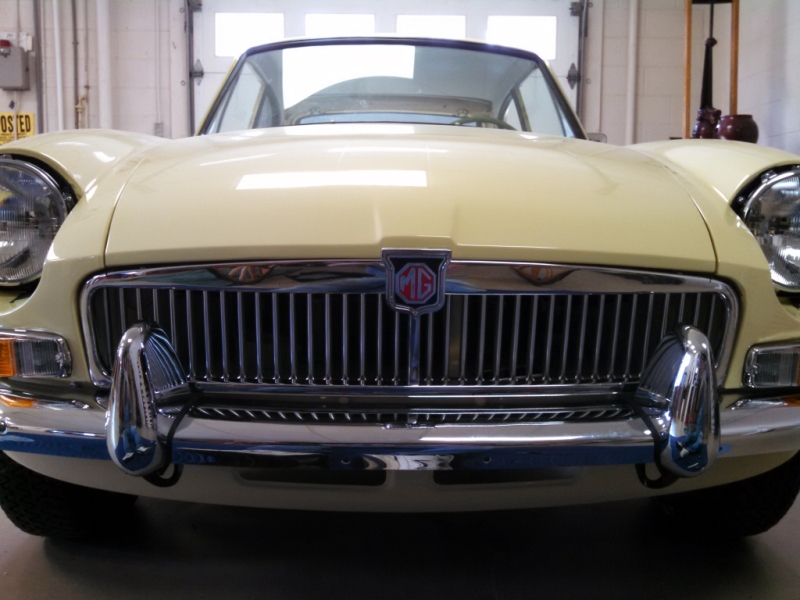
New grill installed. Not very pleased with the difference in the
curvature of the new Moss hood and the curvature of the top of the Moss grill.
Looking on the 'net at photos of other MG's, I see the exact same problem. My
guess is the reproduction hoods are made incorrectly. Re-curving the hood would
not be an easy task, so this is the way it will be.
April 2016
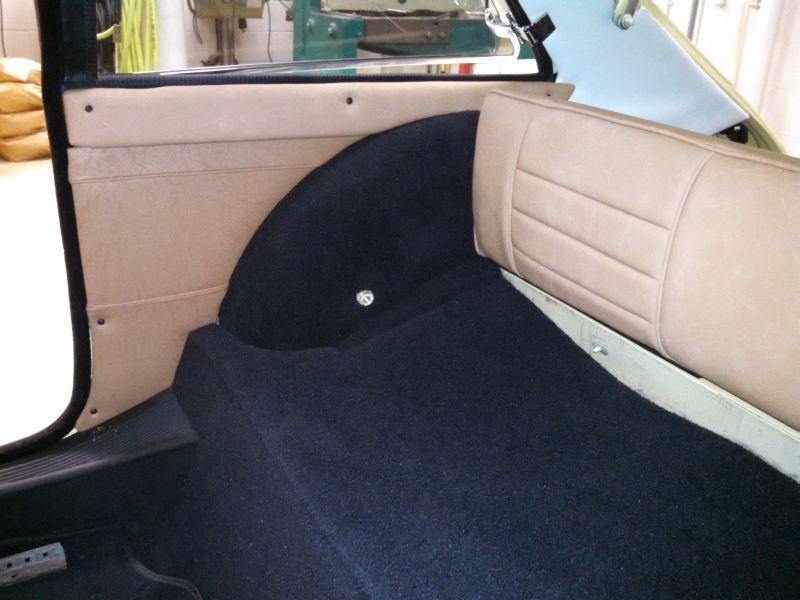
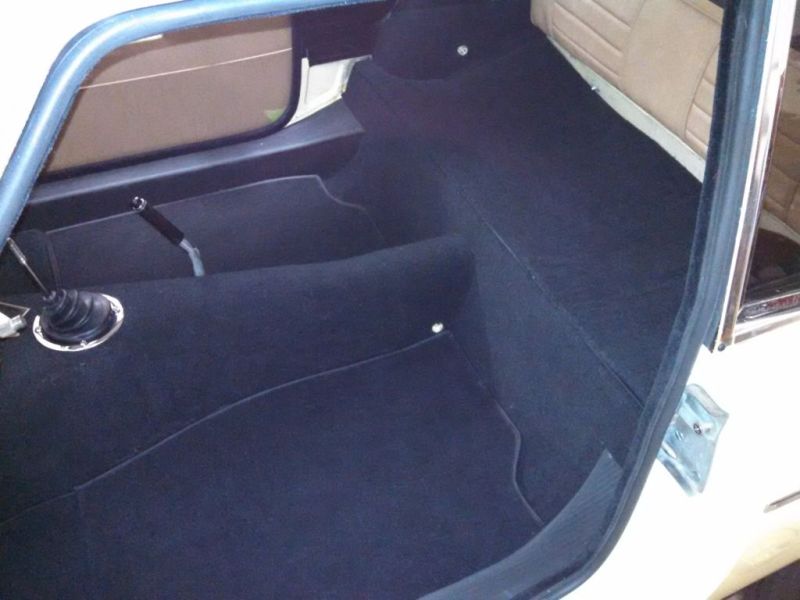
With the carpets installed, the interior panels installation
could begin. Here part of the 2+2 back seat has begun along with side panels.
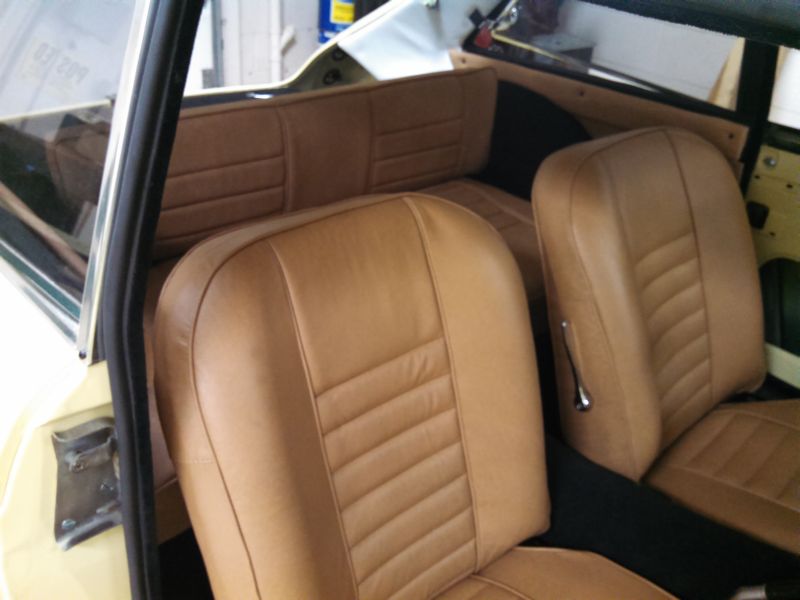
Front seat installed next. Still working on the headrests.
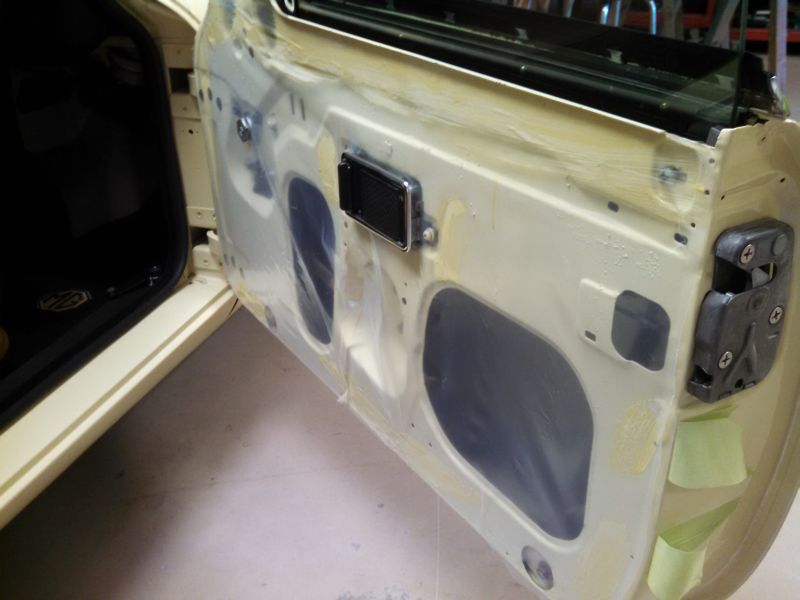
Heavy mil plastic glued in place to keep any moisture from the
new door panels.
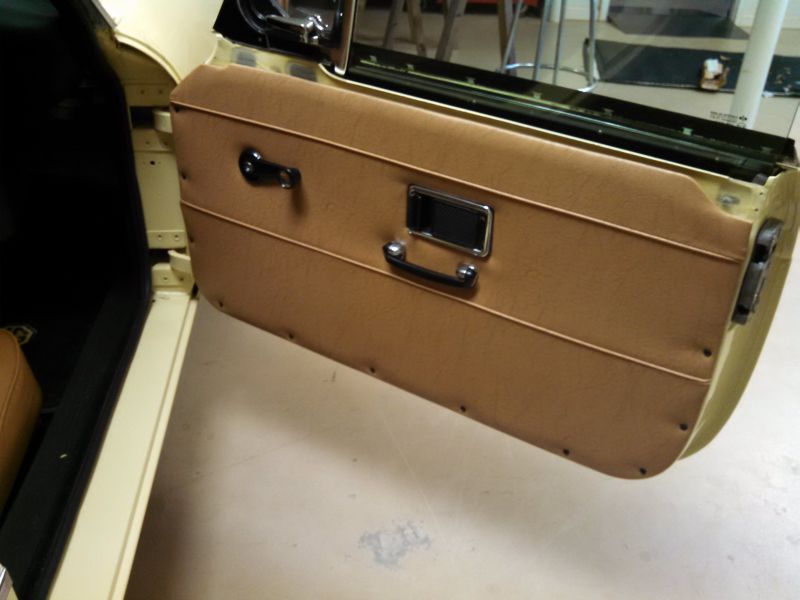
Door panel fitted. Next the top rails will be fitted.
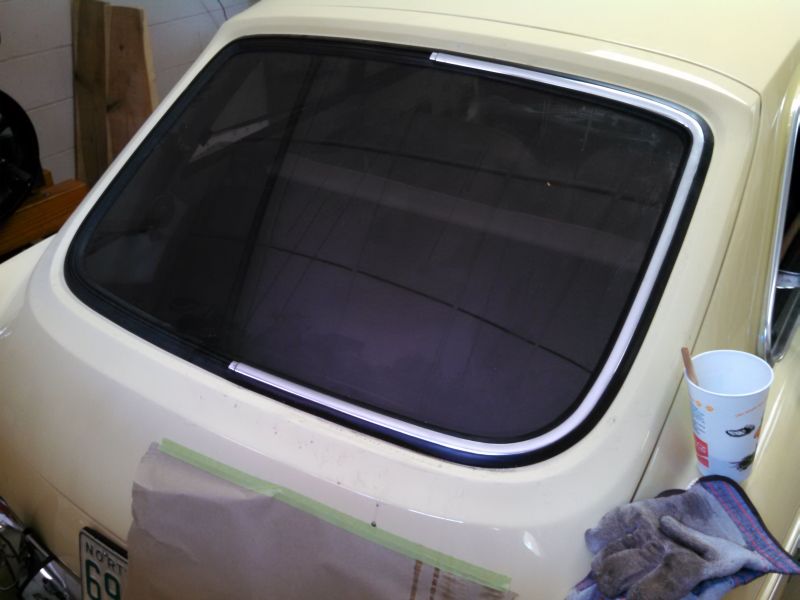
Without question, one of the worst tasks in putting an MGBGT
back together, is the installation of the trim in the glass gaskets in the front
and back windows! Several days were consumed doing this and several versions of
special tools were made to aid the process. Luckily no slips to scratch any
paint!
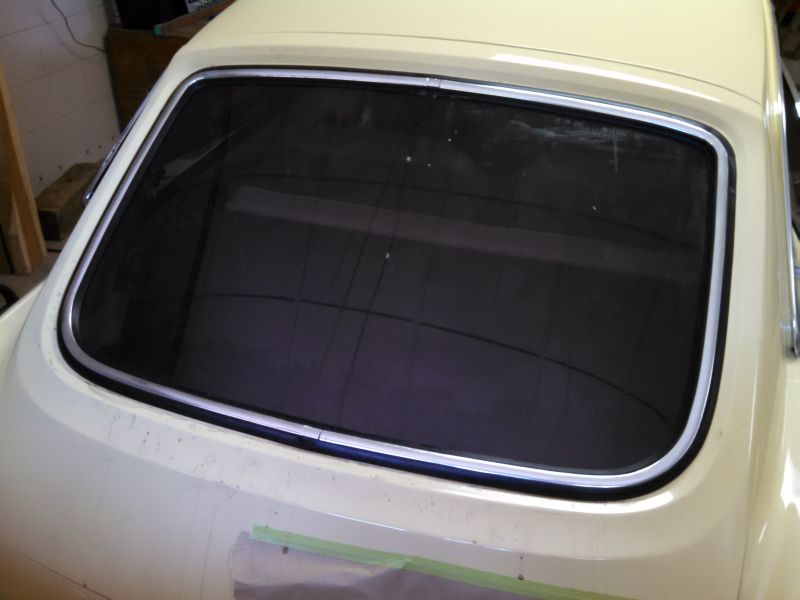
All the trim is complete now! Whew!
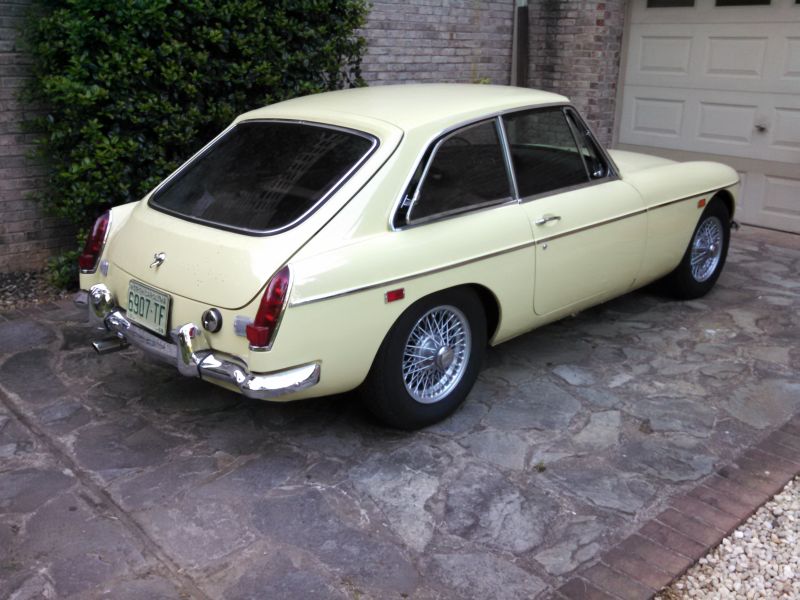
Have just taken her for the maiden voyage and all went well.
Ready for her first outing on April 30th!
April 30th, first showing...
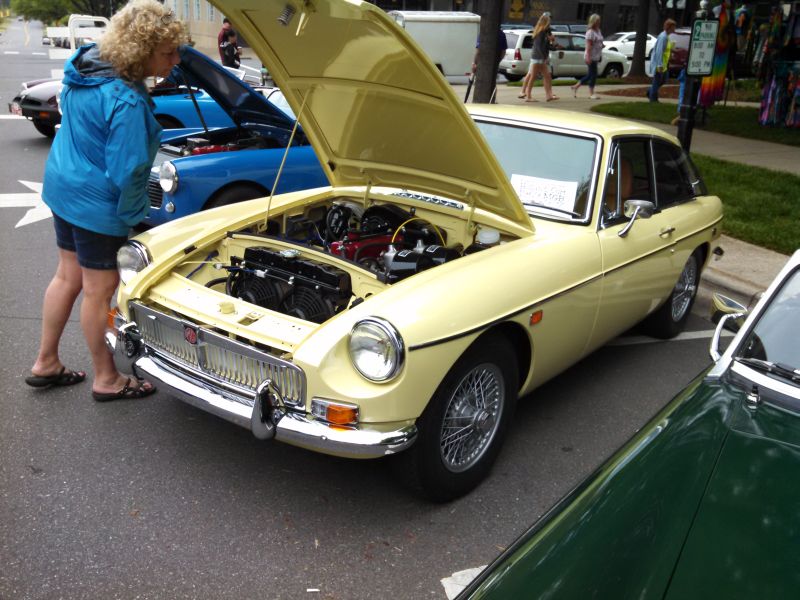
The 6th annual Broad River Classic was on April 30th, 2016, and
the MG made a good showing.