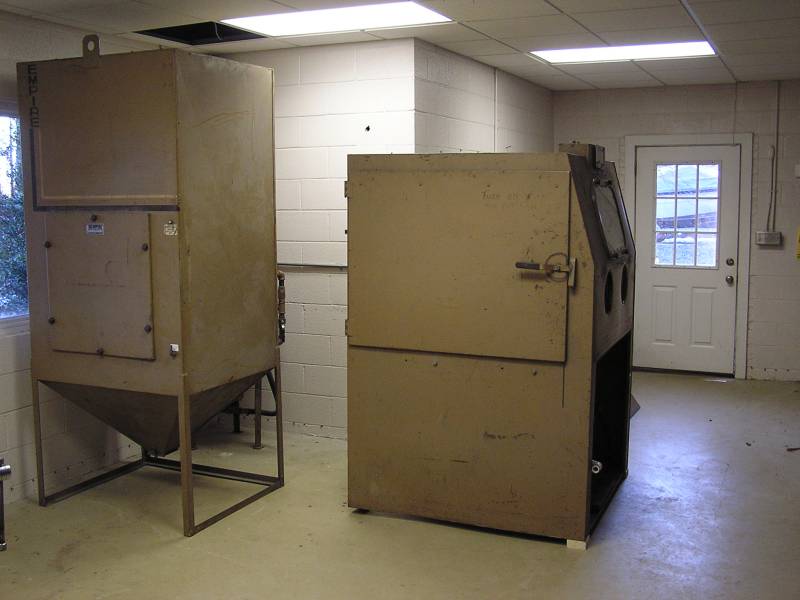
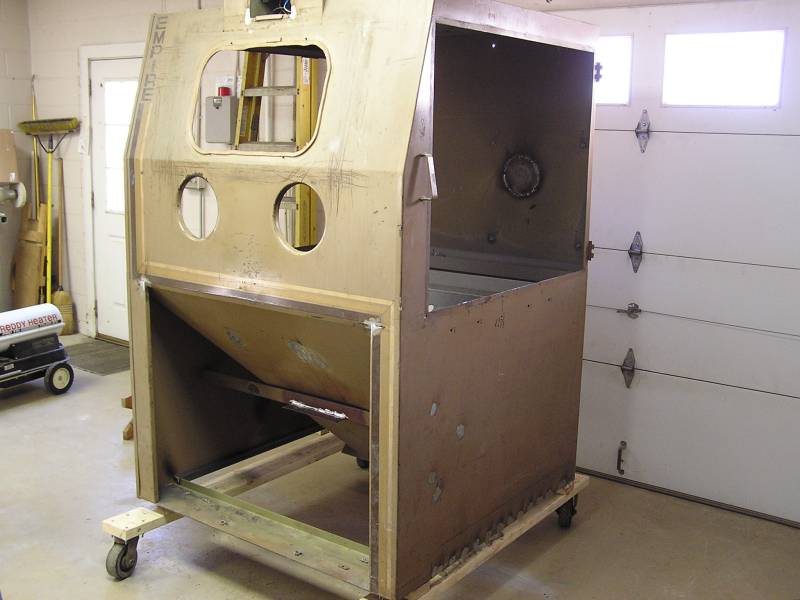
 Here are the cabinet and bag house of the blaster set in place on moving day.
The PF4848 Empire blaster would not fit in the new shop due to reduced ceiling height. To solve the problem, parts of the blaster needed to be modified to conserve height. Namely the pressure pot and the accumulation chamber that sits on the pressure pot. Since I was into the project this deep, I decided to just go ahead and repaint the entire unit, updating the color to the modern Empire color.
Click on the thumbnails for a full sized image. Close that image to return to this page.
Here are the cabinet and bag house of the blaster set in place on moving day.
 The accumulation tank alongside the bracket that holds the cyclone to the blast
cabinet. Both will need modification.
The accumulation tank alongside the bracket that holds the cyclone to the blast
cabinet. Both will need modification.
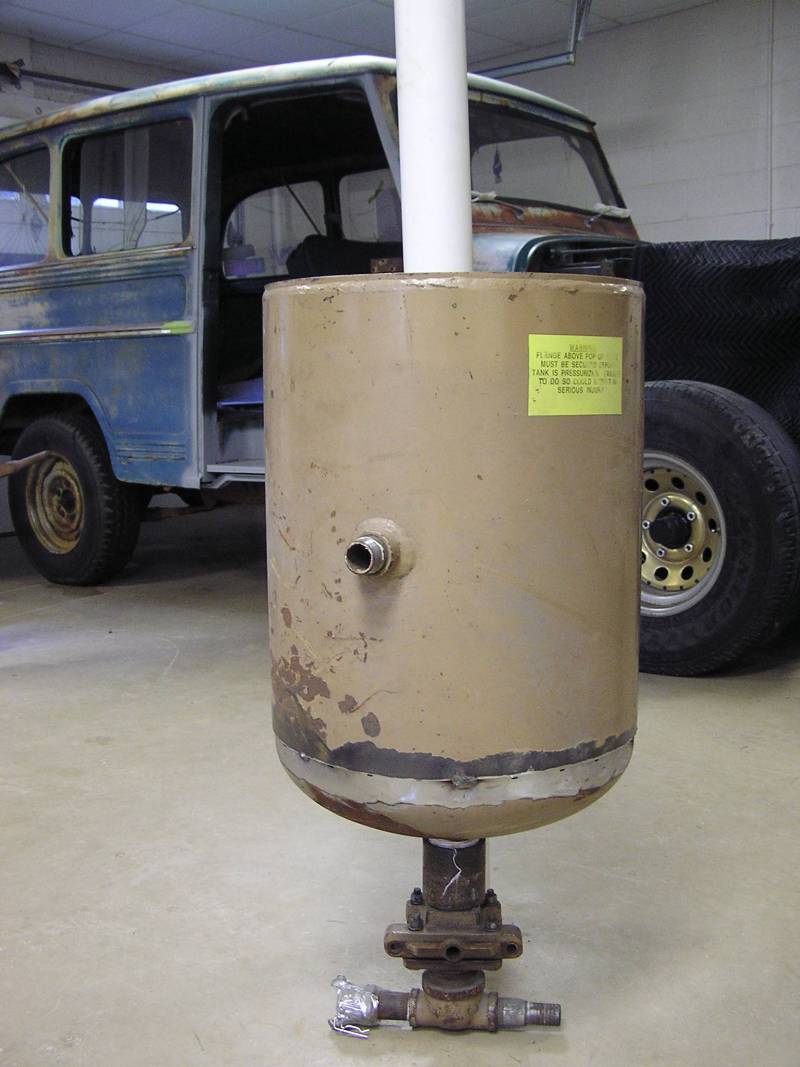
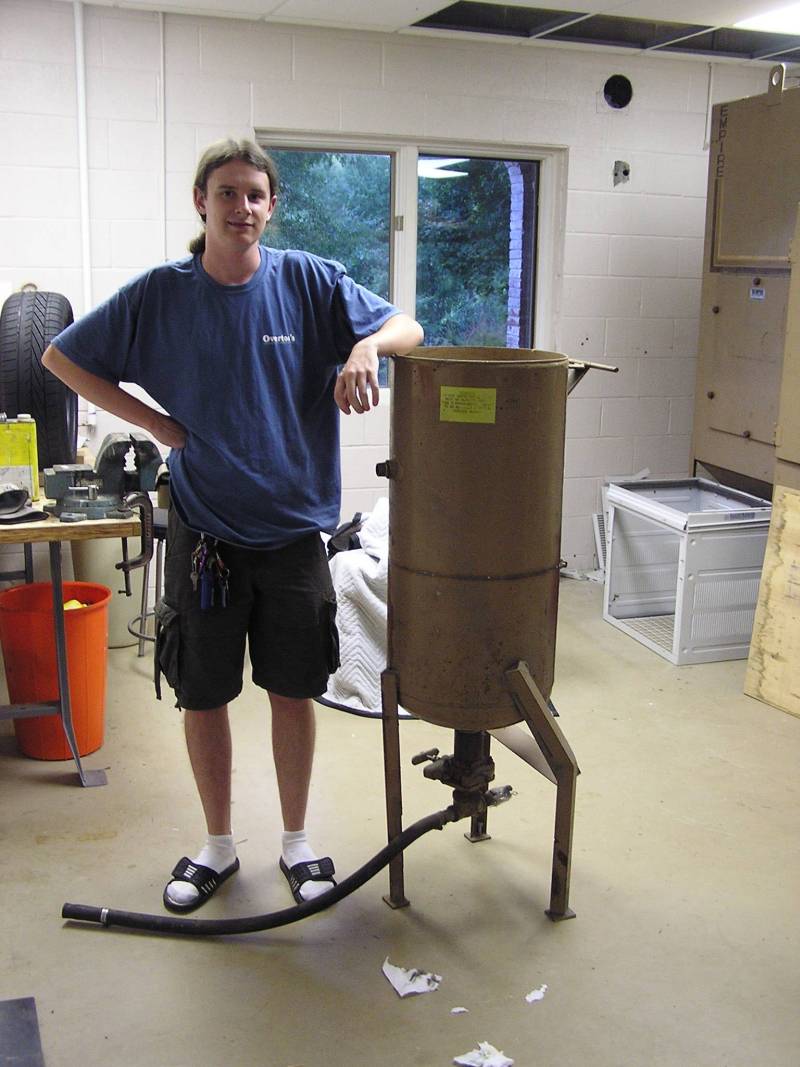 Here is the height of the pressure pot originally. Son Devin is 6' 2", so it's a
tall and large tank.
Here is the height of the pressure pot originally. Son Devin is 6' 2", so it's a
tall and large tank.
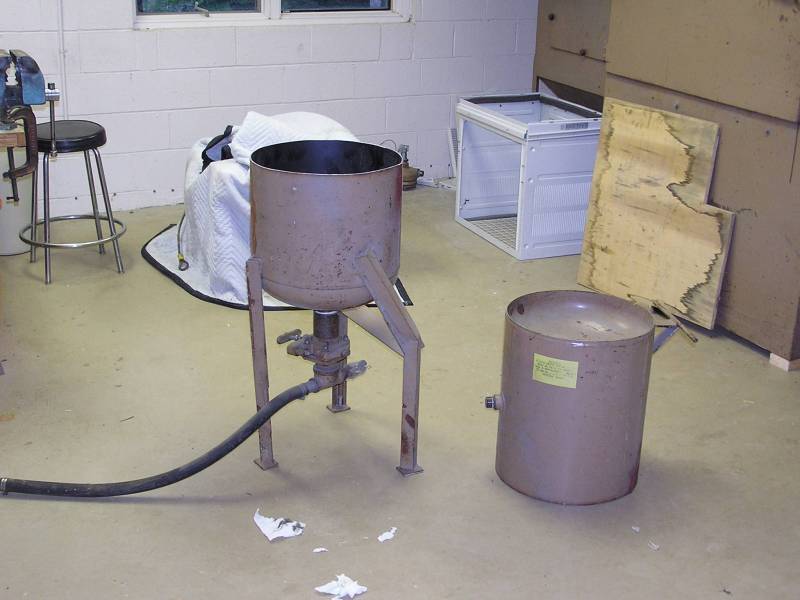 The first modification was to shorten the pressure vessel.
A little time with the grinder and it's in two pieces.
The first modification was to shorten the pressure vessel.
A little time with the grinder and it's in two pieces.
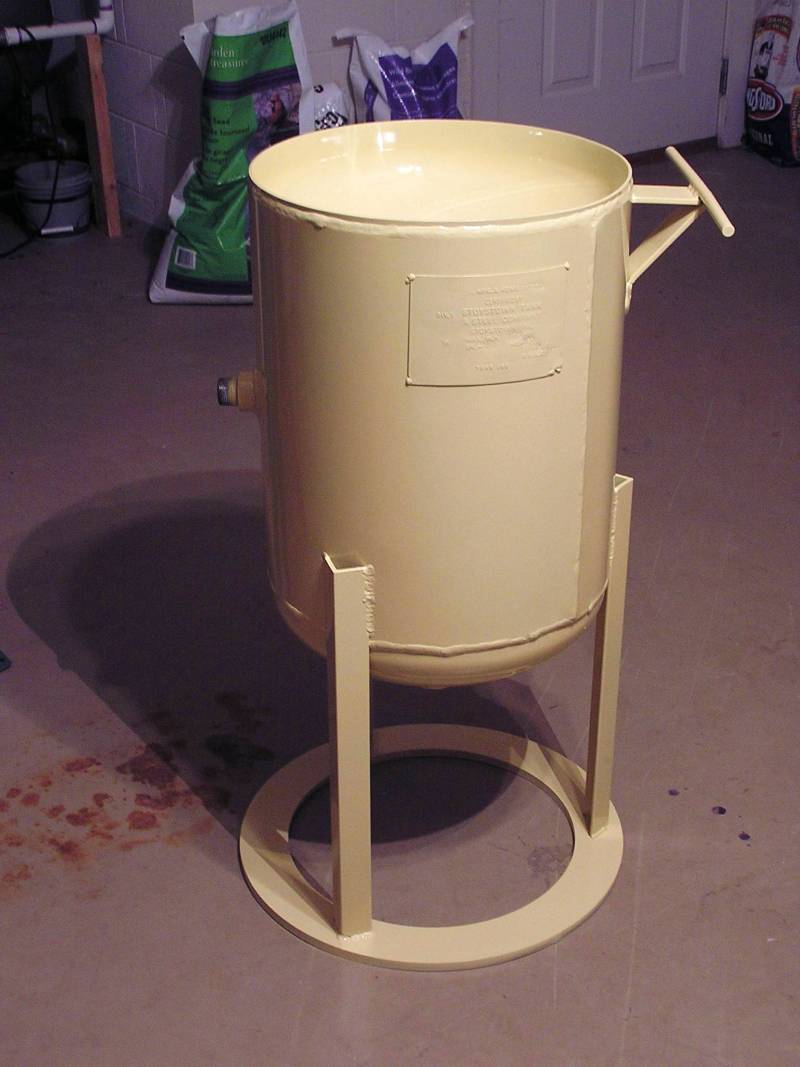
 The cylinder sheet was carefully removed from the end cap, and tacked into the
remaining upper barrel. This was
certified welded and then hydro-pressure tested. A new ring base and three legs
were added to better
support the bottom.
The cylinder sheet was carefully removed from the end cap, and tacked into the
remaining upper barrel. This was
certified welded and then hydro-pressure tested. A new ring base and three legs
were added to better
support the bottom.
 Here everything is all welded and painted in the correct new color of Empire
blasters. It's a mustard yellow color. It's the same as some mid-80's Porsche
color per the color scanner.
Here everything is all welded and painted in the correct new color of Empire
blasters. It's a mustard yellow color. It's the same as some mid-80's Porsche
color per the color scanner.
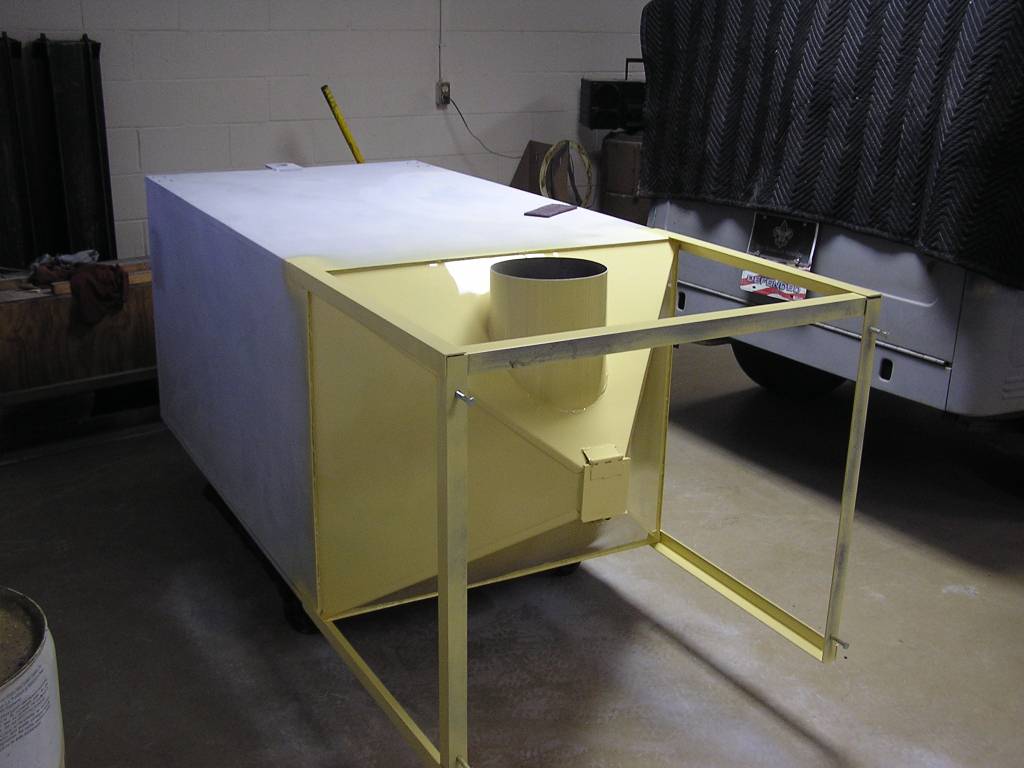 The next part to be painted was the bag house. All the bags were removed and the
unit cleaned. Fun job....not! After lots of sanding and several applications of
primer surfacer, it was time to spray some color. Couldn't figure how to paint
this in a single event, so split it up into two paint sessions. The first was to
paint the hopper portion at the bottom. Once cured this area was taped & papered
off, and the upper housing painted.
The next part to be painted was the bag house. All the bags were removed and the
unit cleaned. Fun job....not! After lots of sanding and several applications of
primer surfacer, it was time to spray some color. Couldn't figure how to paint
this in a single event, so split it up into two paint sessions. The first was to
paint the hopper portion at the bottom. Once cured this area was taped & papered
off, and the upper housing painted.
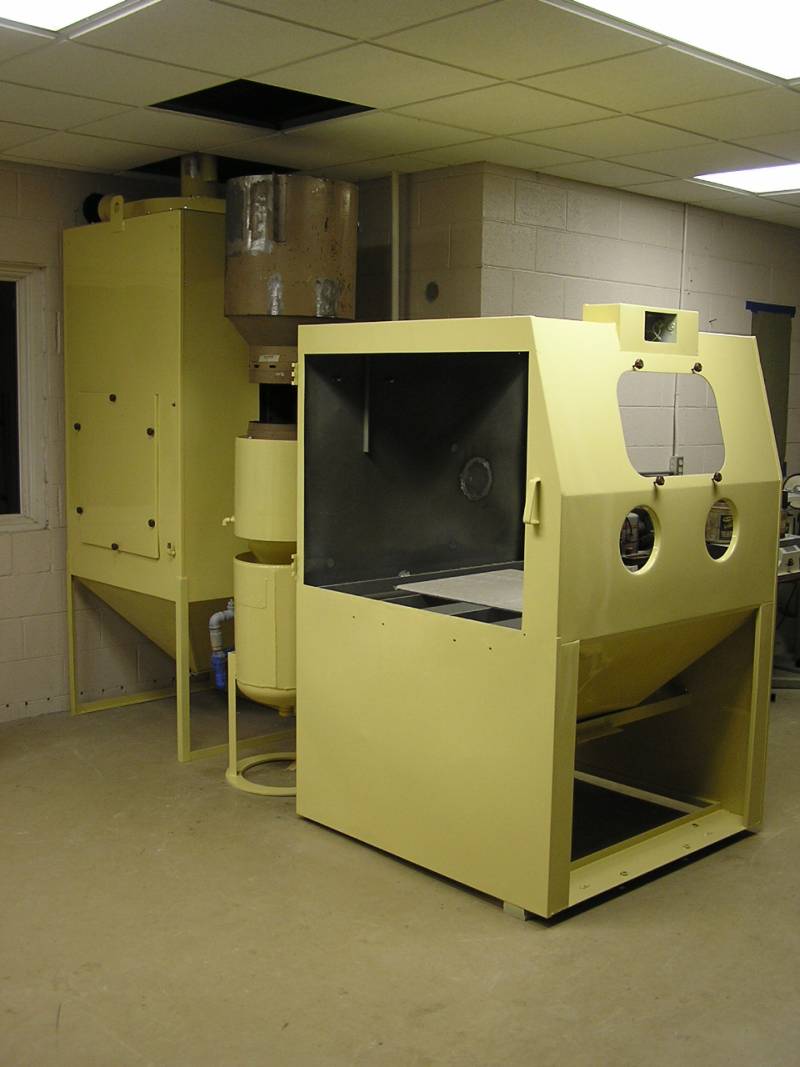
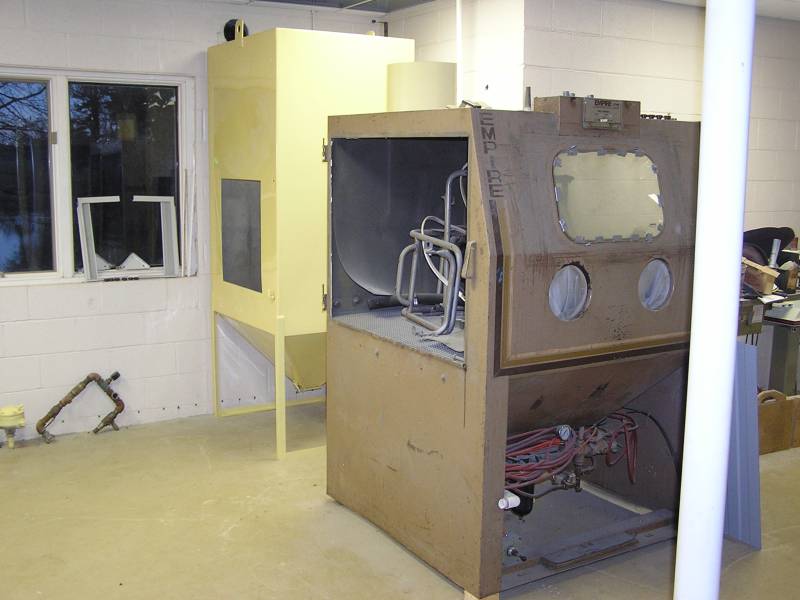 The bag house is all done and in its final location. Looks pretty sharp compared
to the ugly cabinet in the foreground. It won't be long and the cabinet will be
looking just as good.
The bag house is all done and in its final location. Looks pretty sharp compared
to the ugly cabinet in the foreground. It won't be long and the cabinet will be
looking just as good.
 To make the large cabinet easier to move around, a large dolly was made to fit
the base. Here all the welding repairs have been completed and the welds ground
flush. There were several large holes filled by welding in 16 ga steel, closing holes
made by previous accessories. In it's former life it was set up in a
semi-automatic blasting configuration, blasting meter casings. I removed all
these parts when I bought the blaster about 10 years ago.
To make the large cabinet easier to move around, a large dolly was made to fit
the base. Here all the welding repairs have been completed and the welds ground
flush. There were several large holes filled by welding in 16 ga steel, closing holes
made by previous accessories. In it's former life it was set up in a
semi-automatic blasting configuration, blasting meter casings. I removed all
these parts when I bought the blaster about 10 years ago.
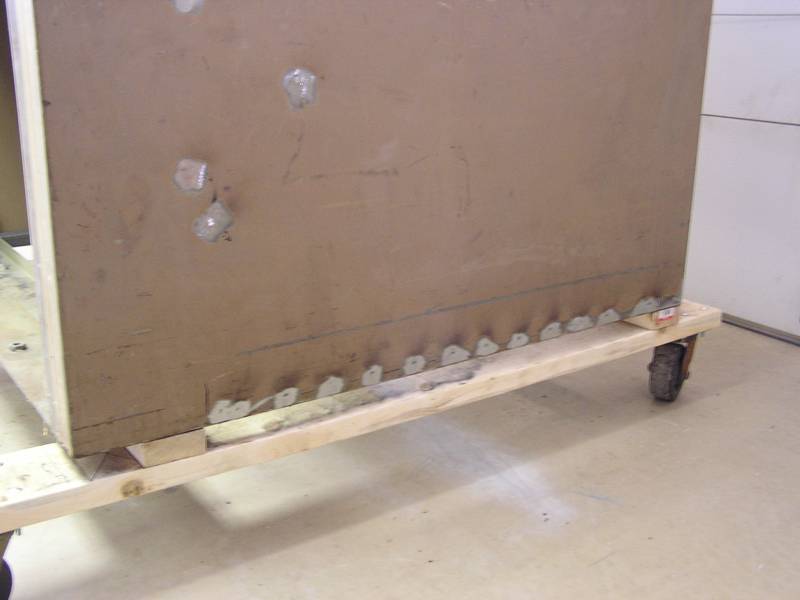 The sides at the bottom were bent in by the former owner due to careless use of
a folk lift to load the cabinet. I drilled holes about every 3" along the bottom
and plug welded the bottom to pieces of square tubing installed on the inside.
It's all dead straight now and as good as new.
The sides at the bottom were bent in by the former owner due to careless use of
a folk lift to load the cabinet. I drilled holes about every 3" along the bottom
and plug welded the bottom to pieces of square tubing installed on the inside.
It's all dead straight now and as good as new.
Knowing how difficult sanding all the nooks and crannies of this cabinet would be, I decided the best option was to haul the cabinet outdoors and sand blast it. All the paint and surface rust were blasted off, and then immediately primed in SEM self etching primer. Within a couple of hours a heavy coat of PPG primer surfacer was also sprayed on. Now the long task of sanding and re-priming to smooth the surfaces began. A little body filler was used to fill in the inevitable dings that occurred over its life since leaving the Empire factory.
 The outside is starting to look pretty good with a couple of coats of primer
surfacer and some sanding sessions.
The outside is starting to look pretty good with a couple of coats of primer
surfacer and some sanding sessions.
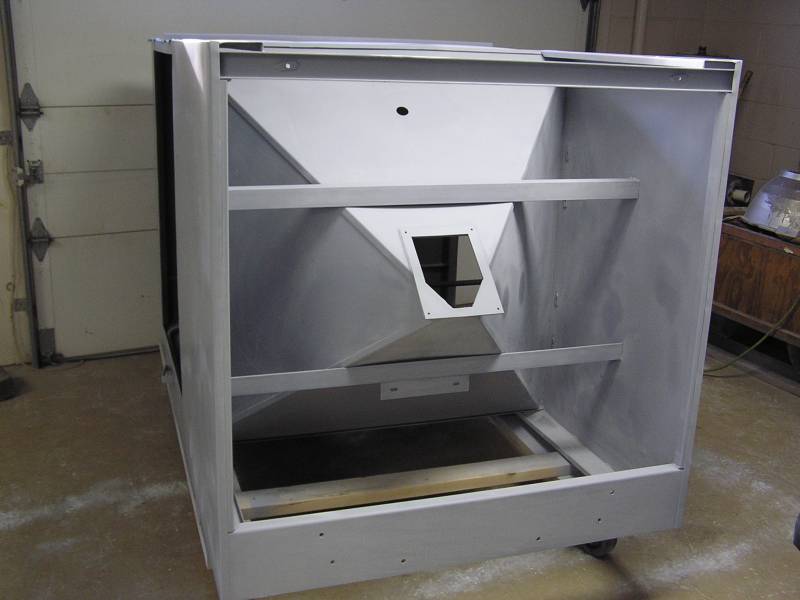 Even the underside bin area got a couple coats of primer and two sanding
sessions.
Even the underside bin area got a couple coats of primer and two sanding
sessions.
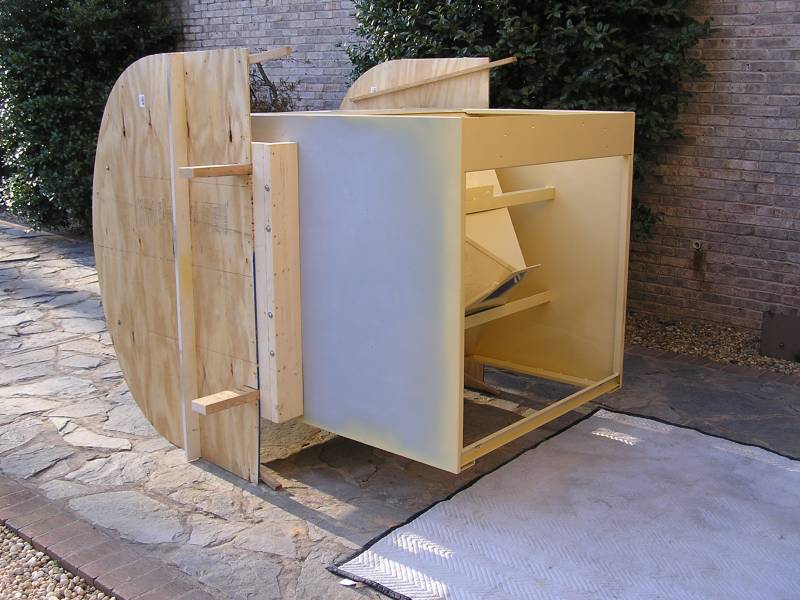 Just like the bag house, I decided the best way to paint the cabinet was to
split it up into two painting sessions. The challenge was to figure out how to
roll this cabinet over, to be able to paint the underside. Rotisserie ends were
made from plywood and bolted onto the sides of the cabinet. This allowed the
cabinet to be positioned upside down, or on either side, allowing good access to
the underneath side for painting.
Just like the bag house, I decided the best way to paint the cabinet was to
split it up into two painting sessions. The challenge was to figure out how to
roll this cabinet over, to be able to paint the underside. Rotisserie ends were
made from plywood and bolted onto the sides of the cabinet. This allowed the
cabinet to be positioned upside down, or on either side, allowing good access to
the underneath side for painting.
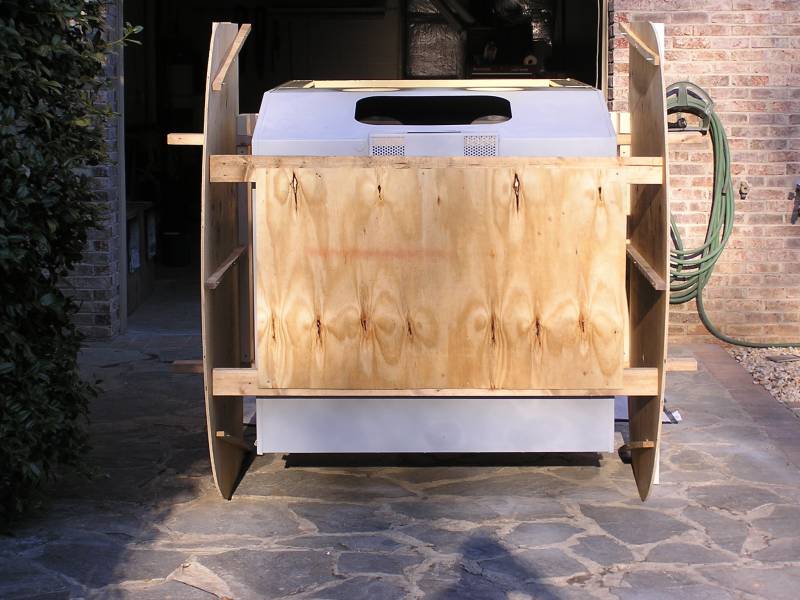 An end view of the rotisserie.
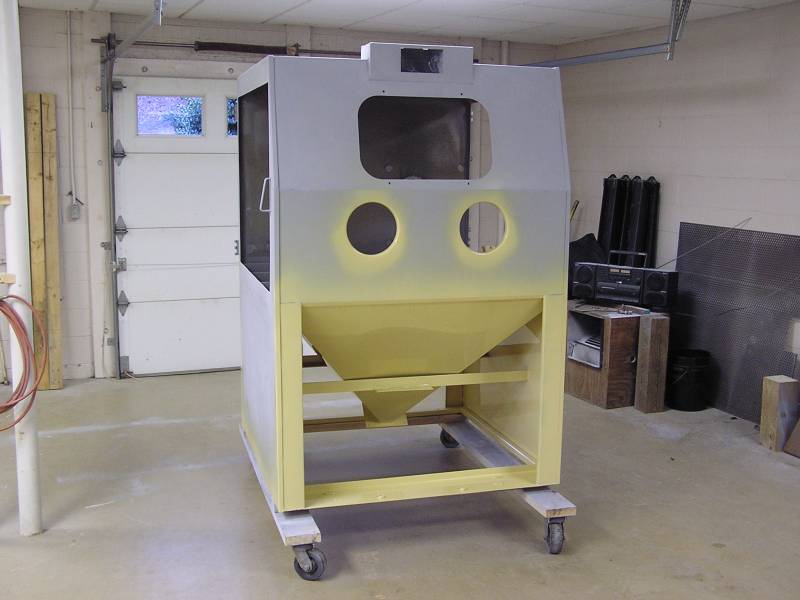
 Cabinet righted and placed on dolly, for easy movement about the shop.
 Rotisserie removed and now the rest of the cabinet is ready to paint. Very
pleased with how the paint turned out underneath.
Rotisserie removed and now the rest of the cabinet is ready to paint. Very
pleased with how the paint turned out underneath.
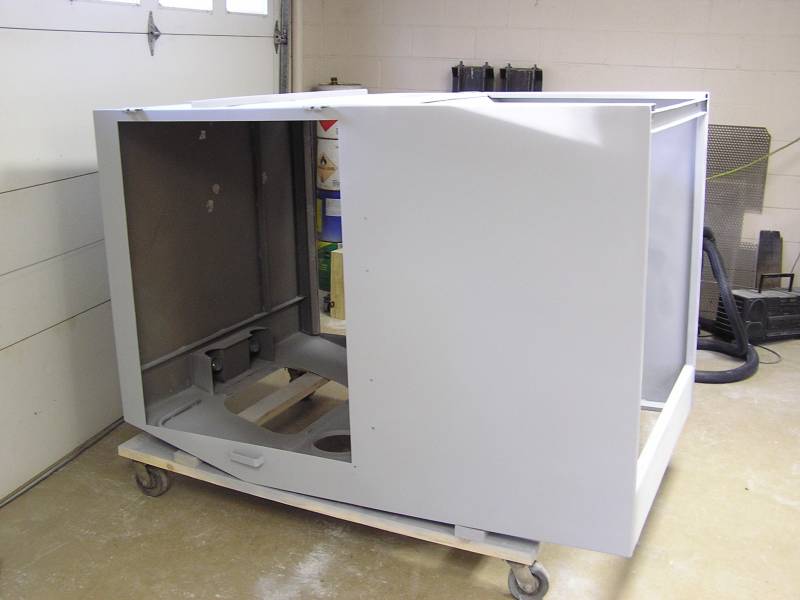
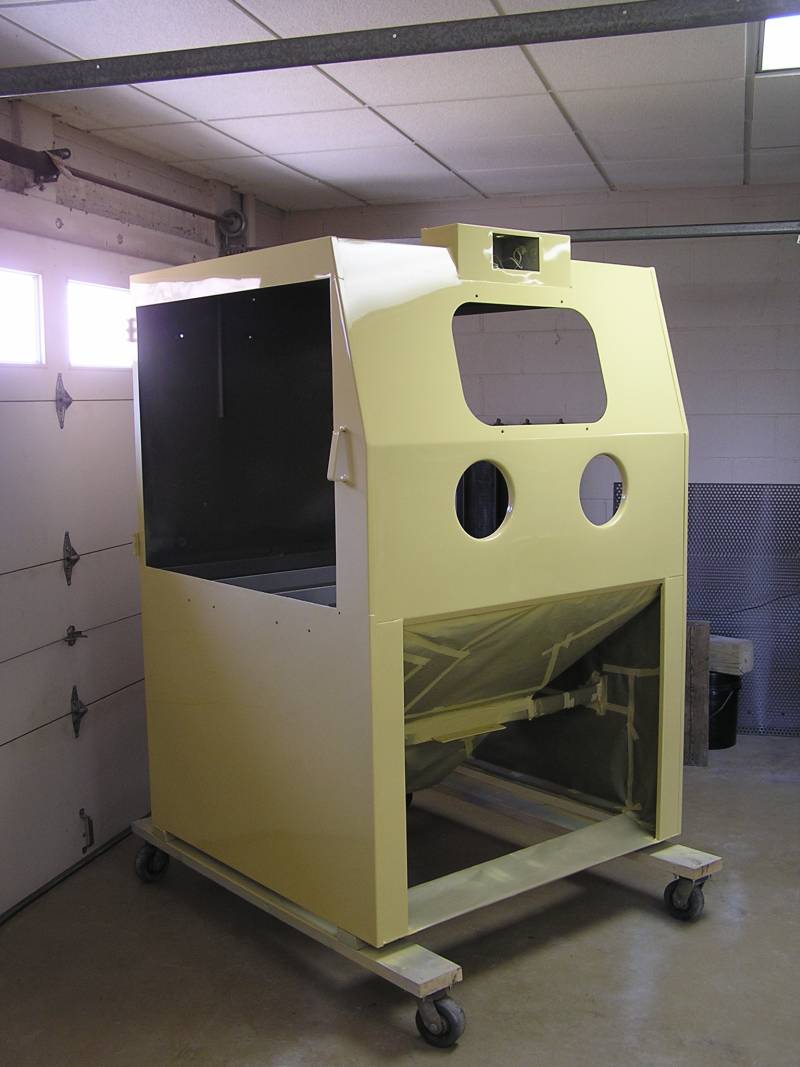 The rest of the cabinet was painted early Saturday morning 3/12/11. Pleased with
the outcome.
The rest of the cabinet was painted early Saturday morning 3/12/11. Pleased with
the outcome.
 The lower half all un-papered, un-taped, and rolled over close to where it will live when put back together.
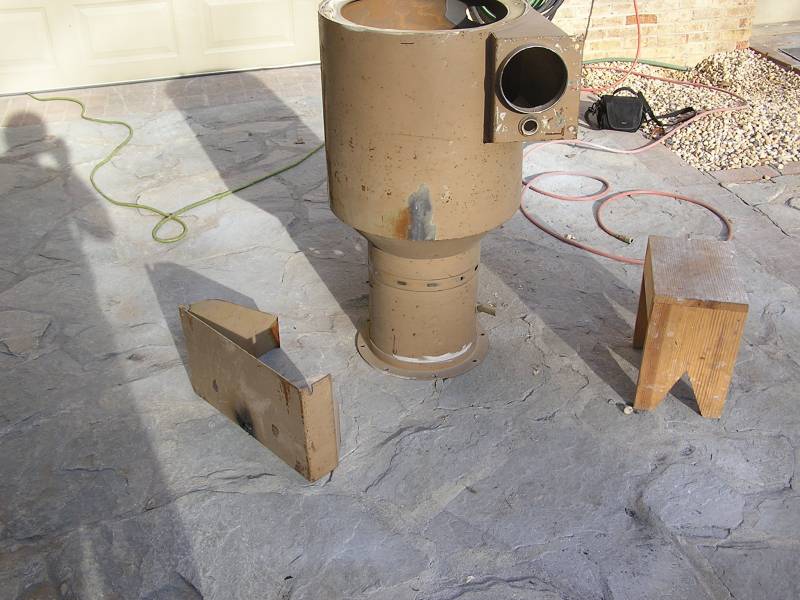 The cyclone sits atop the accumulation tank and spins the air & aluminum oxide
mixture coming out of the cabinet. Since the pressure pot and accumulation tank
have each been shortened 12" to fit in the new shop, the bracket that holds this to
the blast cabinet will no longer work, so it has been cut off and the welds
ground flush.
The cyclone sits atop the accumulation tank and spins the air & aluminum oxide
mixture coming out of the cabinet. Since the pressure pot and accumulation tank
have each been shortened 12" to fit in the new shop, the bracket that holds this to
the blast cabinet will no longer work, so it has been cut off and the welds
ground flush.
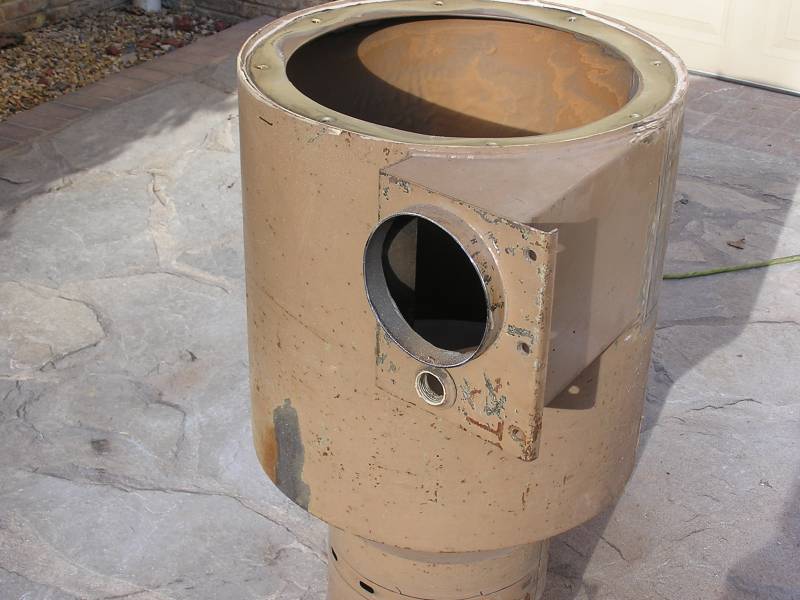 Aluminum oxide is quite abrasive and years of use have left the incoming tube
razor thin at the leading edge. 5" of that inlet have been removed, getting back
to a decent thickness.
Aluminum oxide is quite abrasive and years of use have left the incoming tube
razor thin at the leading edge. 5" of that inlet have been removed, getting back
to a decent thickness.
 Where the abrasive hits the cyclone wall, it wore thru the protective rubber
coating inside, and then wore completely thru the metal side of the cyclone.
Where the abrasive hits the cyclone wall, it wore thru the protective rubber
coating inside, and then wore completely thru the metal side of the cyclone.
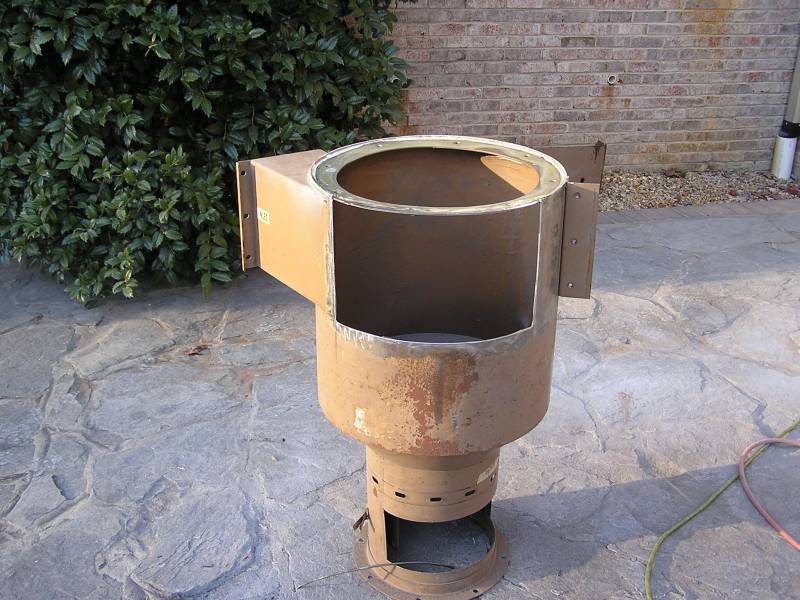 The worn area has been removed. Enough was removed to assure no thinned material
remained.
The worn area has been removed. Enough was removed to assure no thinned material
remained.
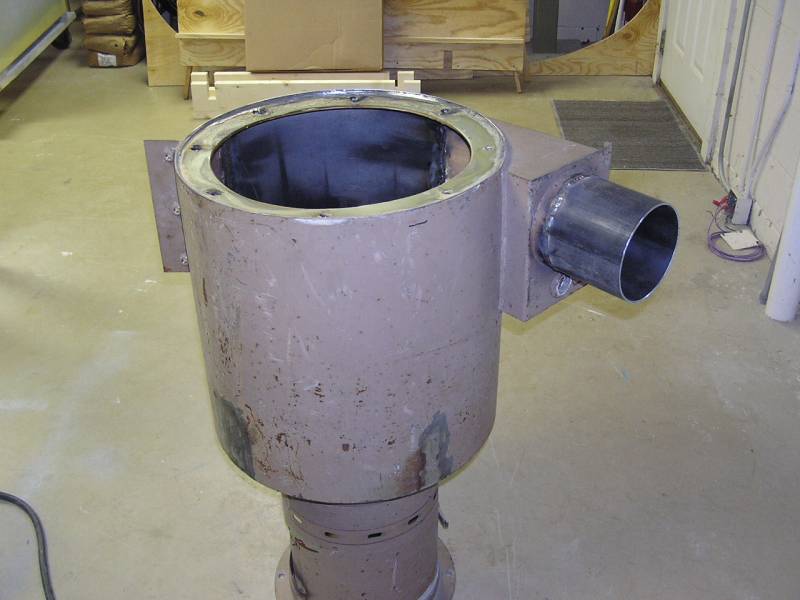
 A replacement piece was rolled and welded in 100%.
Good as new!
A replacement piece was rolled and welded in 100%.
Good as new!
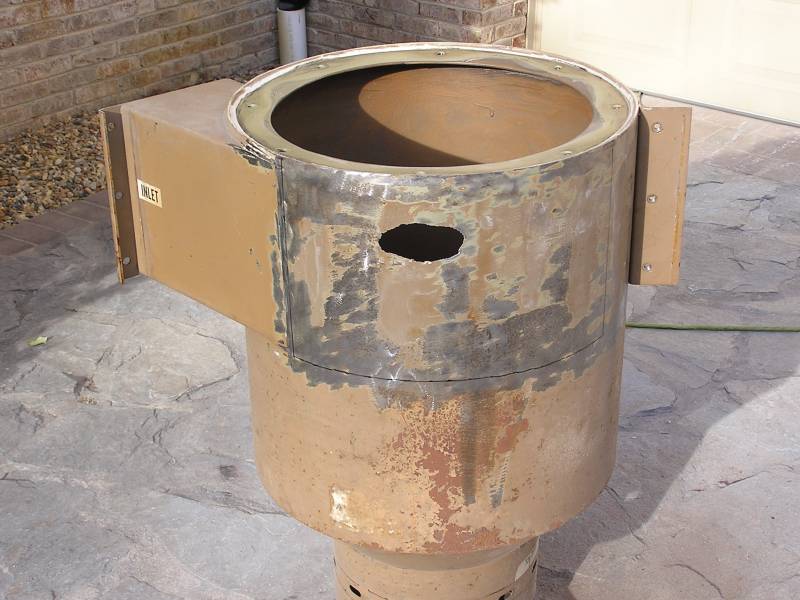
 The 6" diameter inlet tube was also sectioned in. An
additional piece was added to the upper half of the inlet tube to act as wear
material for longer life. Hopefully I'll never have to do this again in my
lifetime.
The 6" diameter inlet tube was also sectioned in. An
additional piece was added to the upper half of the inlet tube to act as wear
material for longer life. Hopefully I'll never have to do this again in my
lifetime.
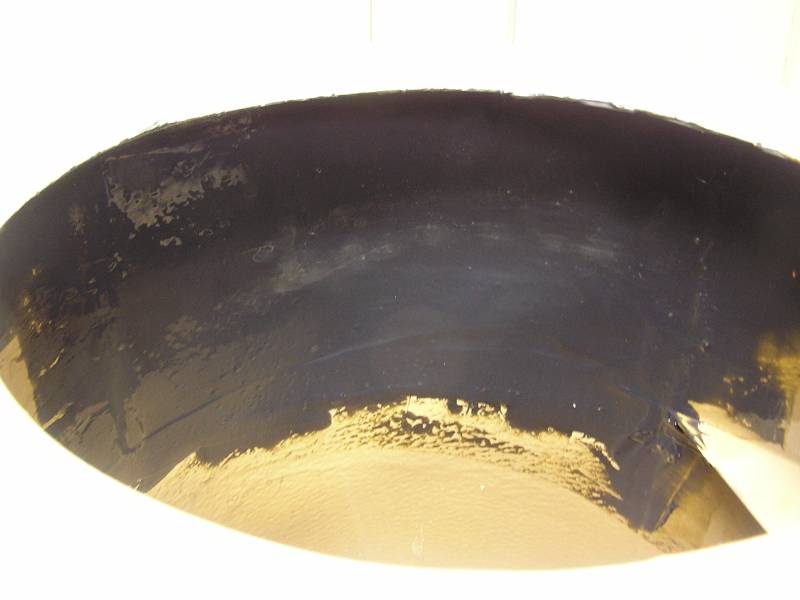 A good bit of research went into locating a material to re-line the repaired
section of the cyclone. An 85 durometer urethane rubber was the original spec
and I wanted to duplicate this. Most urethane is very liquid and would have
required building a special form to create a partial coating. I finally
discovered a 2 part urethane putty to try. Bought two 1 pound containers. This
was mixed and spread in place with a plastic Bondo spreader. True to the
urethane manufacturer's word, it is a non-sagging product and it stayed in place
where I applied it. It was set in about an hour and in another few days will be
full cured. Only run time will prove if it is as abrasion resistant as they
claim. Lets hope so.
A good bit of research went into locating a material to re-line the repaired
section of the cyclone. An 85 durometer urethane rubber was the original spec
and I wanted to duplicate this. Most urethane is very liquid and would have
required building a special form to create a partial coating. I finally
discovered a 2 part urethane putty to try. Bought two 1 pound containers. This
was mixed and spread in place with a plastic Bondo spreader. True to the
urethane manufacturer's word, it is a non-sagging product and it stayed in place
where I applied it. It was set in about an hour and in another few days will be
full cured. Only run time will prove if it is as abrasion resistant as they
claim. Lets hope so.
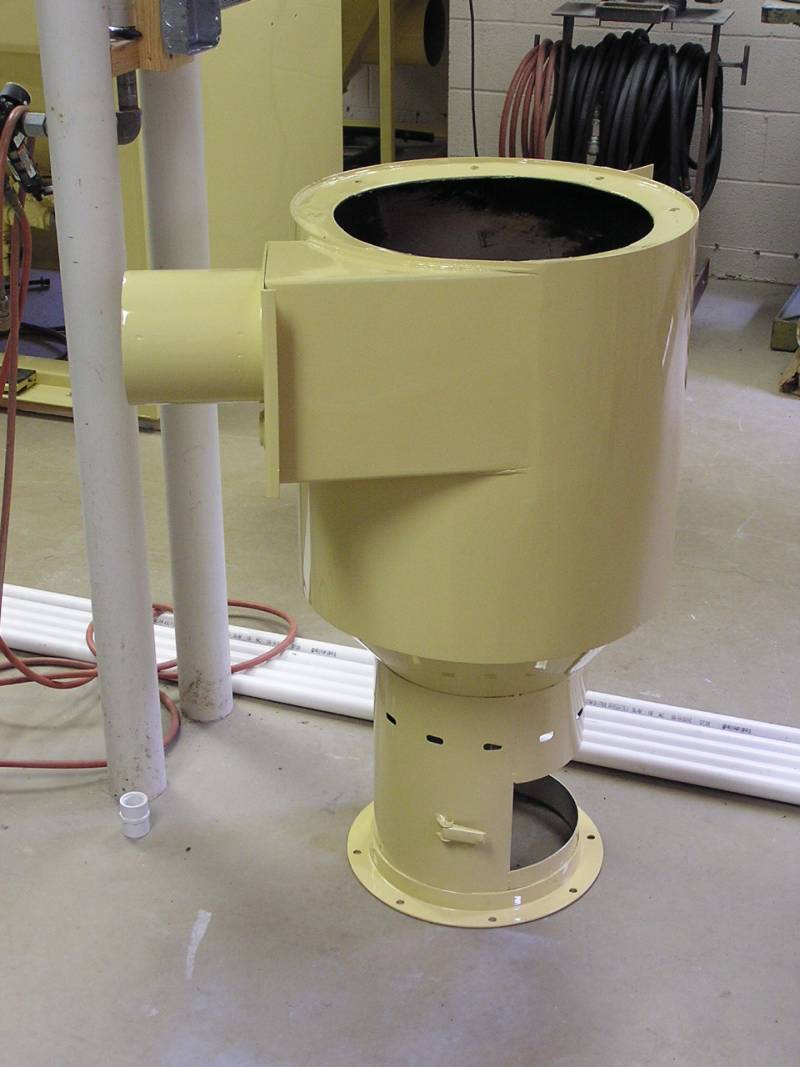
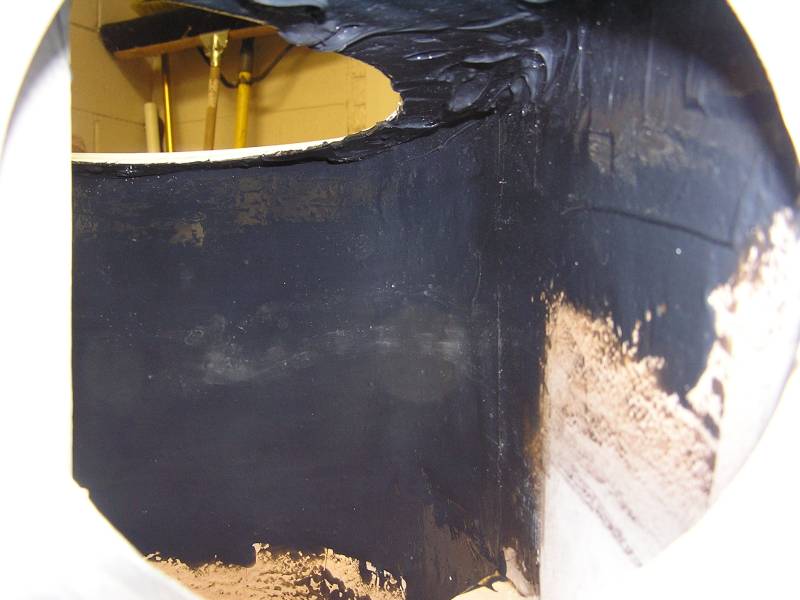 A view of the inside and top of the cyclone showing a heavy coating under the
top edge, and all around the perimeter where the metal was replaced.
A view of the inside and top of the cyclone showing a heavy coating under the
top edge, and all around the perimeter where the metal was replaced.
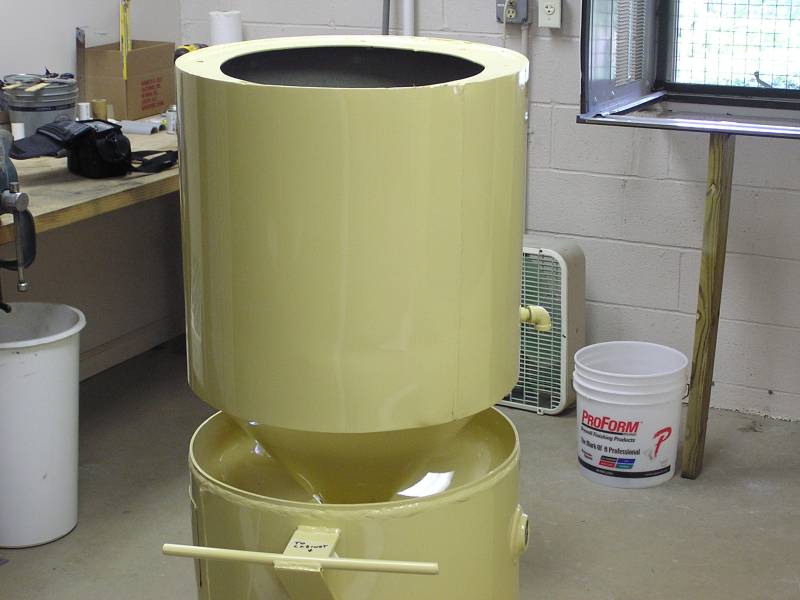
 All painted and ready for installation.
 The accumulation chamber on top of the pressure pot also had to be modified to
fit in the shorter shop. 12" section was removed from the shell and the
two sections welded back together and the welds ground flush. The weld line is
about 3" from the bottom. BTW no body filler was used. Only primer surfacer,
sanding, and then the color coat. Pleased with how it turned out.
The accumulation chamber on top of the pressure pot also had to be modified to
fit in the shorter shop. 12" section was removed from the shell and the
two sections welded back together and the welds ground flush. The weld line is
about 3" from the bottom. BTW no body filler was used. Only primer surfacer,
sanding, and then the color coat. Pleased with how it turned out.
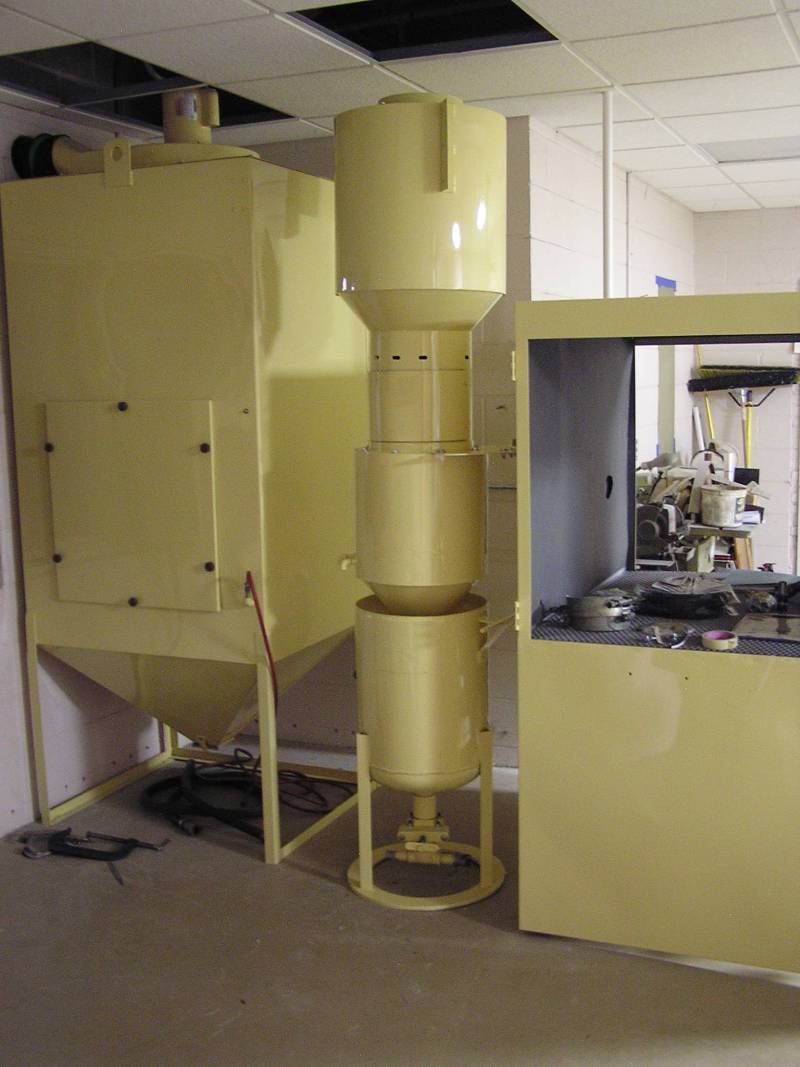
 Meanwhile the blast cabinet has been taken off the rolling dolly and placed on
the floor in it's proper location. Behind the cabinet the pressure tank,
accumulation tank, and newly repaired cyclone have been temporarily assembled to
check fit and to make a bracket that will hold the stack firm against the back
of the cabinet.
Meanwhile the blast cabinet has been taken off the rolling dolly and placed on
the floor in it's proper location. Behind the cabinet the pressure tank,
accumulation tank, and newly repaired cyclone have been temporarily assembled to
check fit and to make a bracket that will hold the stack firm against the back
of the cabinet.
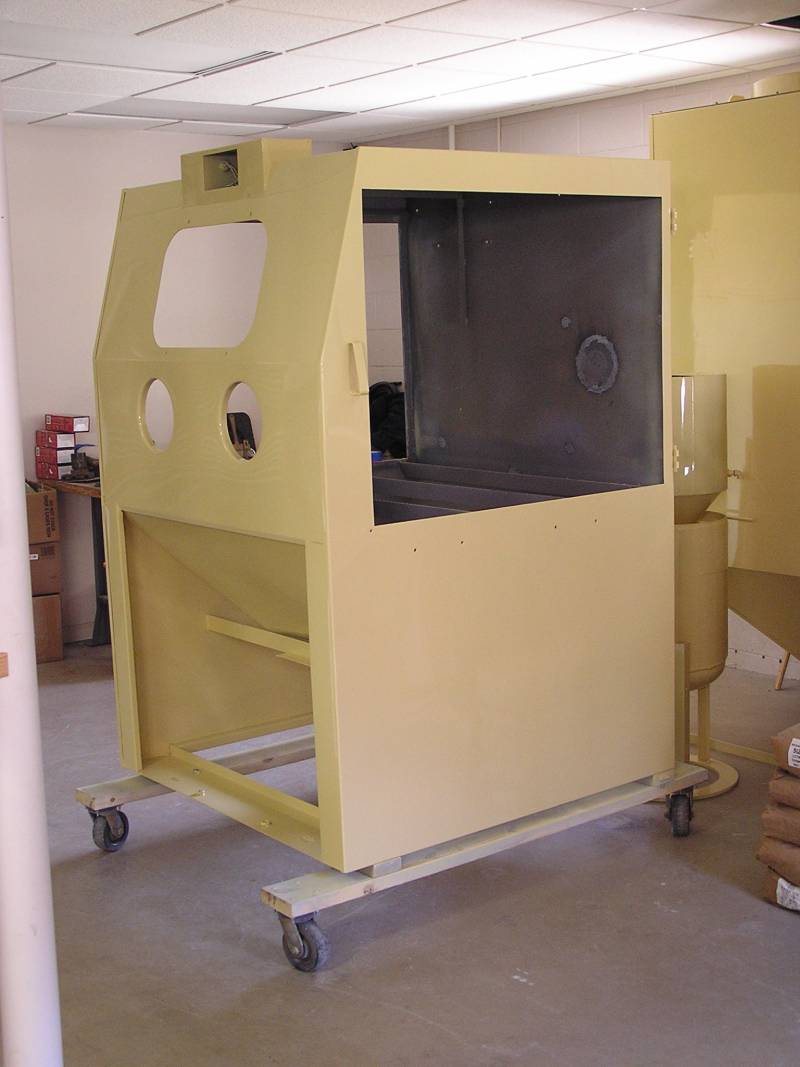
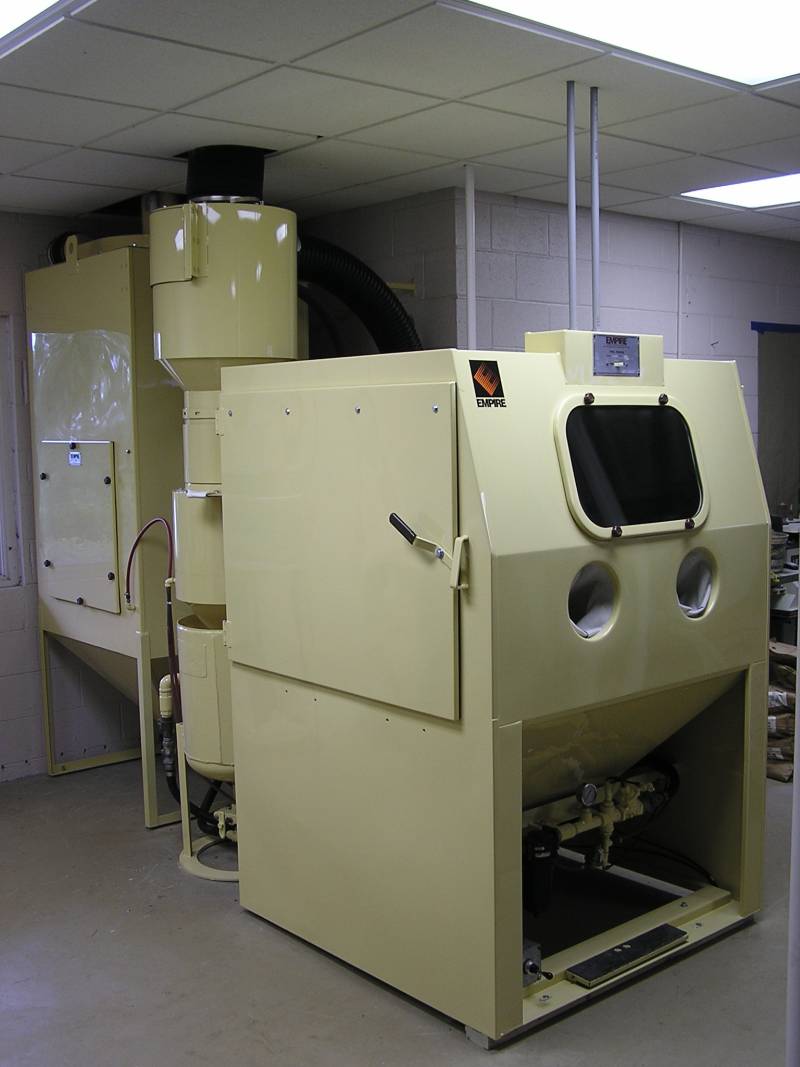
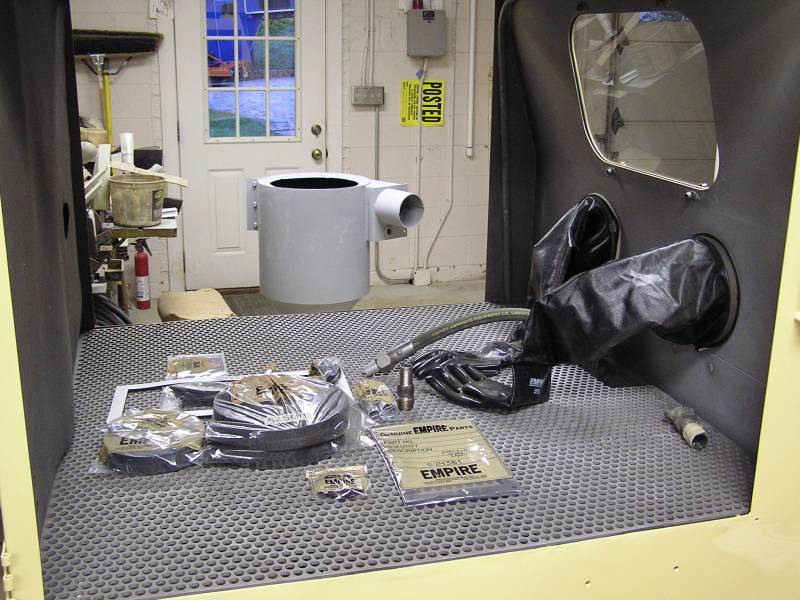 Assembly work on the cabinet has begun with new gloves and glass. The blast hose
was routed thru the back of the hopper, the floor grate has been installed, and
the rubber sheet on the back installed. It's starting to look like a blast
cabinet.
Assembly work on the cabinet has begun with new gloves and glass. The blast hose
was routed thru the back of the hopper, the floor grate has been installed, and
the rubber sheet on the back installed. It's starting to look like a blast
cabinet.
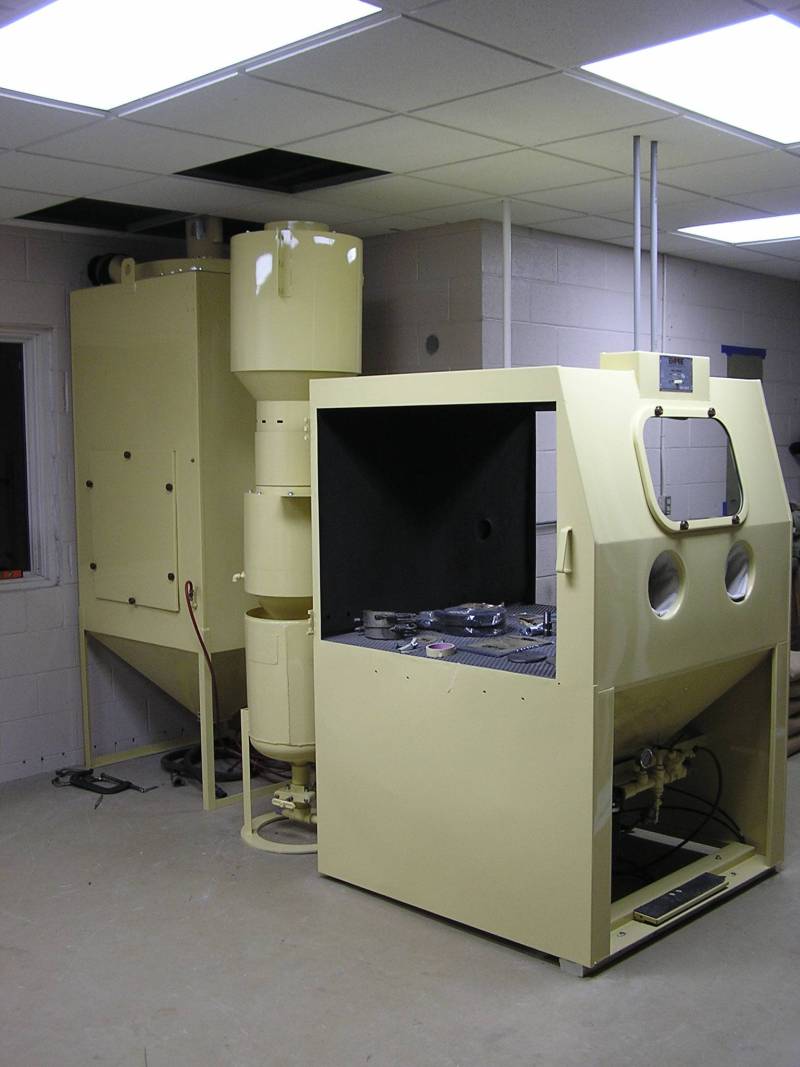 The pressure pot, accumulation chamber, cyclone, and cyclone topper were
assembled laying down and then stood up and positioned in place between the
cabinet and bag house.
The pressure pot, accumulation chamber, cyclone, and cyclone topper were
assembled laying down and then stood up and positioned in place between the
cabinet and bag house.
 Closer view of the same. A new bracket was designed and fabricated to hold the
vertical assembly to the back of the cabinet securely.
Closer view of the same. A new bracket was designed and fabricated to hold the
vertical assembly to the back of the cabinet securely.
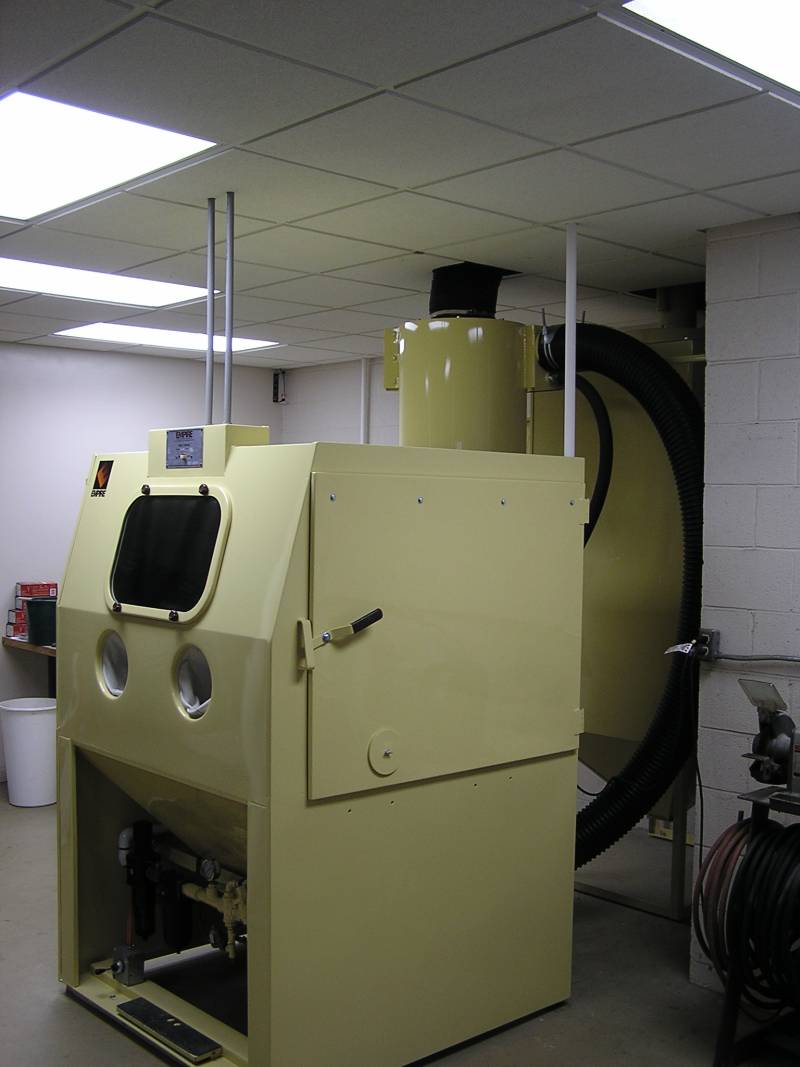
Finally all completed. The last of the hoses have been connected and the exhaust duct work routed. It's good to be back in the blasting business!
8/15/11