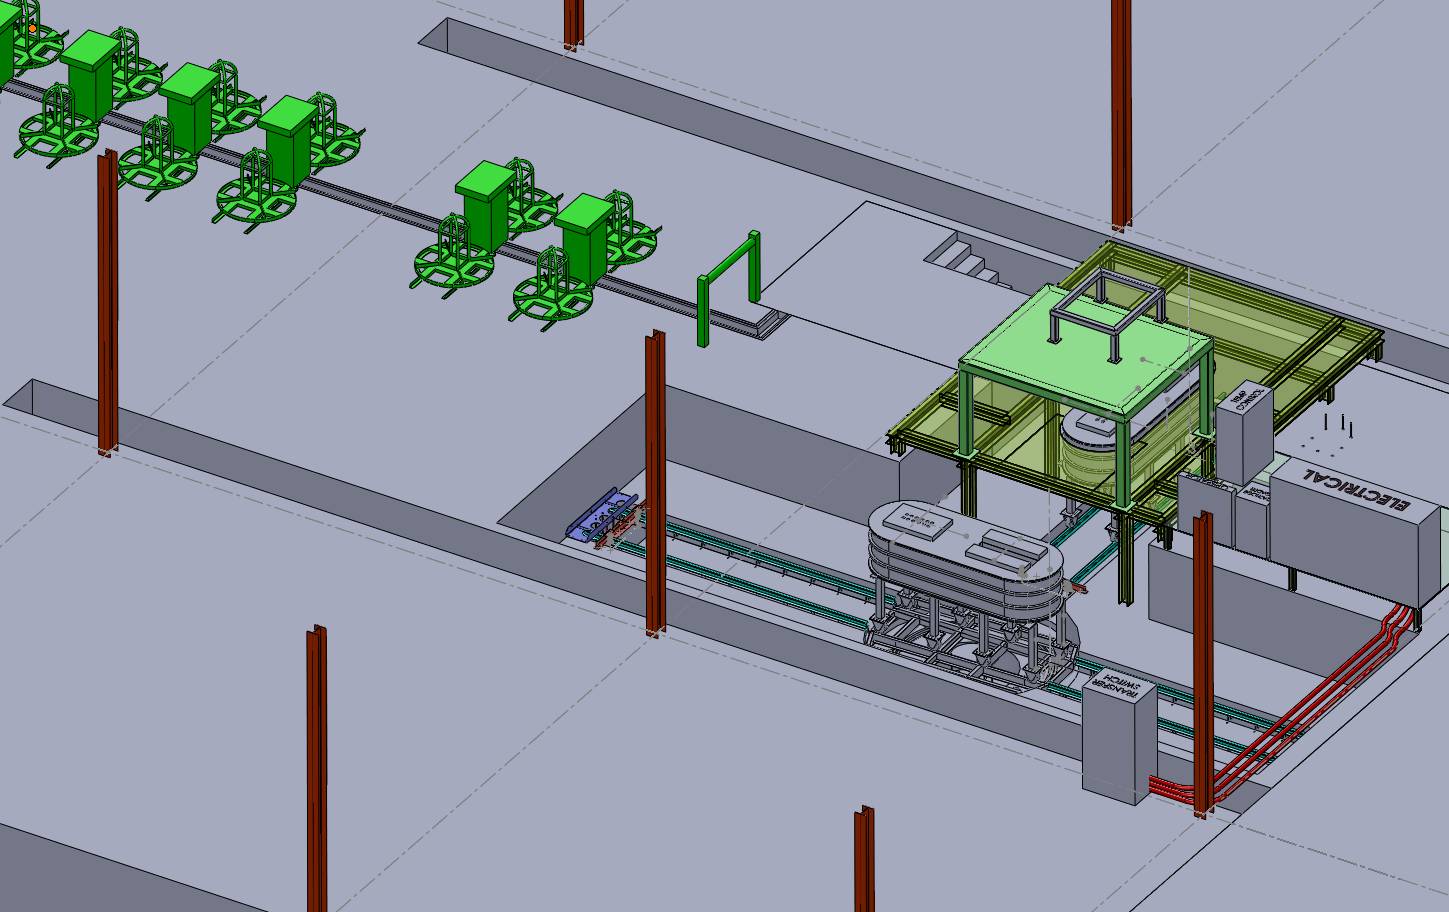
 Isometric 3D SolidWorks layout of installation.
 Most of the month of March was spent preparing 3D foundation layouts and designing the fixtures to construct the foundation. On April 7th demolition work in the Zone II area began with Calvin Huffman sawing and jack hammering the concrete.
Isometric 3D SolidWorks layout of installation.
4/7/11
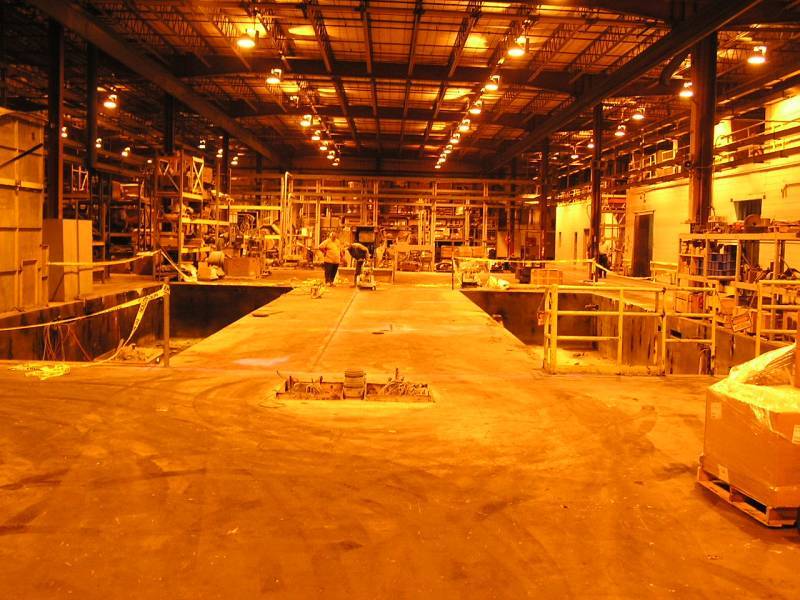 All of the Zone II equipment has been removed and the lines chalked on the floor
for the sawing.
All of the Zone II equipment has been removed and the lines chalked on the floor
for the sawing.
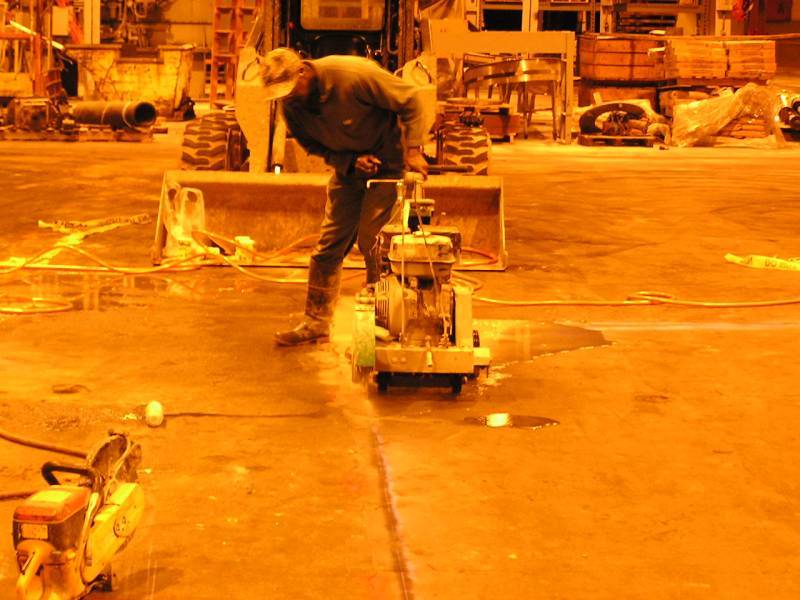 Calvin's man beginning the saw cuts.
4/8/11
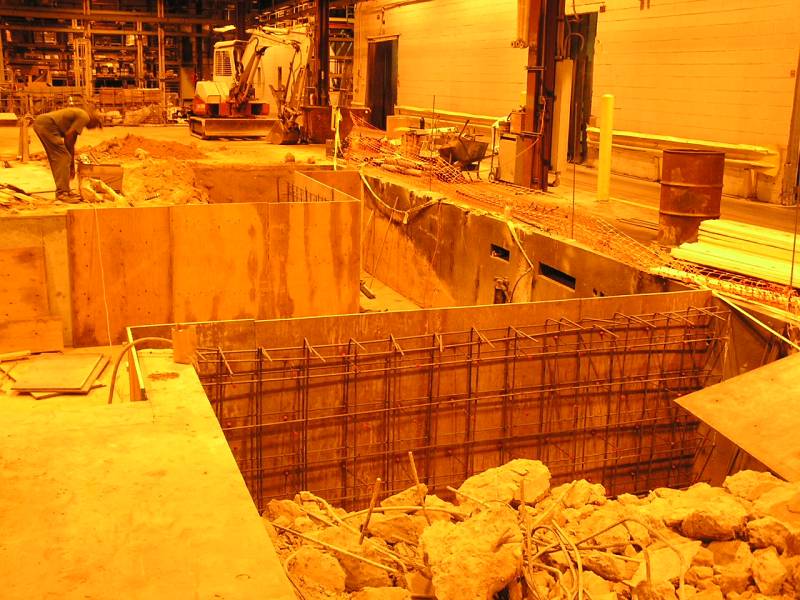
 Calvin beginning the jackhammer work. This entire wall will be removed. New wall
will be constructed about 5' to the north (right).
Calvin beginning the jackhammer work. This entire wall will be removed. New wall
will be constructed about 5' to the north (right).
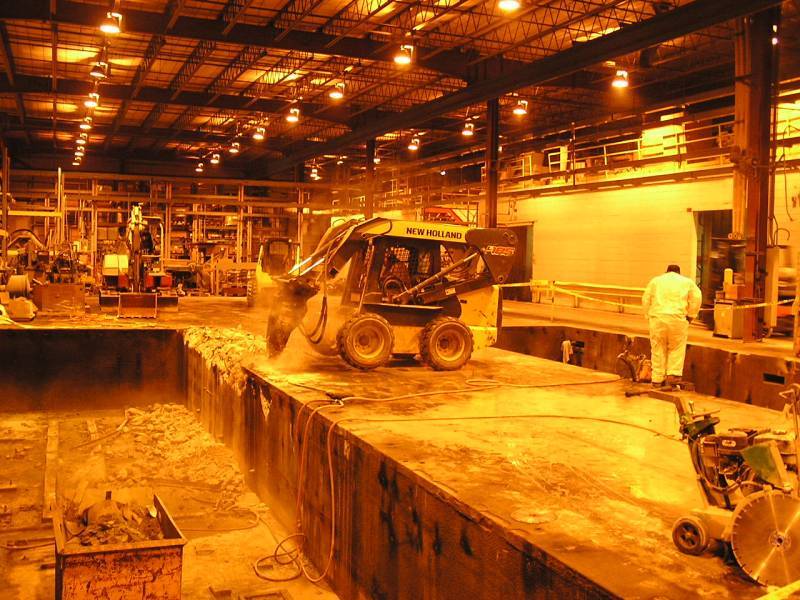
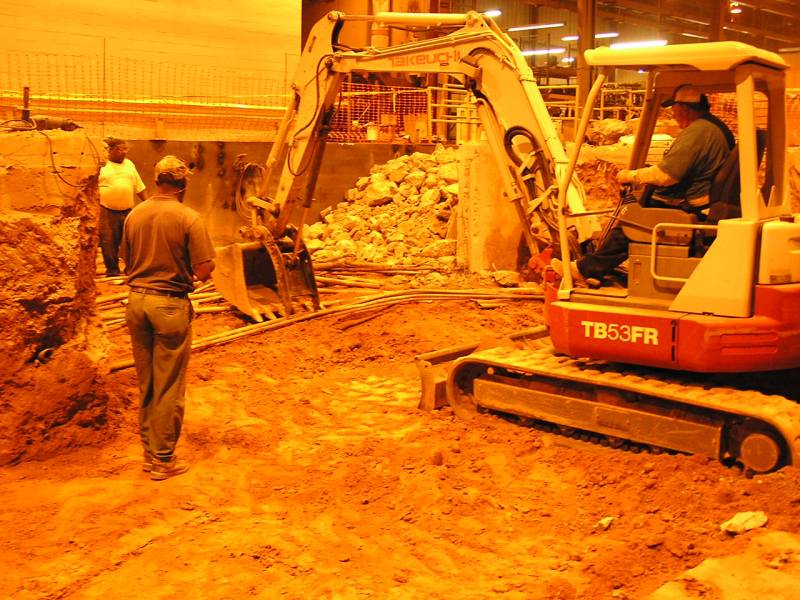
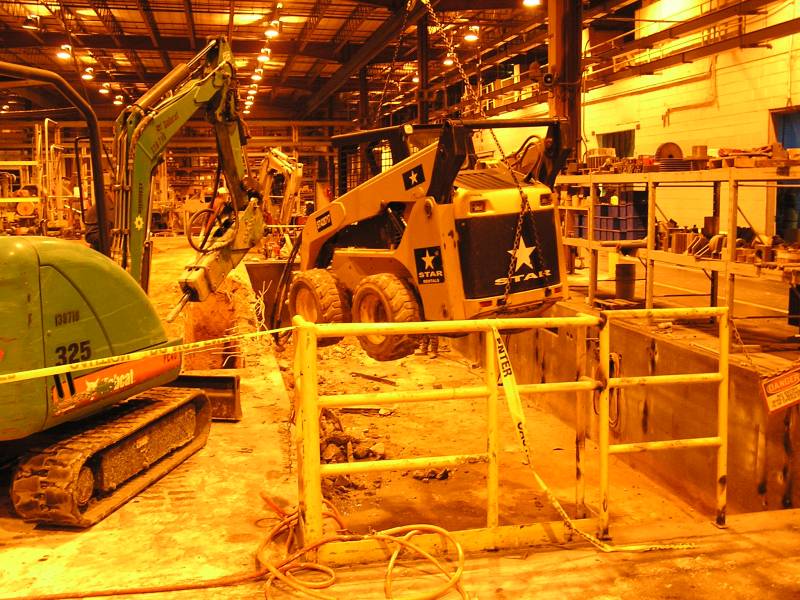 The crane was used to set Calvin's skid steer into the pit to jackhammer.
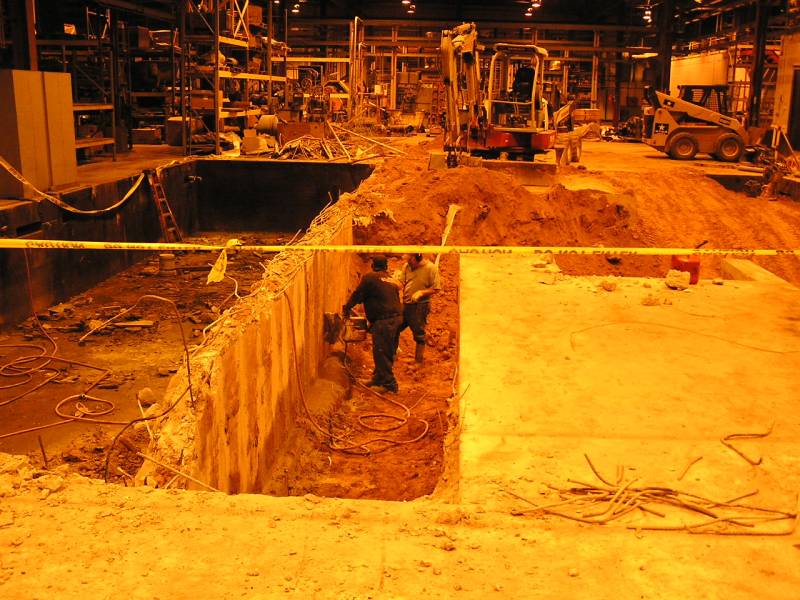
4/11/11
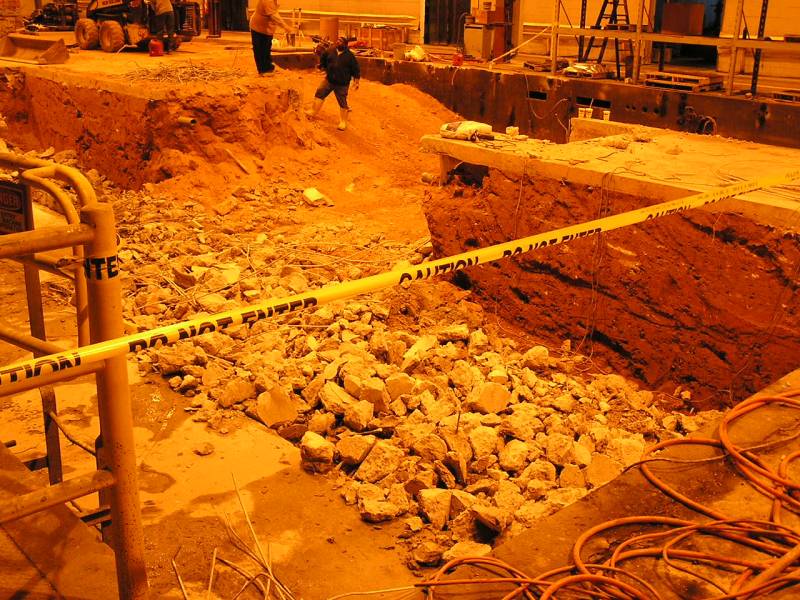
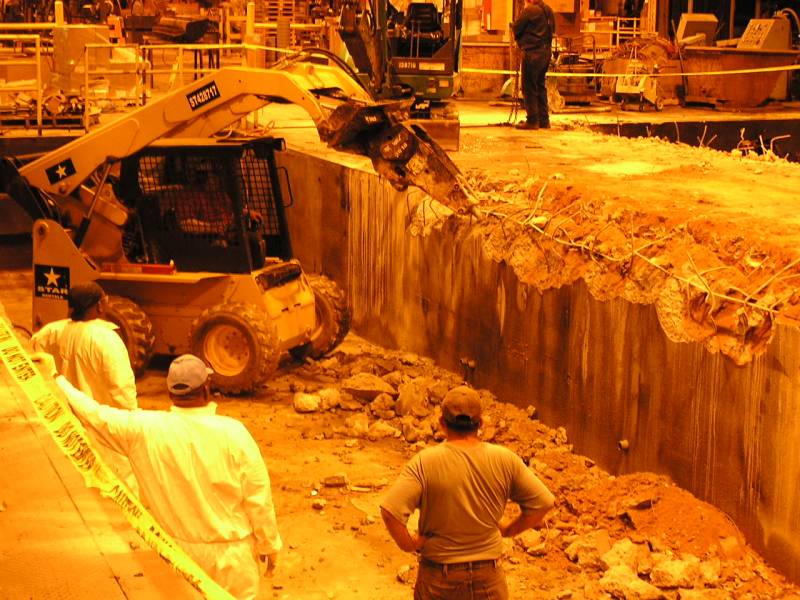 Removal of the south wall of the north pit beginning. Lots of re-bar within is
making it tough going. This was expected.
Removal of the south wall of the north pit beginning. Lots of re-bar within is
making it tough going. This was expected.
 The wall has been removed.
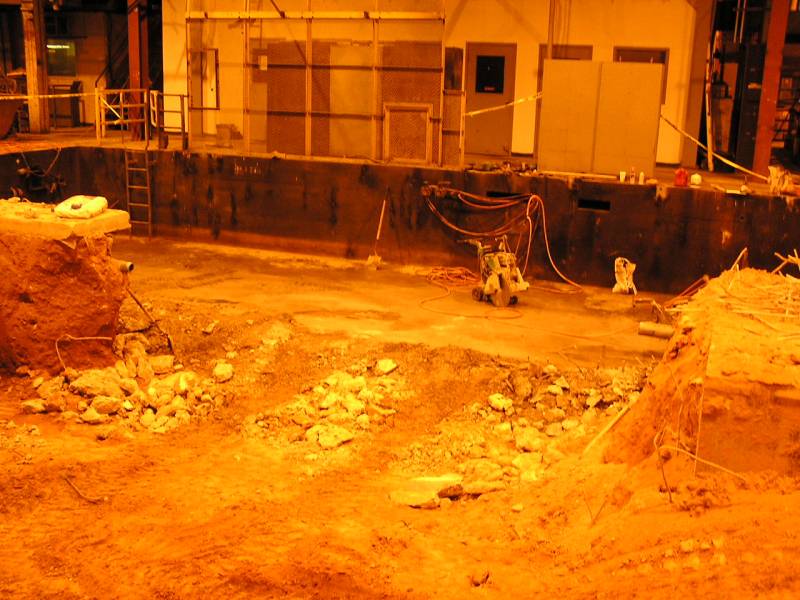
4/12/11
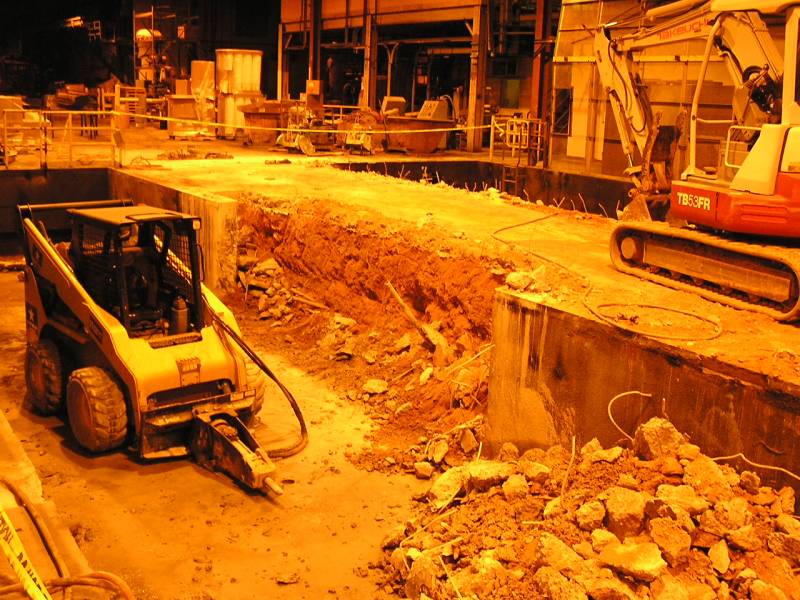
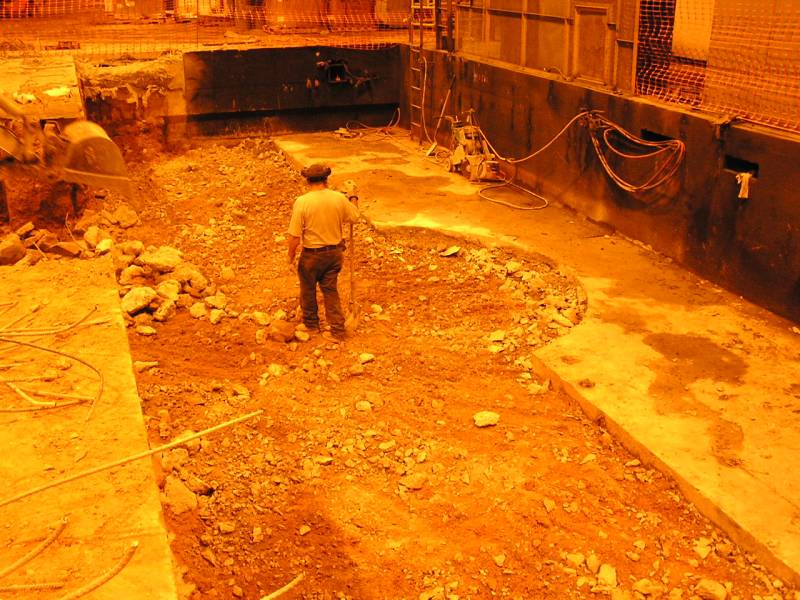
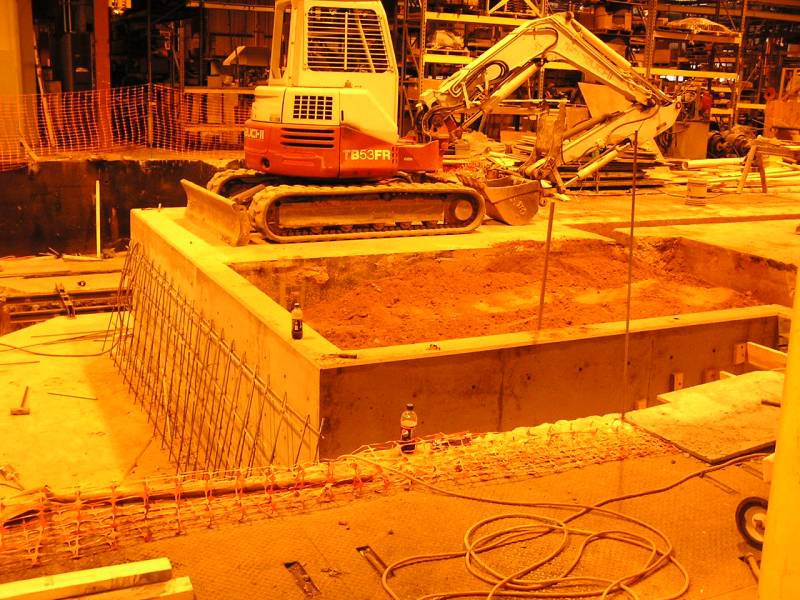
 Dirt has been removed in the portion between the pits. Notice Calvin also
created a temporary ramp so he can drive his equipment down into the pits.
Dirt has been removed in the portion between the pits. Notice Calvin also
created a temporary ramp so he can drive his equipment down into the pits.
 Saw cutting thru the re-bar on the wall in the south pit. This is being done
every 2 feet or so, which will make the jack hammering faster.
Saw cutting thru the re-bar on the wall in the south pit. This is being done
every 2 feet or so, which will make the jack hammering faster.
4/13/11
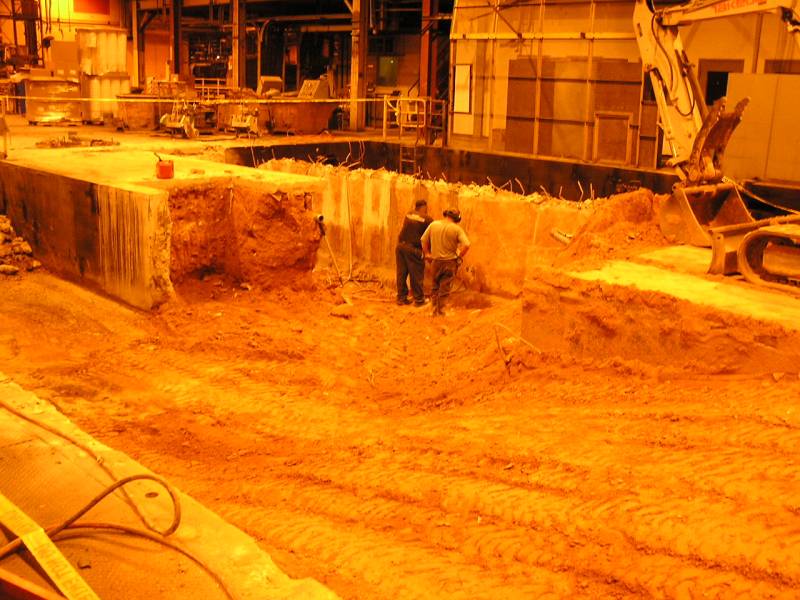
 The entire day was spent jack hammering this wall and sawing the rebar. Now
Calvin can drive between the two pits and jackhammer from the south pit.
The entire day was spent jack hammering this wall and sawing the rebar. Now
Calvin can drive between the two pits and jackhammer from the south pit.
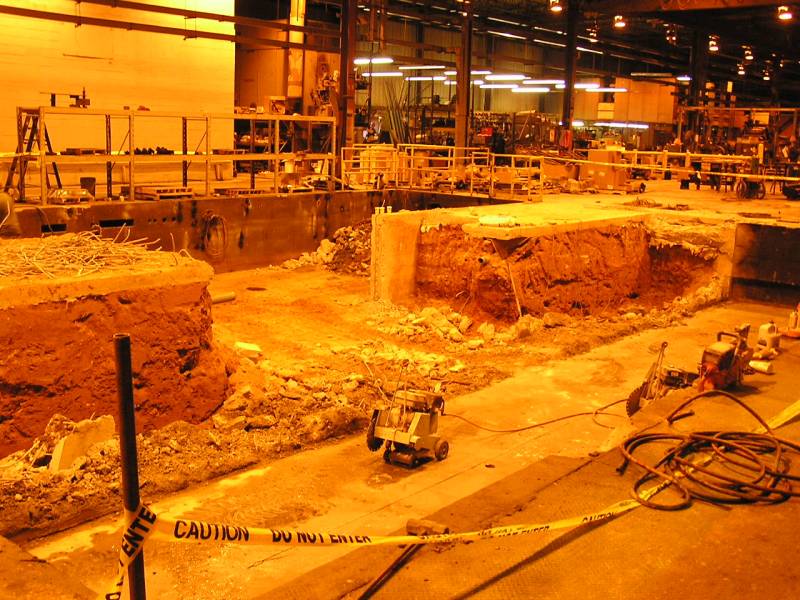 View of the removed north wall of the south pit.
4/14/11
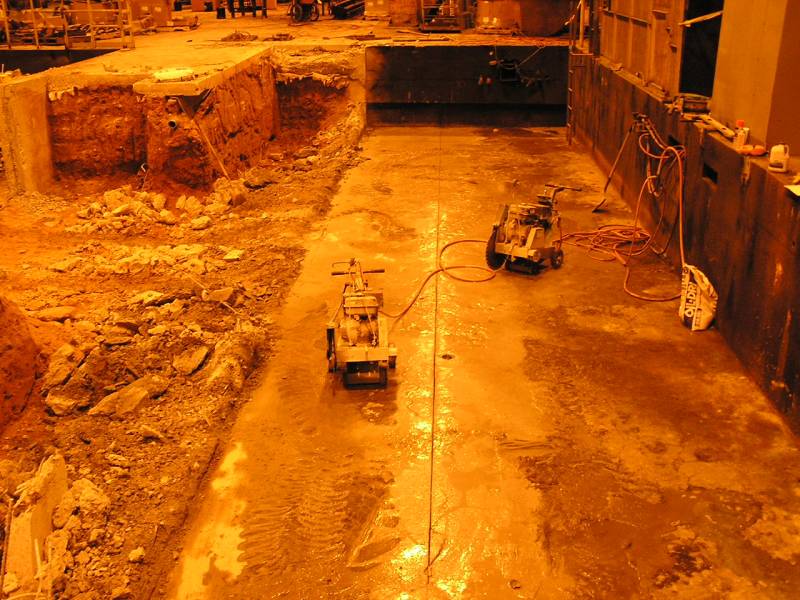 A saw cut the length of the south pit floor has been made. This cut will be the
south edge of the railroad iron's pit. Everything north (left) of the saw cut will
be removed, including what left of the original wall. The 4100mm diameter arc
for the turntable pit has also been marked and will be sawed out in multiple
steps.
A saw cut the length of the south pit floor has been made. This cut will be the
south edge of the railroad iron's pit. Everything north (left) of the saw cut will
be removed, including what left of the original wall. The 4100mm diameter arc
for the turntable pit has also been marked and will be sawed out in multiple
steps.
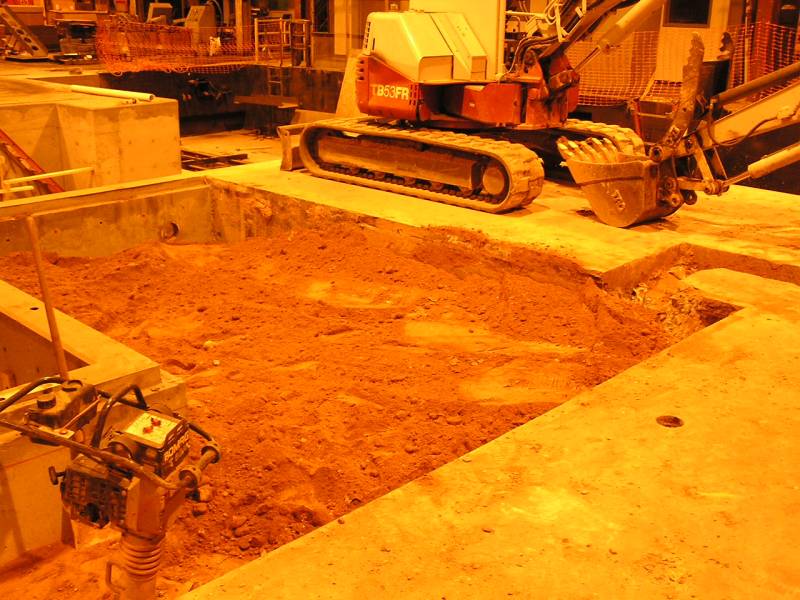
 Material jack hammered and broken up, but not removed.
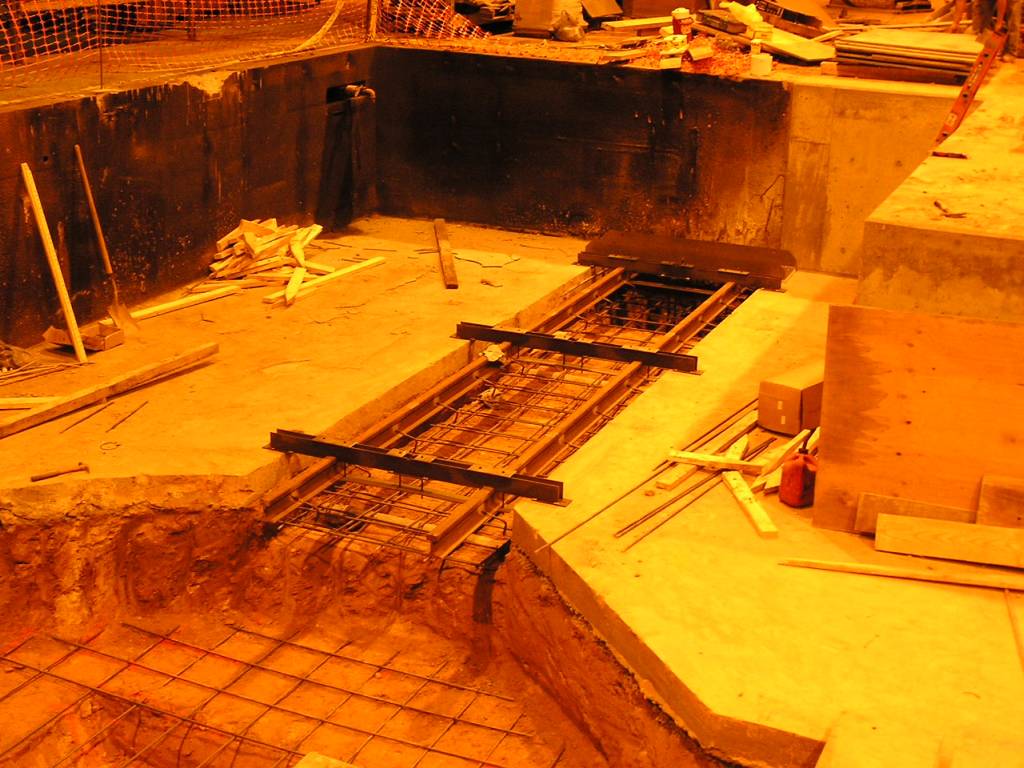
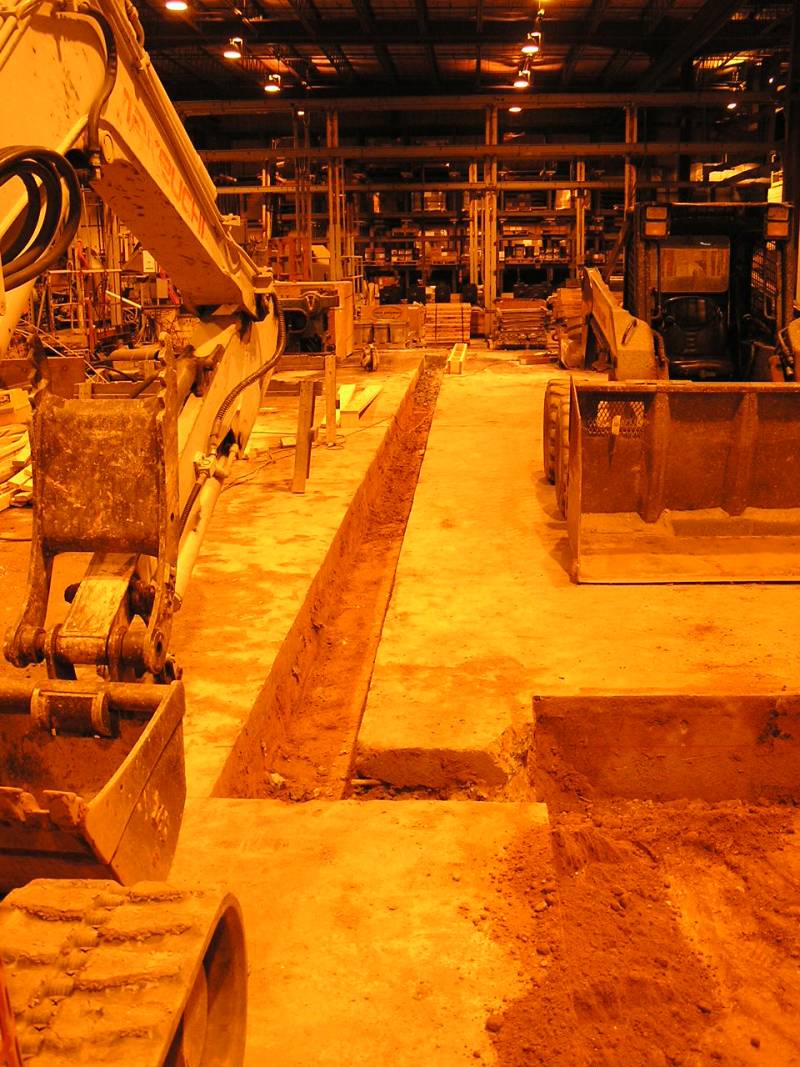
 Sawing for the trench where the north/south rails will be. This is under the
furnace in the casting position.
Sawing for the trench where the north/south rails will be. This is under the
furnace in the casting position.
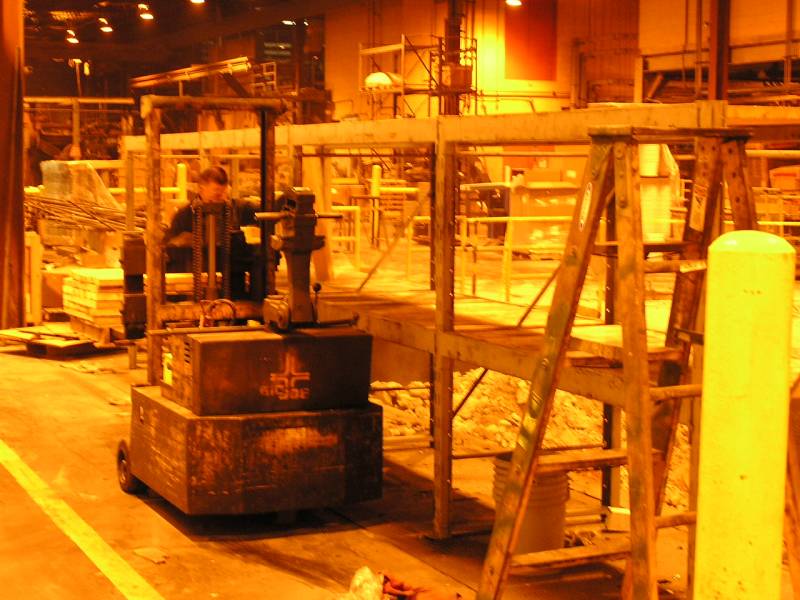 Meanwhile Danny has been moving all the 4" ball header parts from the old racks
and placing them in the new rack in the new storage room for ball header parts.
This rack over the trench is about ready to be taken apart, allowing access to
the trench in preparation for piping work.
Meanwhile Danny has been moving all the 4" ball header parts from the old racks
and placing them in the new rack in the new storage room for ball header parts.
This rack over the trench is about ready to be taken apart, allowing access to
the trench in preparation for piping work.
4/15/11
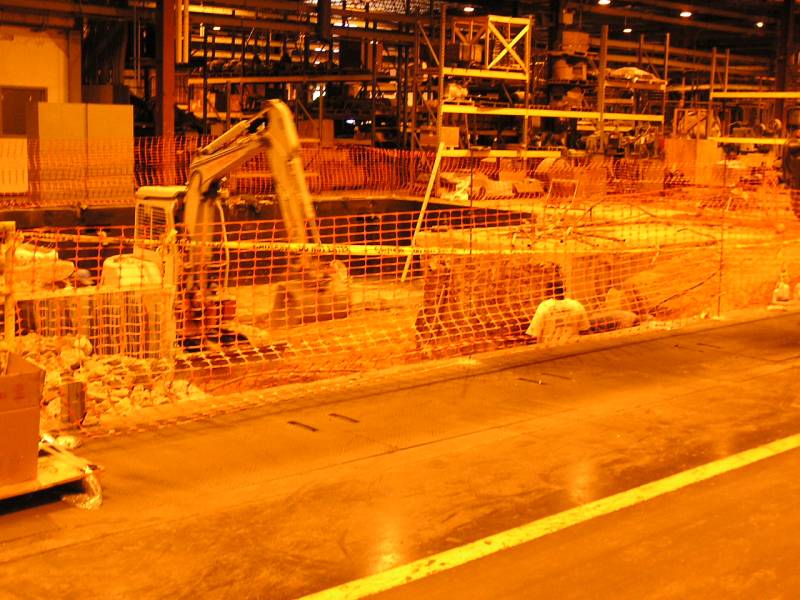
 The south pit almost all demo'd. You can see the beginnings of the turntable pit
cut out of the existing slab.
The south pit almost all demo'd. You can see the beginnings of the turntable pit
cut out of the existing slab.
 There were several deep conduits that needed removal. Calvin is pulling them up
and his guys are sawing them on each end. Randy checked each wire to assure
there was no power on them before sawing.
There were several deep conduits that needed removal. Calvin is pulling them up
and his guys are sawing them on each end. Randy checked each wire to assure
there was no power on them before sawing.
 Danny has moved all the 4" ball header parts and removed all the racks, leaving
a great view of the work from the north side (aisle).
Danny has moved all the 4" ball header parts and removed all the racks, leaving
a great view of the work from the north side (aisle).
4/18/11
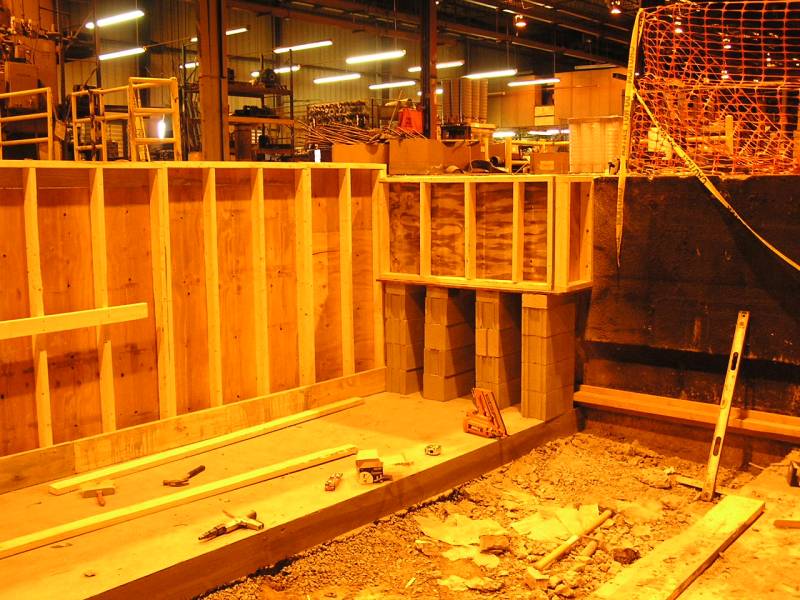
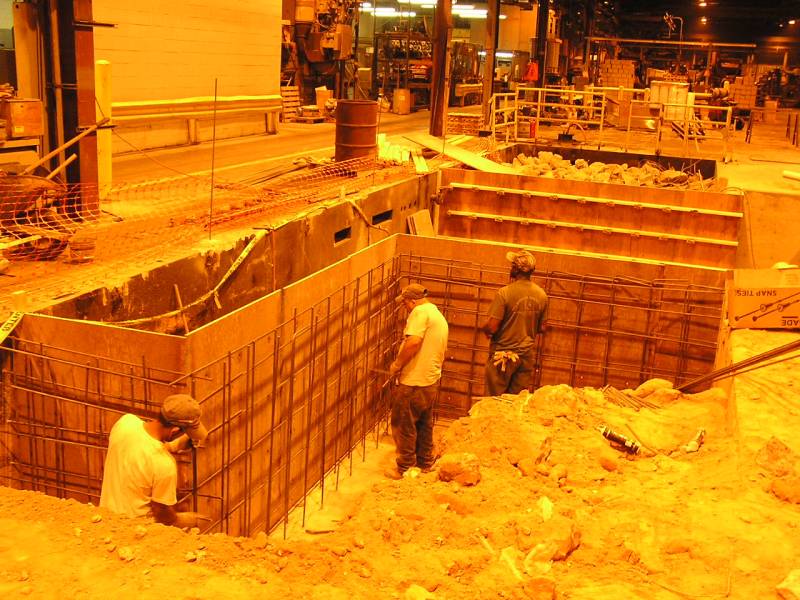
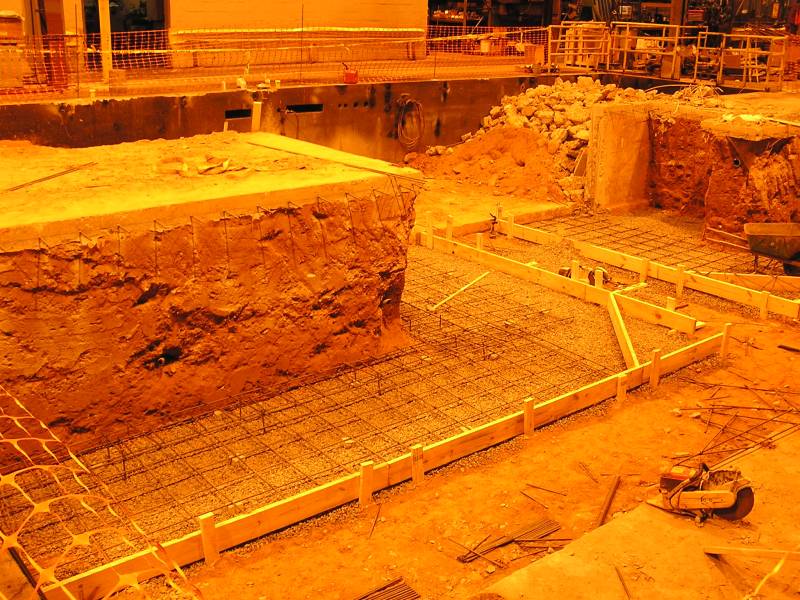 Construction of the forms for a portion of the floor has begun. The 60" wide gap
is where the railroad iron will go later.
Construction of the forms for a portion of the floor has begun. The 60" wide gap
is where the railroad iron will go later.
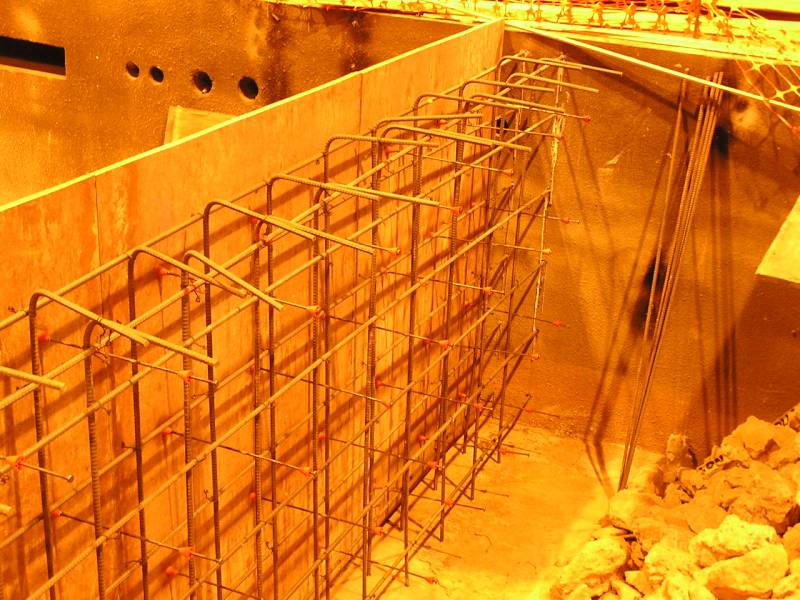
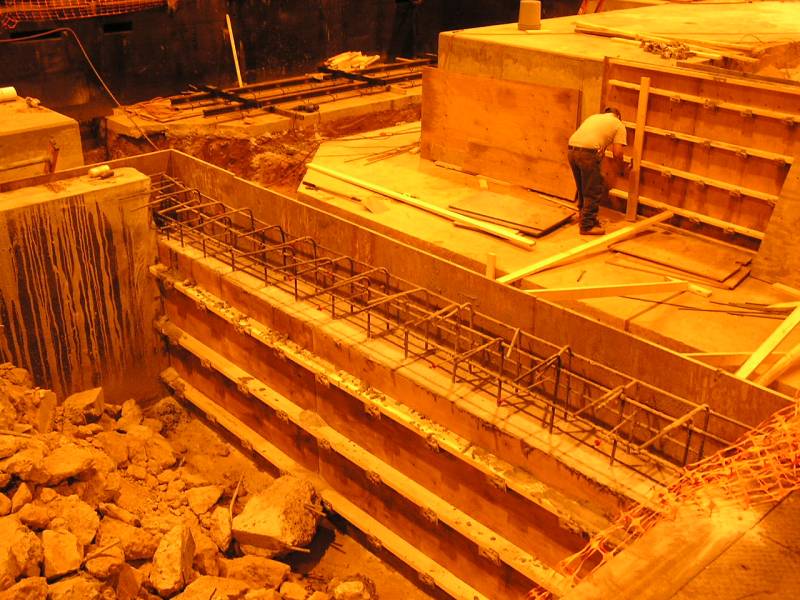
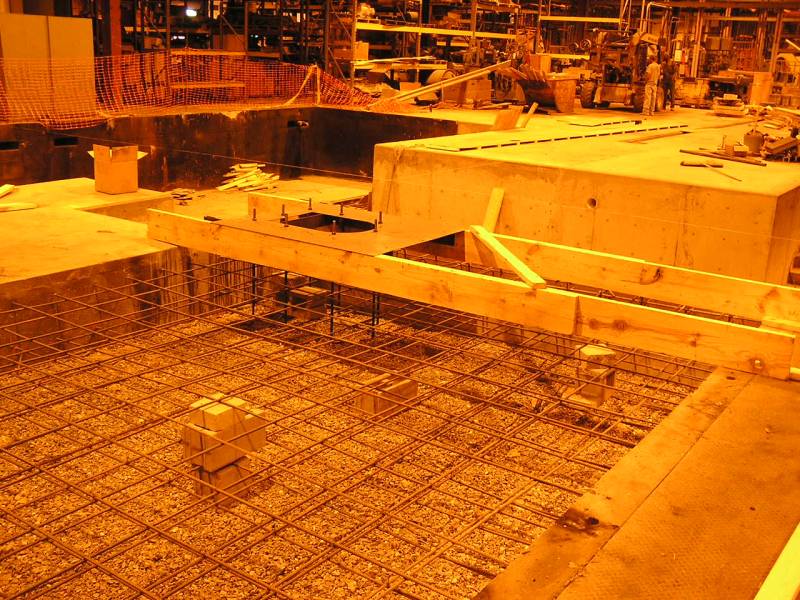
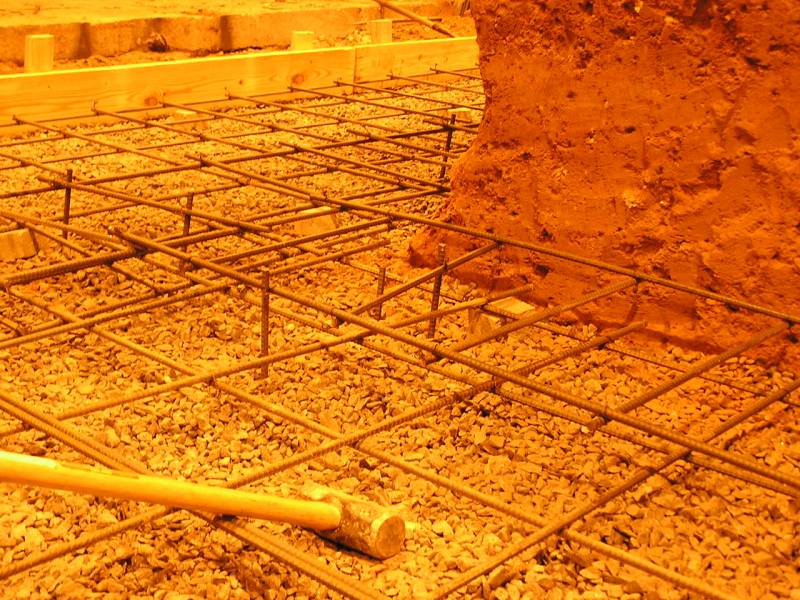 Double layer of re-bar where the wall will be.
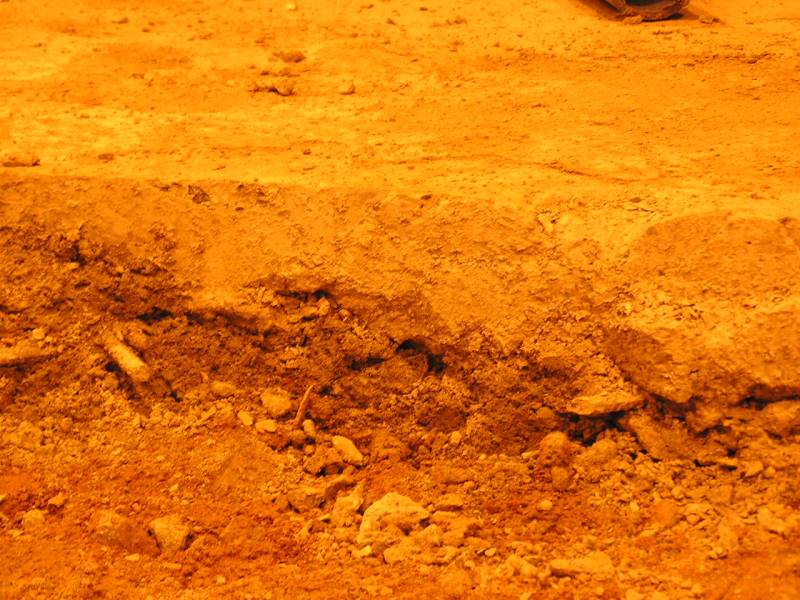 Photo of original slab showing single layer of rebar.
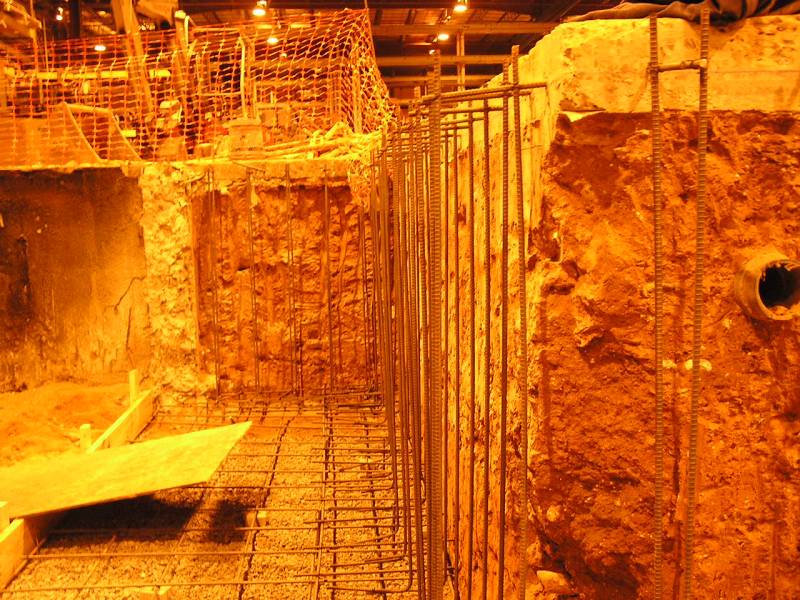 Double re-bar in wall area. At the top you can see where holes were drill every
foot and pieces of re-bar were epoxy'd into the slab. Then the L shaped re-bars
were hung from this.
Double re-bar in wall area. At the top you can see where holes were drill every
foot and pieces of re-bar were epoxy'd into the slab. Then the L shaped re-bars
were hung from this.
 This shows how the L re-bars transition from the wall to the slab.
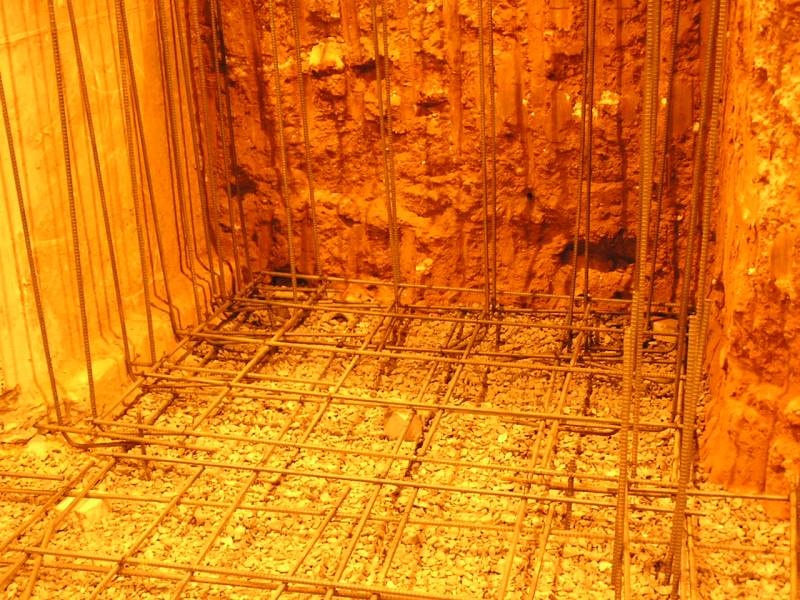 Double re-bar in the floor and walls in the area of the thermoscope (temperature control cabinet)
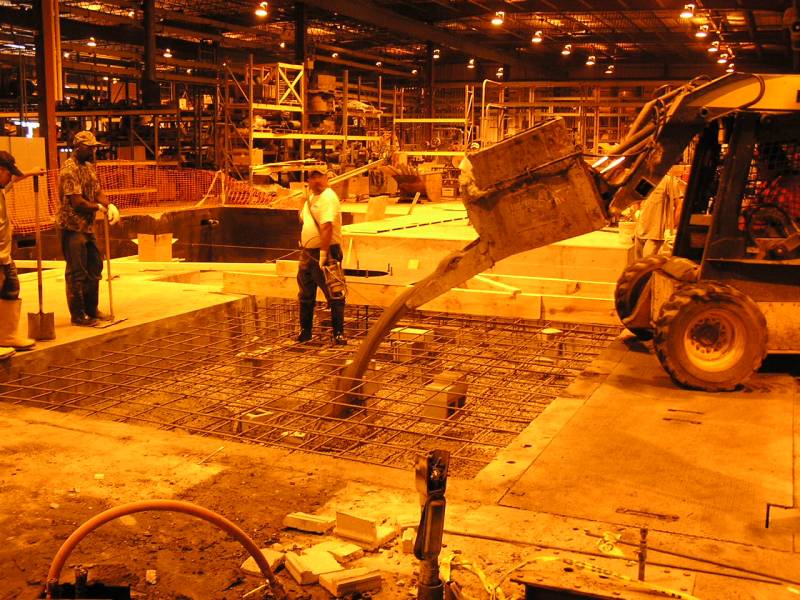
Pouring time!
 It's concrete pouring time. Two buckets of today's 11-1/2 yards of concrete has
been poured at this point.
It's concrete pouring time. Two buckets of today's 11-1/2 yards of concrete has
been poured at this point.
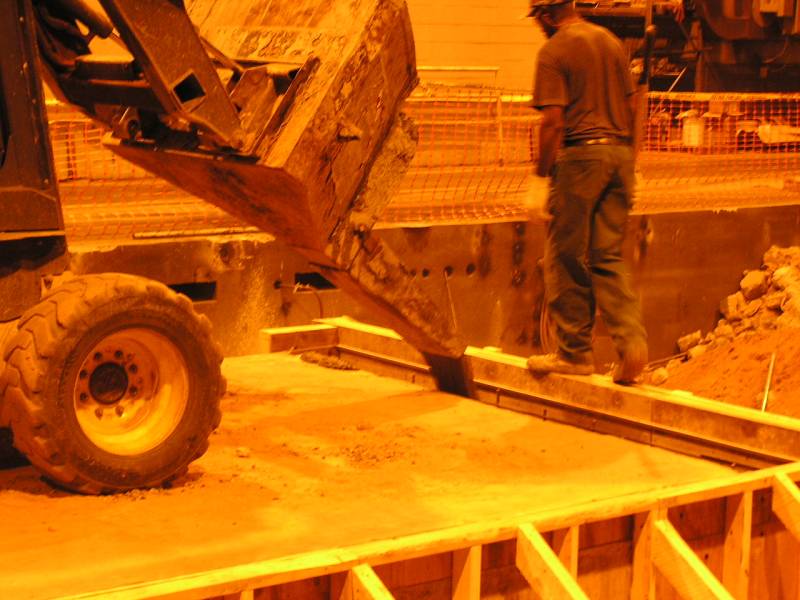
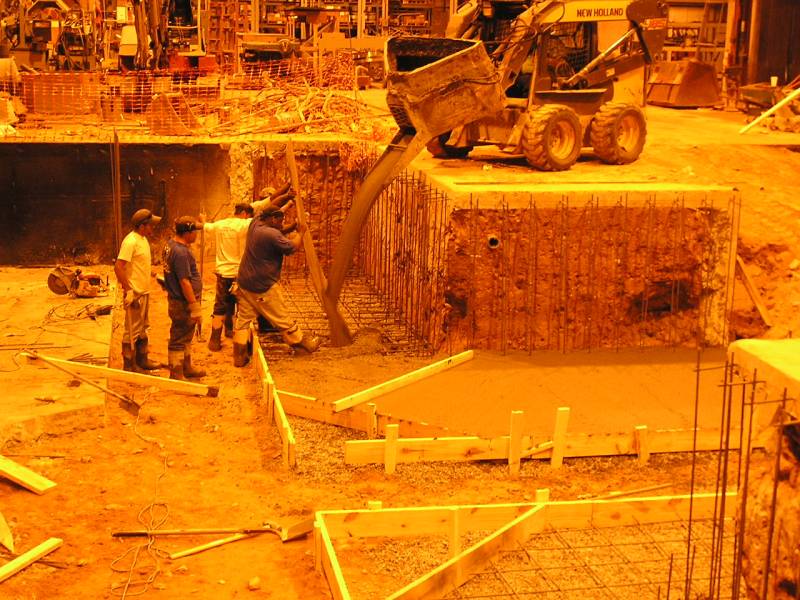 Here the concrete had to be "poured" in. The plywood keeps the splash mess at a
minimum.
Here the concrete had to be "poured" in. The plywood keeps the splash mess at a
minimum.
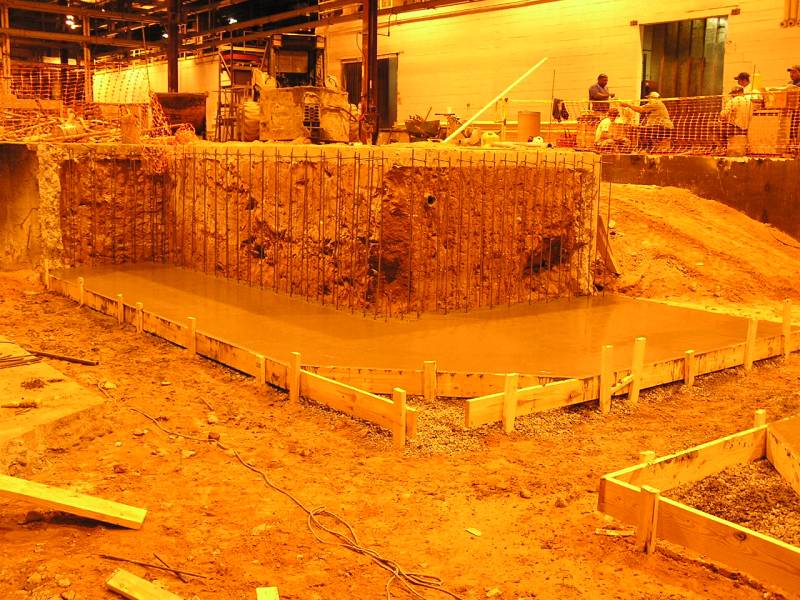 The west floor has been poured....
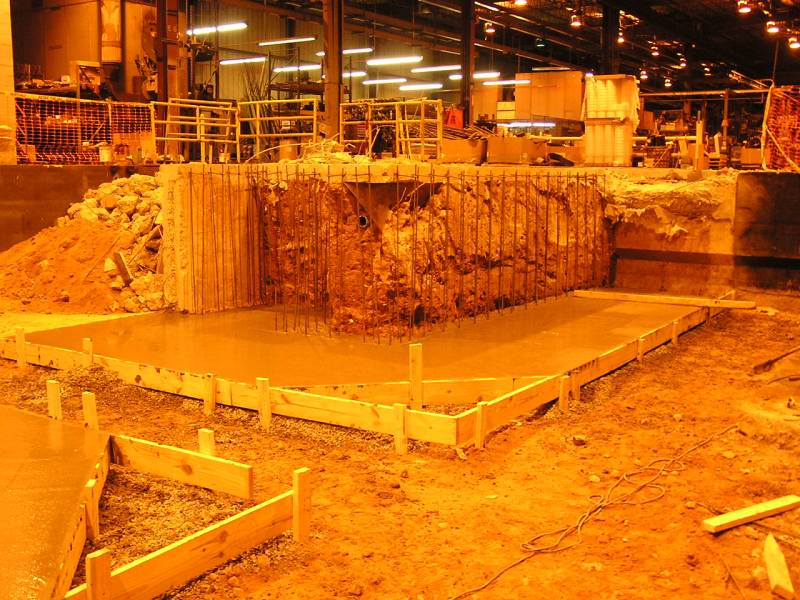 and this is a view of the east floor.
4/19 & 4/20/11
 The rebar work is being completed in the walls. Here the horizontal runs of
rebar are being installed.
The rebar work is being completed in the walls. Here the horizontal runs of
rebar are being installed.
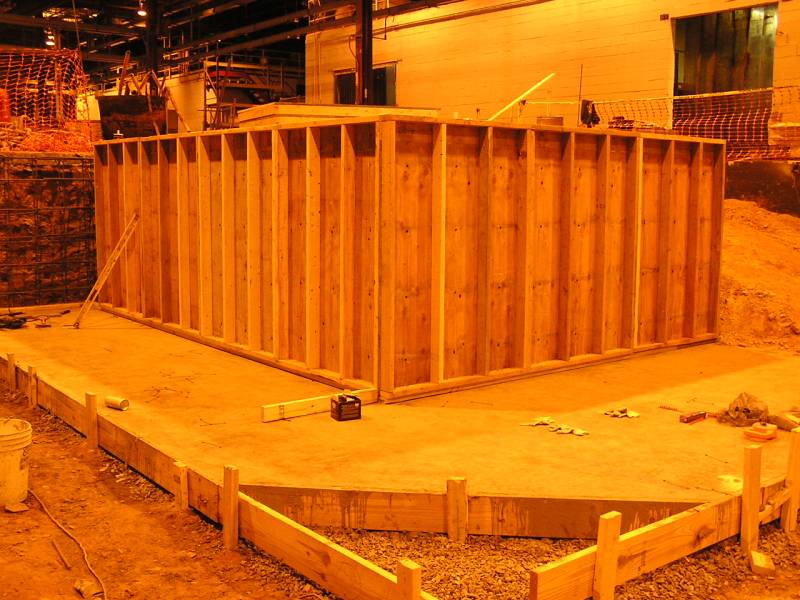 The first of the wall forms going up.
 Here you can see how the forms and rebar will create a structural wall.
 Wall forms in the east end of the pit.
4/21/11
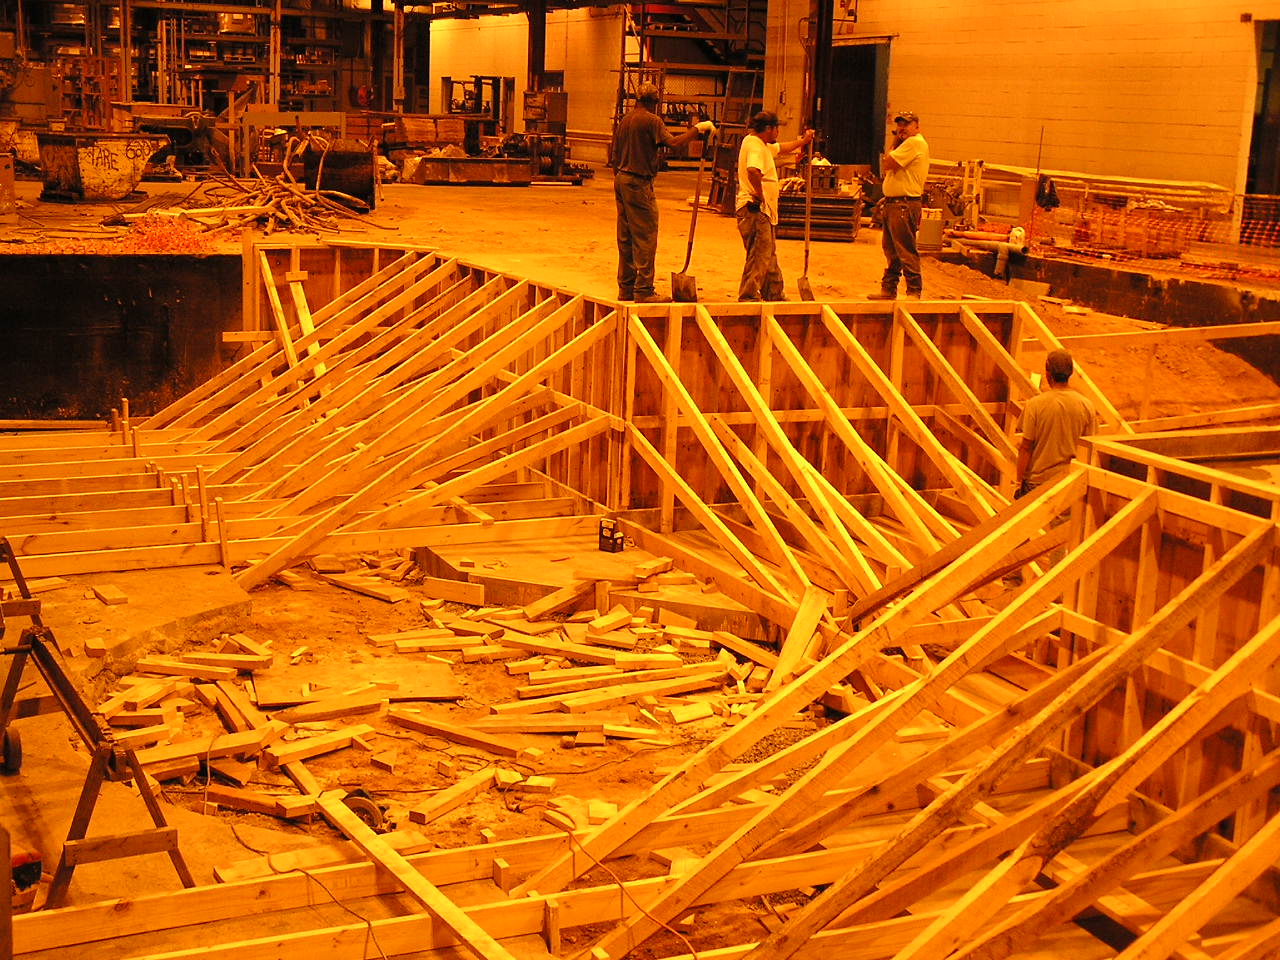 Bracing is complete on the west walls.
Bracing is needed to support the tremendous pressure that wet concrete
will exert on the forms. Even with this bracing the concrete will be poured
slowly in two foot increments, allowing time for partial set of the lower layers
to minimize forces on the lowest parts of the forms.
Bracing is complete on the west walls.
Bracing is needed to support the tremendous pressure that wet concrete
will exert on the forms. Even with this bracing the concrete will be poured
slowly in two foot increments, allowing time for partial set of the lower layers
to minimize forces on the lowest parts of the forms.
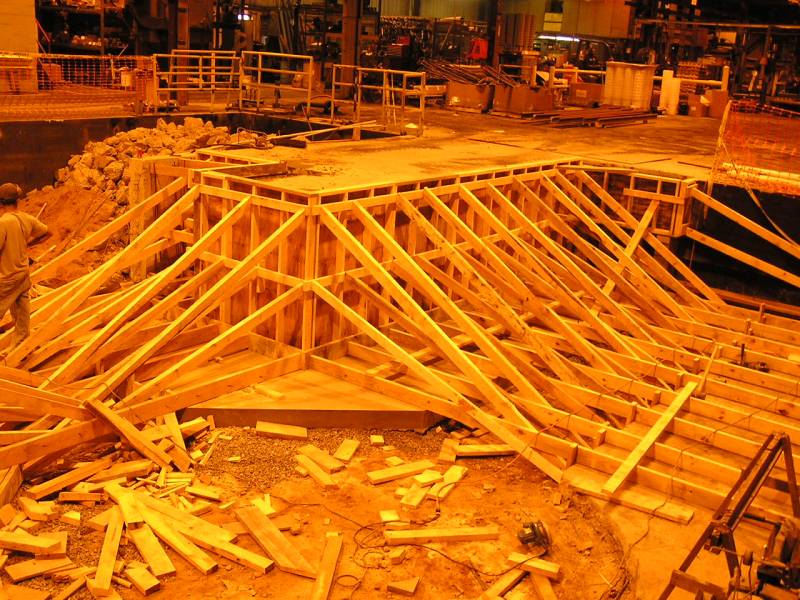 Bracing for the east walls
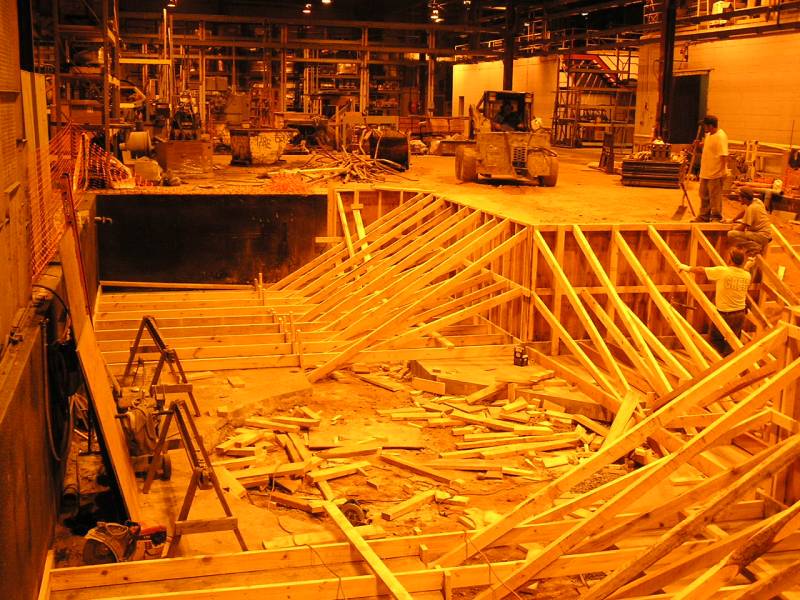 Here you can see the floor level braces going all the way back to the existing
pit wall to the south (left). There are tremendous loads wanting to force out
the bottom of the forms.
Here you can see the floor level braces going all the way back to the existing
pit wall to the south (left). There are tremendous loads wanting to force out
the bottom of the forms.
 The pour began at 10:30.
4/22/11 No work today, Good Friday holiday.
4/25/11
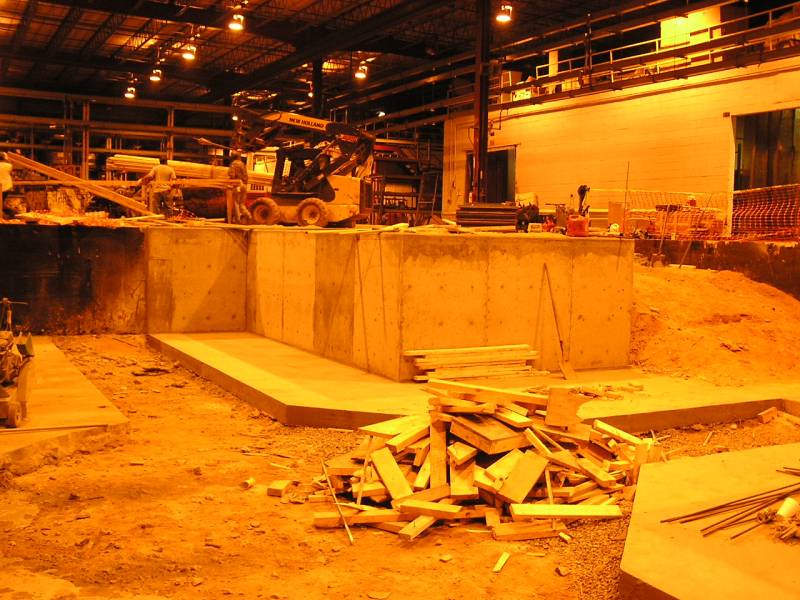
 Forms for the walls were stripped today by two of Calvin's men.
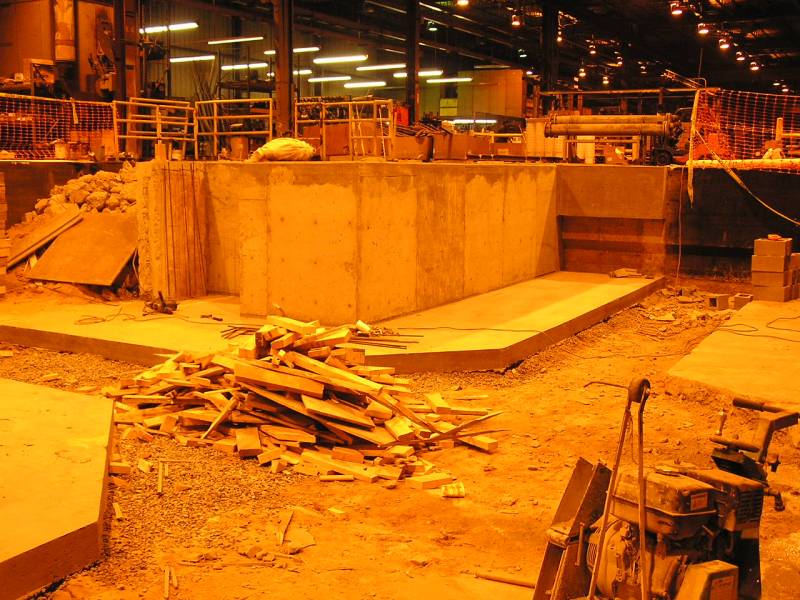
 The walls look great!
4/26/11
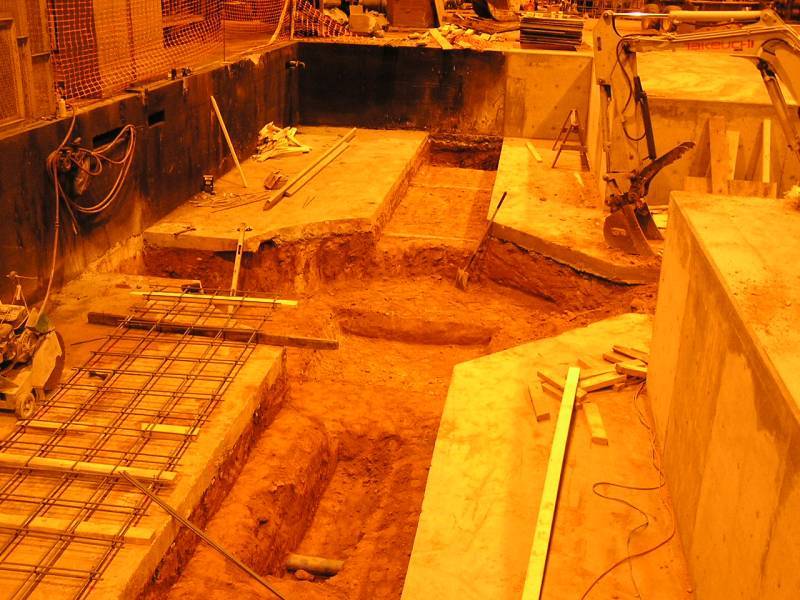 The turntable and railroad trenches were excavated to the correct depth today.
Notice the blue pipe in the foreground. This is where the drain in the turntable
pit will be tied into the existing drainage system that served Zone II
originally. Pipe will be ordered now that we have identified that it is 4" Blueline
material. Three of the four existing drains will remain in service, but
since the turntable pit will be the lowest point in the pit (-24"), this too
needs to be drained.
The turntable and railroad trenches were excavated to the correct depth today.
Notice the blue pipe in the foreground. This is where the drain in the turntable
pit will be tied into the existing drainage system that served Zone II
originally. Pipe will be ordered now that we have identified that it is 4" Blueline
material. Three of the four existing drains will remain in service, but
since the turntable pit will be the lowest point in the pit (-24"), this too
needs to be drained.
 The drain has been tied in and rock placed in around it. You can see the drain
sticking up at the correct height, corresponding to the future height of the
bottom of the pit floor.
The drain has been tied in and rock placed in around it. You can see the drain
sticking up at the correct height, corresponding to the future height of the
bottom of the pit floor.
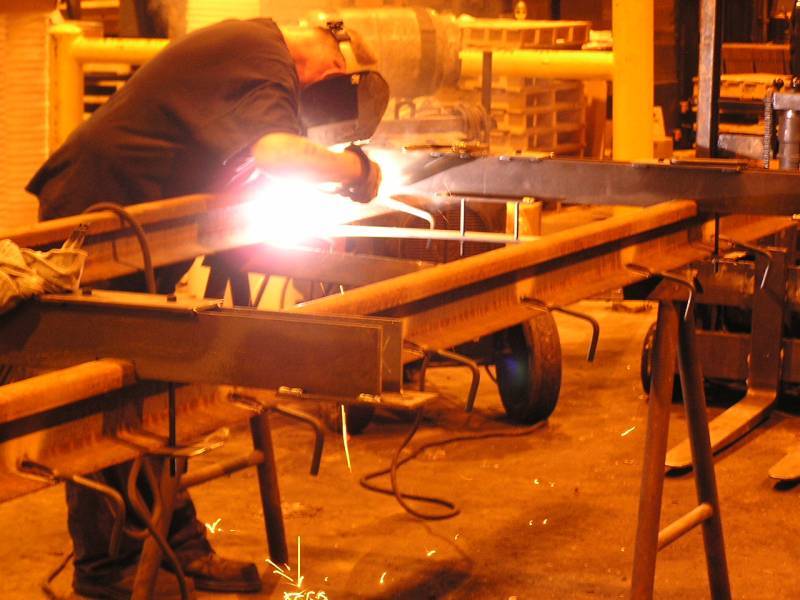 Here Mike and I have begun assembling the fixtures that hold the rail road rails
at the correct spacing and height in the concrete. Mike is welding on the J
bolts to the lower flange of the rail. One every 24" on each side of the rail.
Here Mike and I have begun assembling the fixtures that hold the rail road rails
at the correct spacing and height in the concrete. Mike is welding on the J
bolts to the lower flange of the rail. One every 24" on each side of the rail.
4/27 & 4/28/11
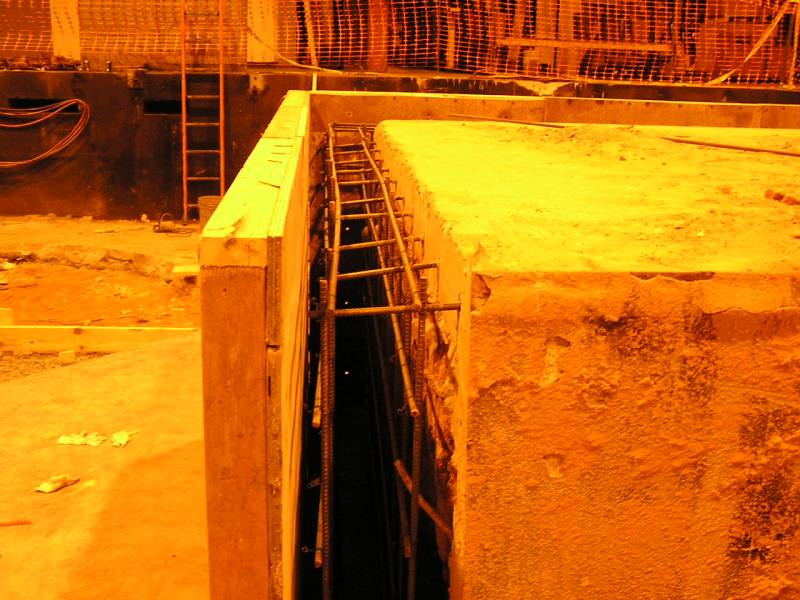
 Here the beginnings of the plywood is going up that will for the last two walls
of the pit. These two walls are on either side of the casting furnace.
Here the beginnings of the plywood is going up that will for the last two walls
of the pit. These two walls are on either side of the casting furnace.
 A close up of the two layers of rebar within this wall. Another sheet of plywood
will go up next making a wall 12" thick.
A close up of the two layers of rebar within this wall. Another sheet of plywood
will go up next making a wall 12" thick.
 The plywood on the far side is the beginning of the wall on the far side of the
pit. The jog in the wall will house the steps. The steps will be poured early
next week.
The plywood on the far side is the beginning of the wall on the far side of the
pit. The jog in the wall will house the steps. The steps will be poured early
next week.
 In this close up the rebar in this wall can be seen. Sheets of plywood will go
up next on this side, creating another 12" wall.
In this close up the rebar in this wall can be seen. Sheets of plywood will go
up next on this side, creating another 12" wall.
These walls were poured the morning of 4/29/11.
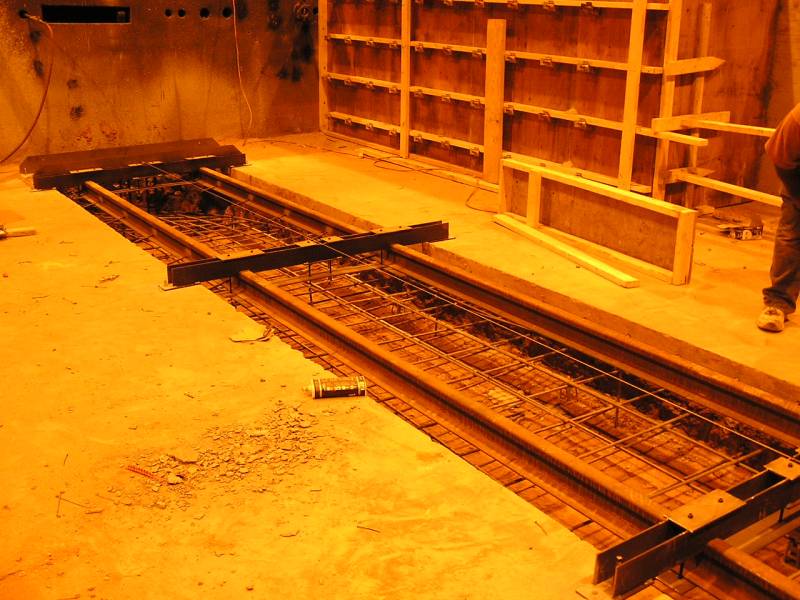
 Meanwhile we set the first rails and fixtures in the rail trench at the west end
of the pit.
Meanwhile we set the first rails and fixtures in the rail trench at the west end
of the pit.
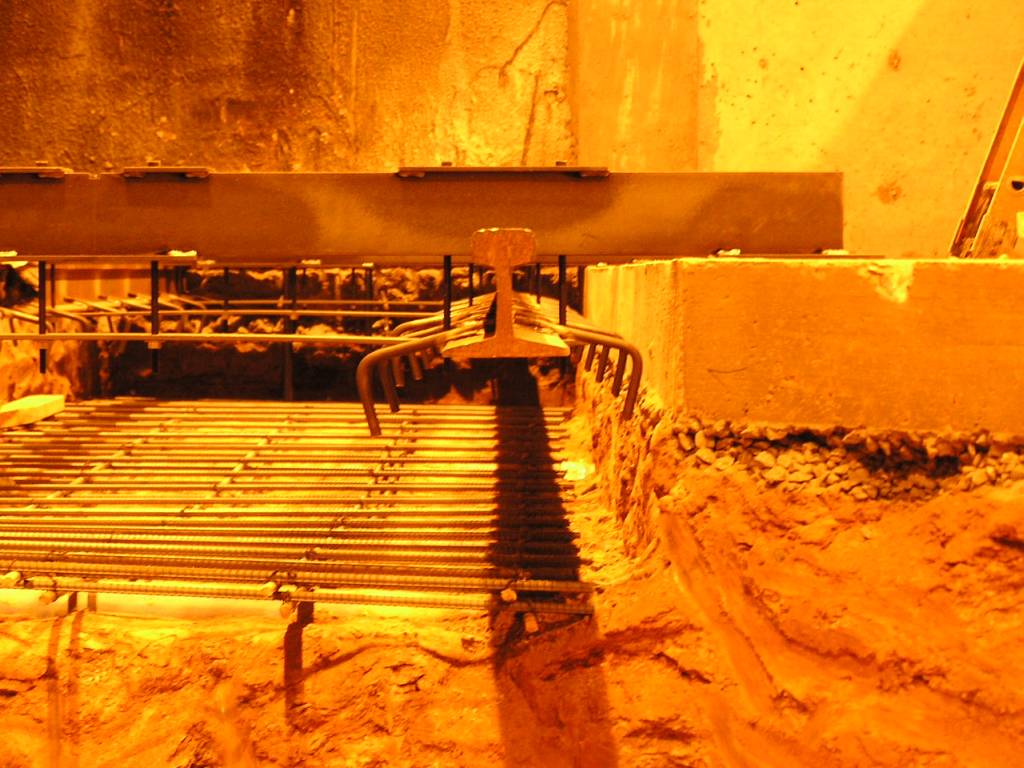 This close up shows how the fixtures made by Alco Metal Fabricators hold the
rails at the correct spacing and at the correct height in the concrete.
This close up shows how the fixtures made by Alco Metal Fabricators hold the
rails at the correct spacing and at the correct height in the concrete.
5/2/11
 It's time to remove the forms off the last of the walls.

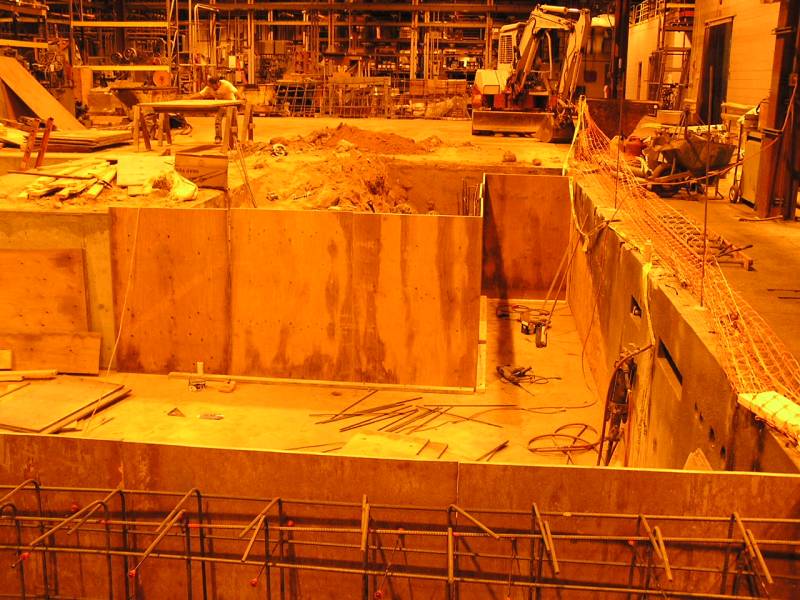
 You can see the finished wall for the NW corner of the new pit.
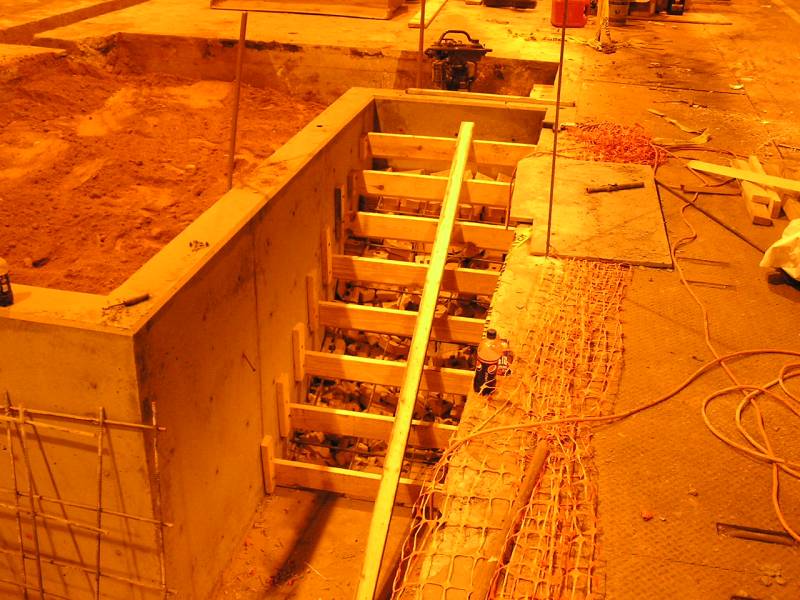 Here the wooden forms have been placed where the steps will be.
 The area beside the new steps has been filled in. You can see a 6" hole in the
wall and the beginnings of the trench in the upper right of the photo. These
will be connected with 6" PVC pipe and will be a wire way for power to the 12
spoolers.
The area beside the new steps has been filled in. You can see a 6" hole in the
wall and the beginnings of the trench in the upper right of the photo. These
will be connected with 6" PVC pipe and will be a wire way for power to the 12
spoolers.
 The rest of the trench feeding power to the spoolers.
5/3/11 & 5/4/11
 Form have been placed for the power trench to the spoolers on 5/3/11 along with
forms for the steps. This was poured 5/4/11.
Form have been placed for the power trench to the spoolers on 5/3/11 along with
forms for the steps. This was poured 5/4/11.
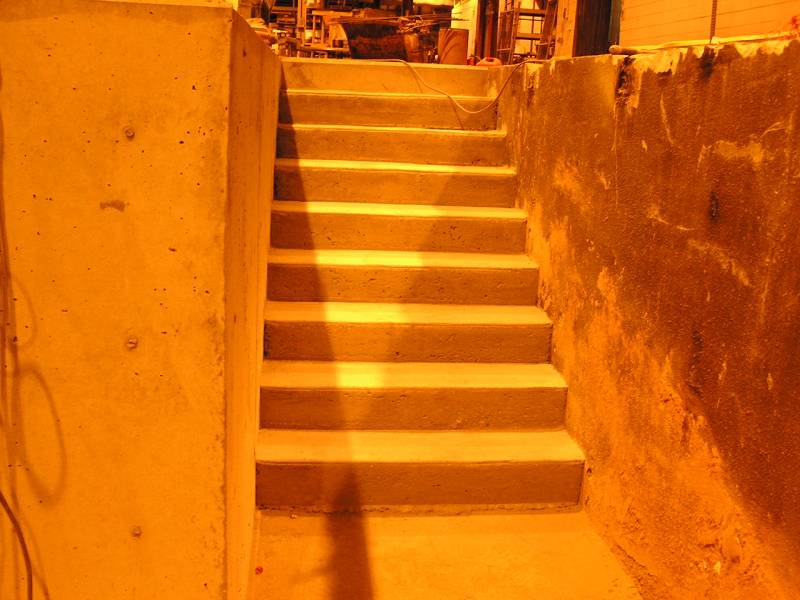 Forms have been stripped off the steps and they look great.
 The north south rails have been set and alignment begun. Notice the string
running down the center.
The north south rails have been set and alignment begun. Notice the string
running down the center.
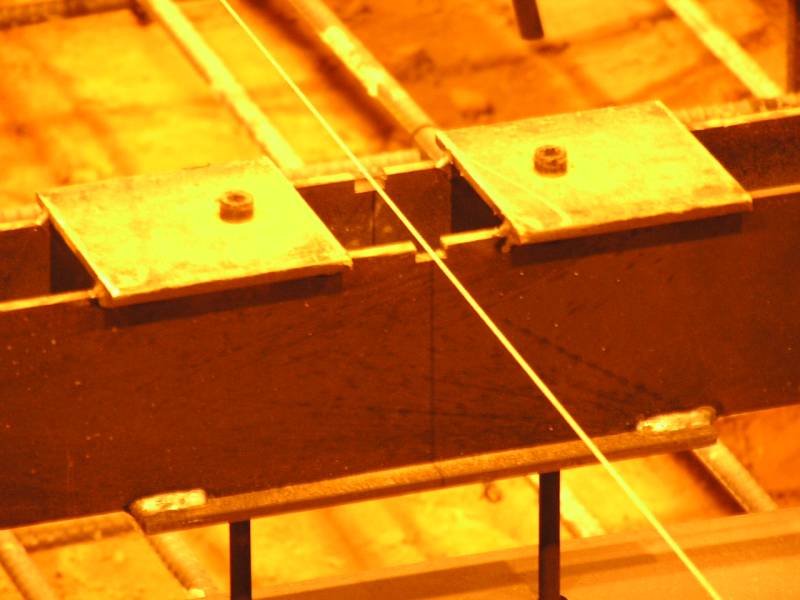 A close up of the string and how this works with the alignment fixtures for the
rails and pulley fixtures.
A close up of the string and how this works with the alignment fixtures for the
rails and pulley fixtures.
5/5 & 5/6/11
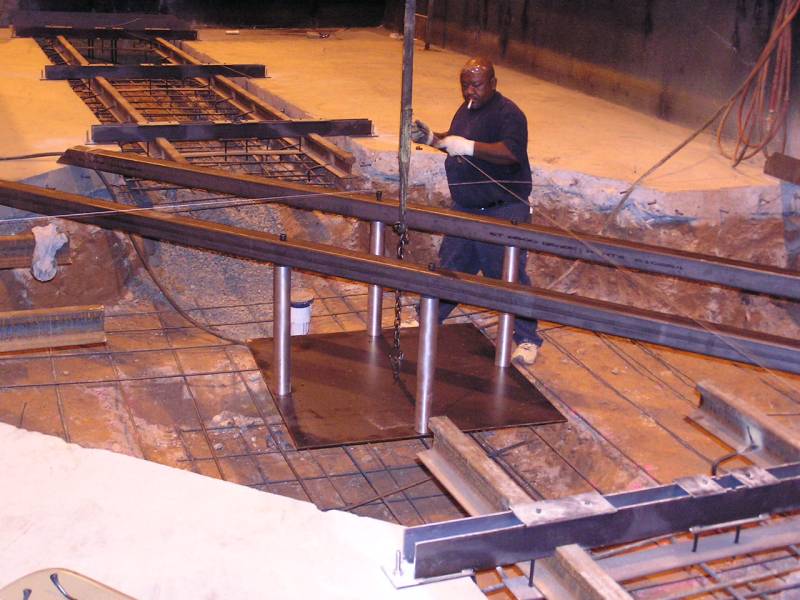 Assembly of the fixture that holds the anchor bolts in the bottom of the
turntable pit has begun. The two pieces of 4 x 4 x 1/4" steel tubing span the
pit, and the plate is spaced properly from the tubing with the round aluminum
bars. The bottom of the plate will be the elevation of the concrete in the
turntable pit. In other words the concrete will be poured just even with the
bottom of the plate.
Assembly of the fixture that holds the anchor bolts in the bottom of the
turntable pit has begun. The two pieces of 4 x 4 x 1/4" steel tubing span the
pit, and the plate is spaced properly from the tubing with the round aluminum
bars. The bottom of the plate will be the elevation of the concrete in the
turntable pit. In other words the concrete will be poured just even with the
bottom of the plate.
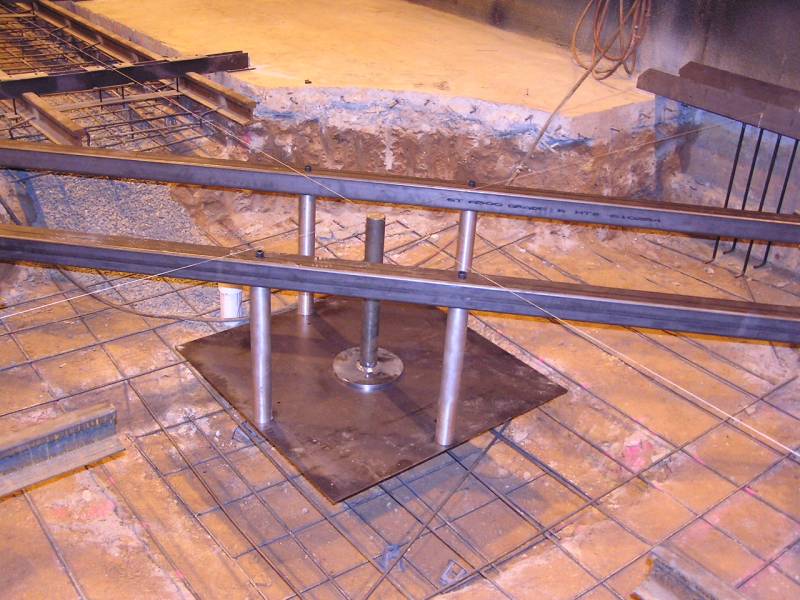 Fixture is assembled and alignment has begun. Not only does it have to be dead
center at the intersection of both sets of rails, it also has to be rotated into
correct position. We used the laser to aid the rotational alignment to the
strings above. The post in the very center is also used to align the entire
assembly onto centerline.
Fixture is assembled and alignment has begun. Not only does it have to be dead
center at the intersection of both sets of rails, it also has to be rotated into
correct position. We used the laser to aid the rotational alignment to the
strings above. The post in the very center is also used to align the entire
assembly onto centerline.
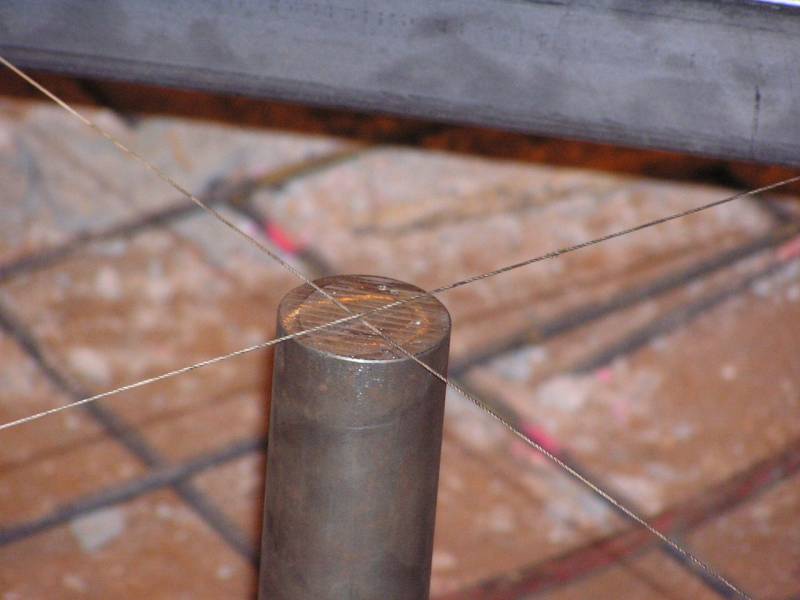 Close up of the centering fixture and how it works with the crossing strings,
which are the rail centerlines.
Close up of the centering fixture and how it works with the crossing strings,
which are the rail centerlines.
5/9/11
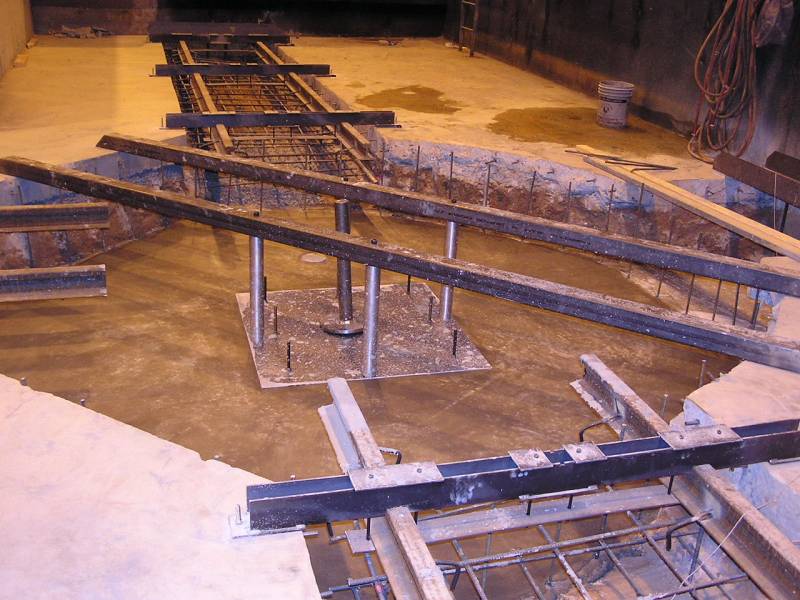 Concrete was poured in the turntable pit on Monday morning.
 In the afternoon we installed the form that locates the 8 J-bolts that will hold
the cathode loader jib crane. Alignment was a bit tricky on this fixture. The
north south direction was easy as we have the casting centerline at floor level.
The east west direction proved more challenging as the string centerline is out
over the center of the open pit. Notice the form is elevated 10" above the floor
level. So you have to get a measurement 10" above the string while standing on
rails and reaching 77" overhead, and keep steady the whole time! We double
checked on Monday afternoon, and then did final QC check on Tuesday morning. All
looked good within an 1/8".
In the afternoon we installed the form that locates the 8 J-bolts that will hold
the cathode loader jib crane. Alignment was a bit tricky on this fixture. The
north south direction was easy as we have the casting centerline at floor level.
The east west direction proved more challenging as the string centerline is out
over the center of the open pit. Notice the form is elevated 10" above the floor
level. So you have to get a measurement 10" above the string while standing on
rails and reaching 77" overhead, and keep steady the whole time! We double
checked on Monday afternoon, and then did final QC check on Tuesday morning. All
looked good within an 1/8".
5/10/11
 Concrete arrived at 8:30 and the pouring of the jib crane foundation began.
5/11/11
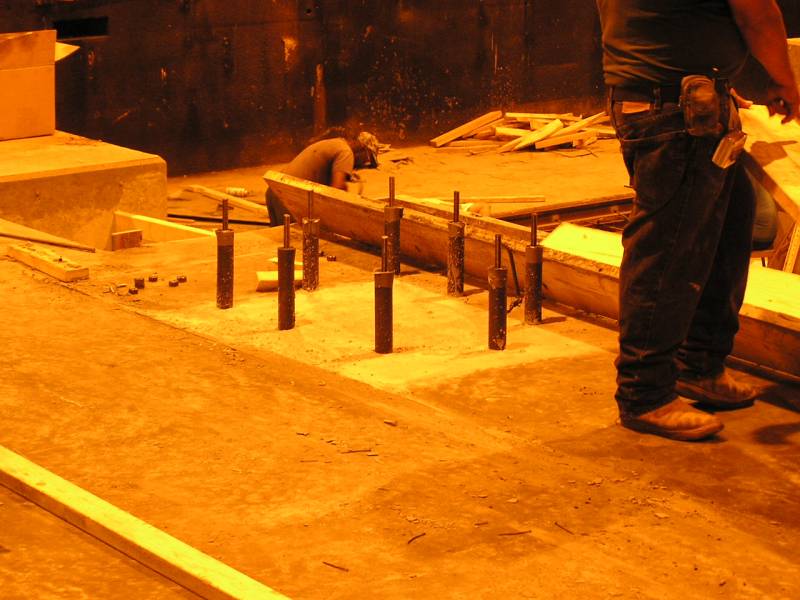 The fixture for the J-bolts was stripped this morning and the area cleaned up
for the next step.
The fixture for the J-bolts was stripped this morning and the area cleaned up
for the next step.
 The foundation for the jib crane is supposed to be 250mm tall, so this form was
constructed for the next piece of concrete.
The foundation for the jib crane is supposed to be 250mm tall, so this form was
constructed for the next piece of concrete.
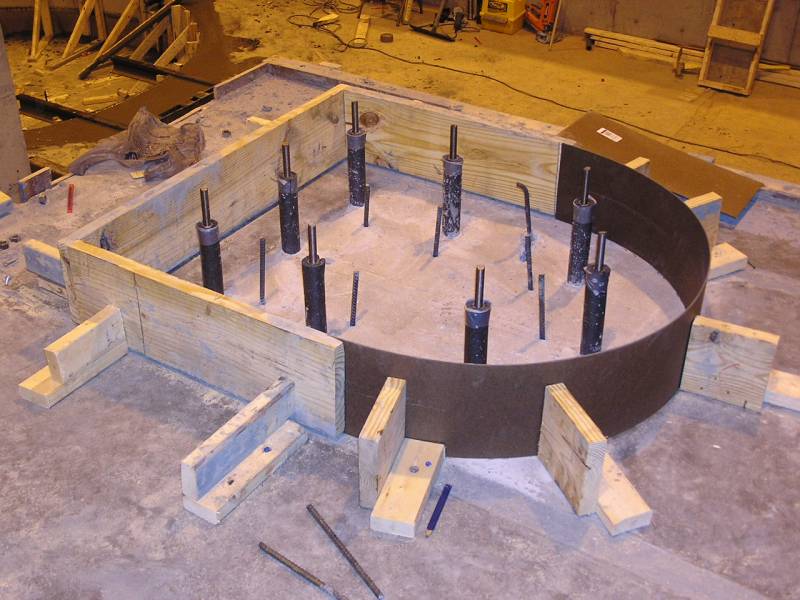
 Meanwhile construction of the round form for the wall of the turntable pit began
and was wrapped up on Wednesday morning.
Meanwhile construction of the round form for the wall of the turntable pit began
and was wrapped up on Wednesday morning.
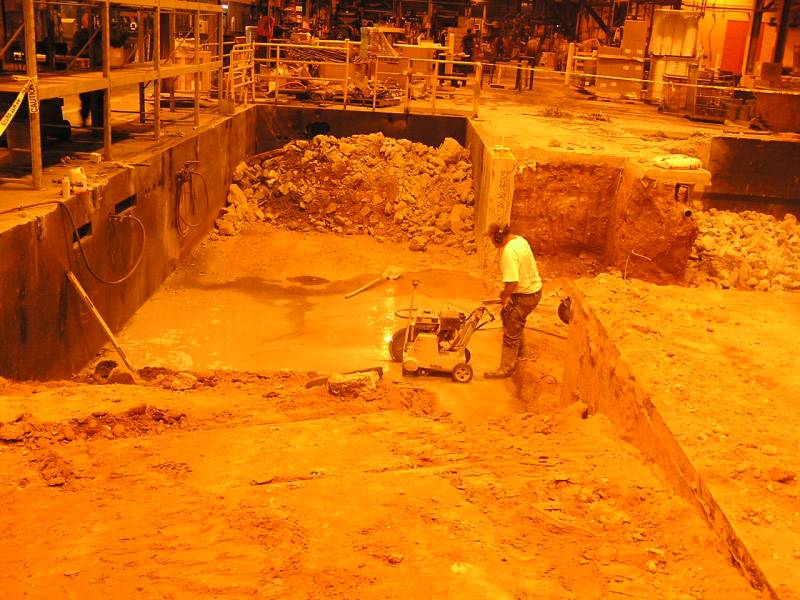
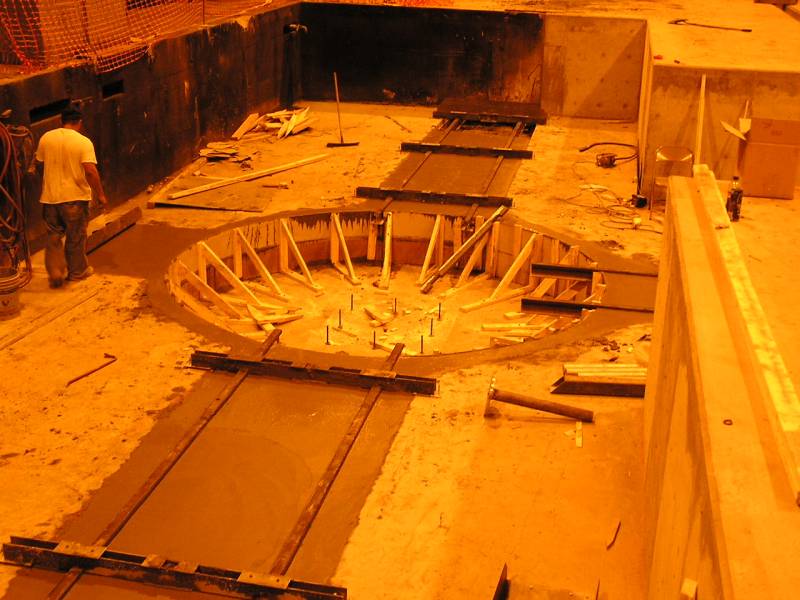 Concrete pouring has begun around the turntable pit and the railroad rails.
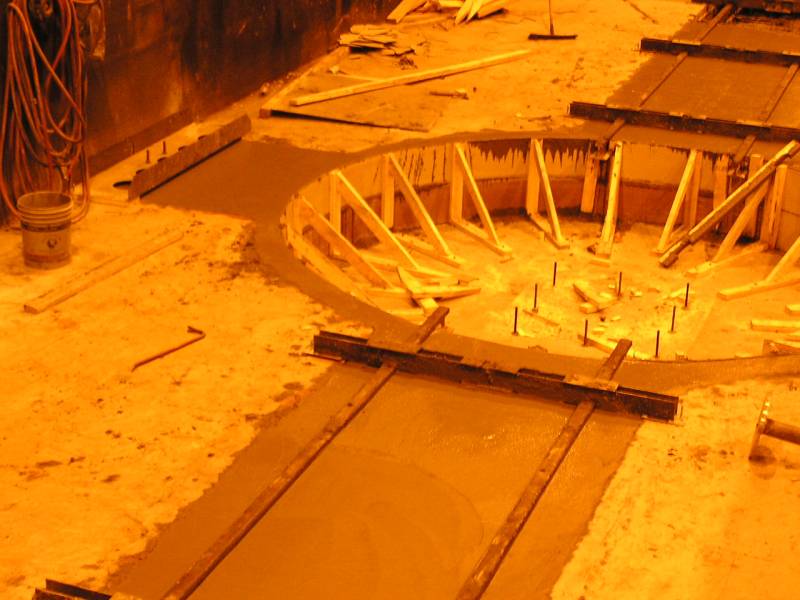 A close up of the semi-finished concrete. Still has to be rubbed out.
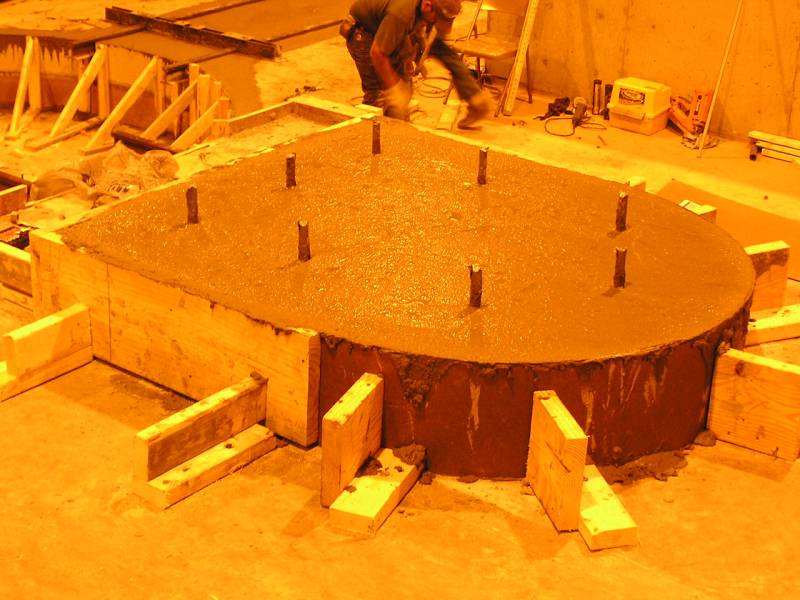 The concrete has just been poured in the raised portion of the jib crane
foundation. It has not been rubbed out yet, which is why it looks watery and
wavy here.
The concrete has just been poured in the raised portion of the jib crane
foundation. It has not been rubbed out yet, which is why it looks watery and
wavy here.
5/12/11
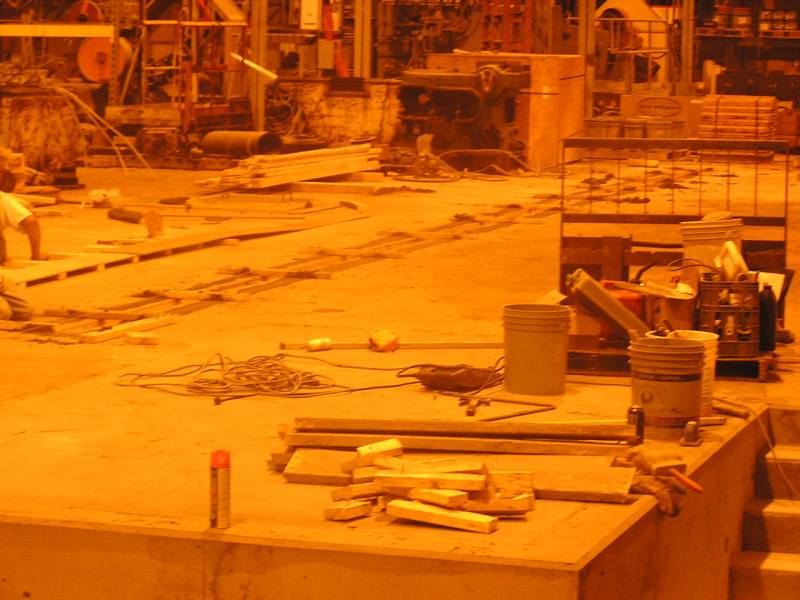
All forms were stripped today and a complete cleanup done. Calvin was packed up and gone by mid afternoon.
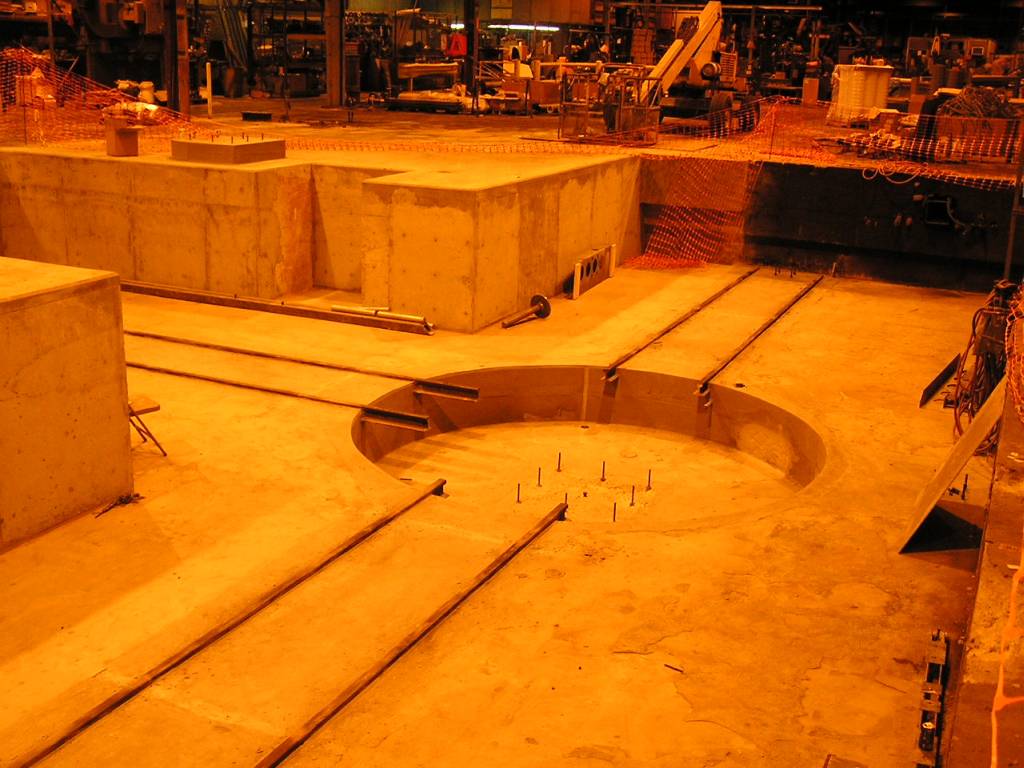 View of the finished turntable pit looking northeast.
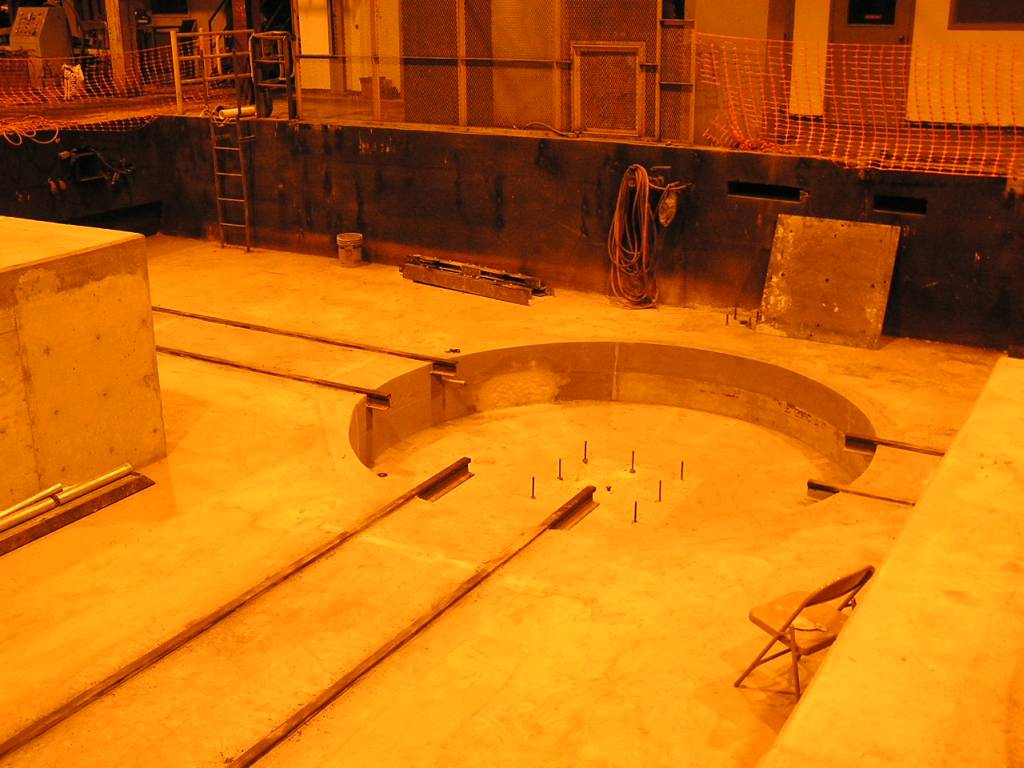 The same, looking southeast.
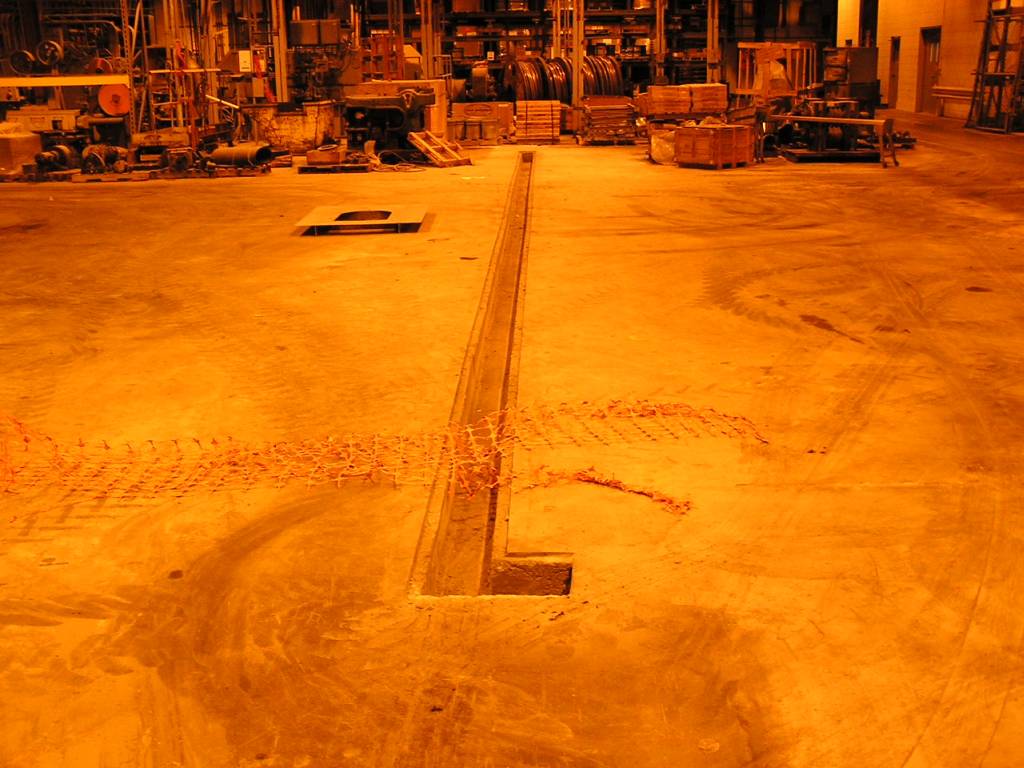 The finished trench the spoolers will be mounted around. Power will go thru the
trench.
The finished trench the spoolers will be mounted around. Power will go thru the
trench.
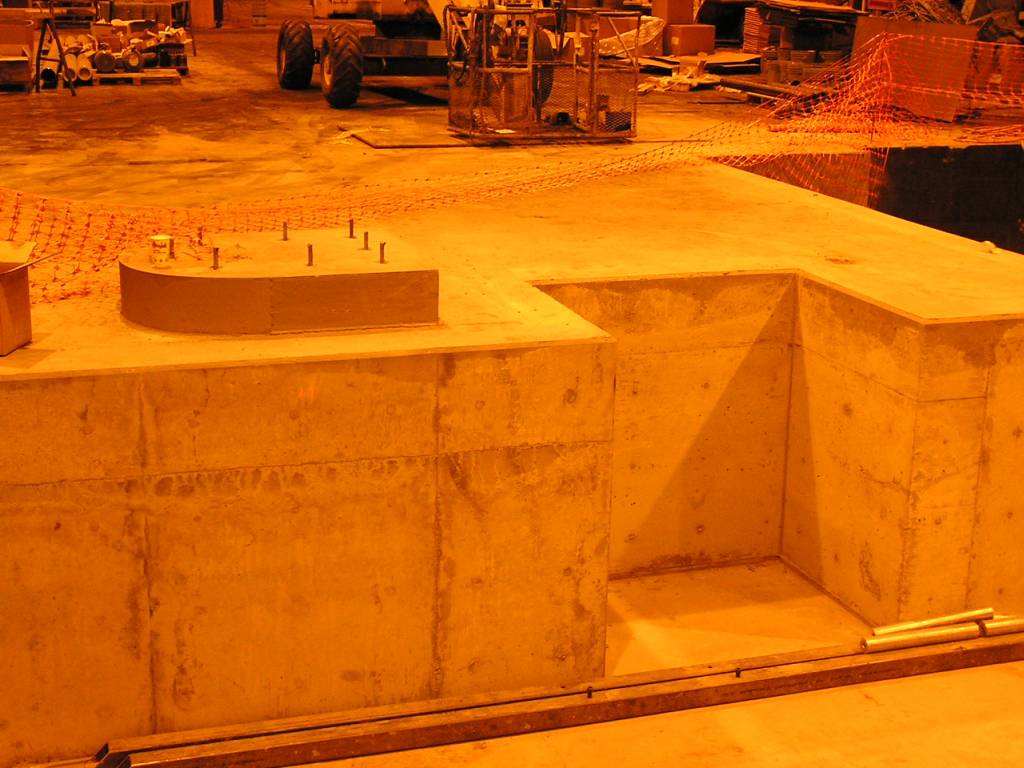 A close up of the jib crane foundation and the area under the thermoscope area.
This complete the concrete work.