Memorial Day weekend work on the 6HP Herc
Click on the small thumbnail pictures to
see full size images.
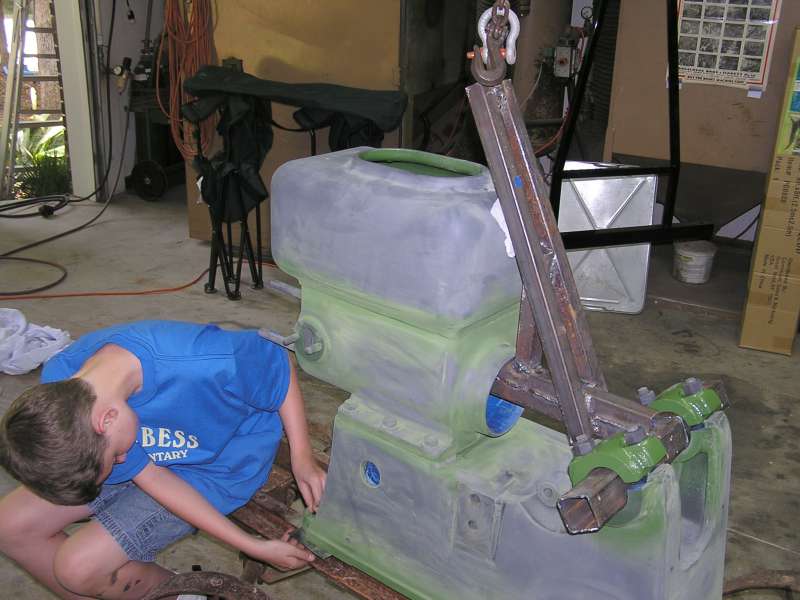
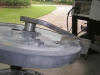
 Several big items remain to complete the project including constructing a lift
to lift the painted engine and set it on the cart without dinging paint. This
was welded up out of tubing and bolts into the mains. The backbone goes up into
the cylinder bore. The angled part was needed to get the lift center forward to
balance.
Several big items remain to complete the project including constructing a lift
to lift the painted engine and set it on the cart without dinging paint. This
was welded up out of tubing and bolts into the mains. The backbone goes up into
the cylinder bore. The angled part was needed to get the lift center forward to
balance.
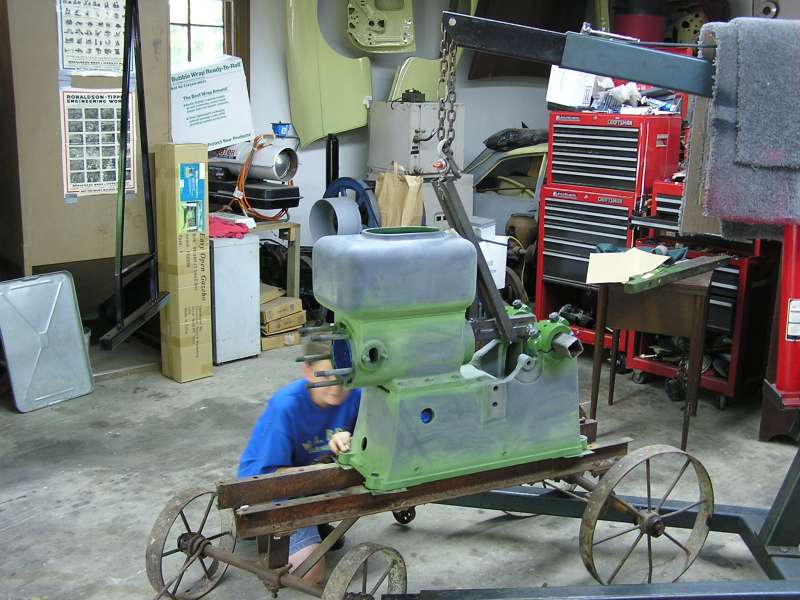
 After final welding we stress tested it by lifting the engine and temporary cart
together. Devin and I stood on the rails of the cart and bounced on it. It ought
to hold. Here you can see where the base, cylinder, and hopper have been "cut
in" with the color coat. Painted inside the base and between the surfaces,
lightly. Here the green has been sanded with 320 paper and Scotchbrite and is
ready for paint. Just need a dry calm morning for spraying.
After final welding we stress tested it by lifting the engine and temporary cart
together. Devin and I stood on the rails of the cart and bounced on it. It ought
to hold. Here you can see where the base, cylinder, and hopper have been "cut
in" with the color coat. Painted inside the base and between the surfaces,
lightly. Here the green has been sanded with 320 paper and Scotchbrite and is
ready for paint. Just need a dry calm morning for spraying.
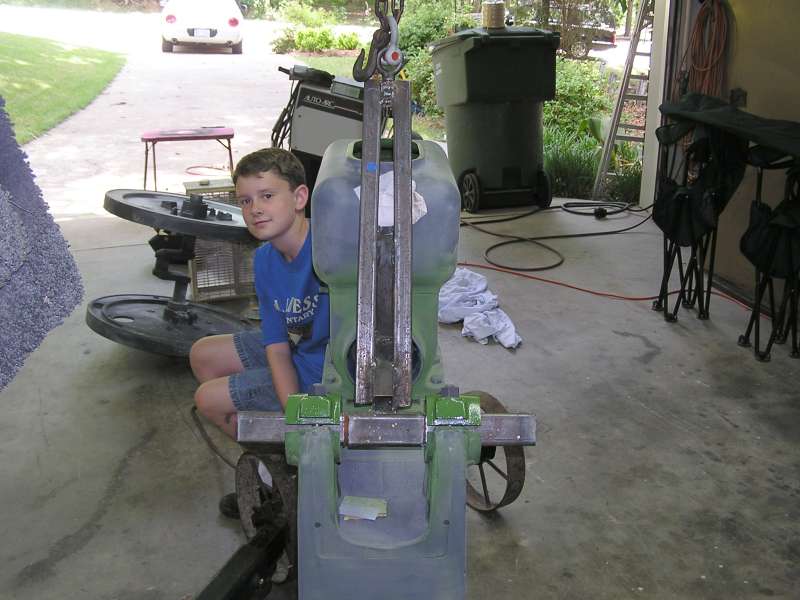
 Here Devin is taking out the bolts so we can lift just the engine to see how the
lift point turned out. The point turned out just about right and was level
within just a few degrees.
Here Devin is taking out the bolts so we can lift just the engine to see how the
lift point turned out. The point turned out just about right and was level
within just a few degrees.
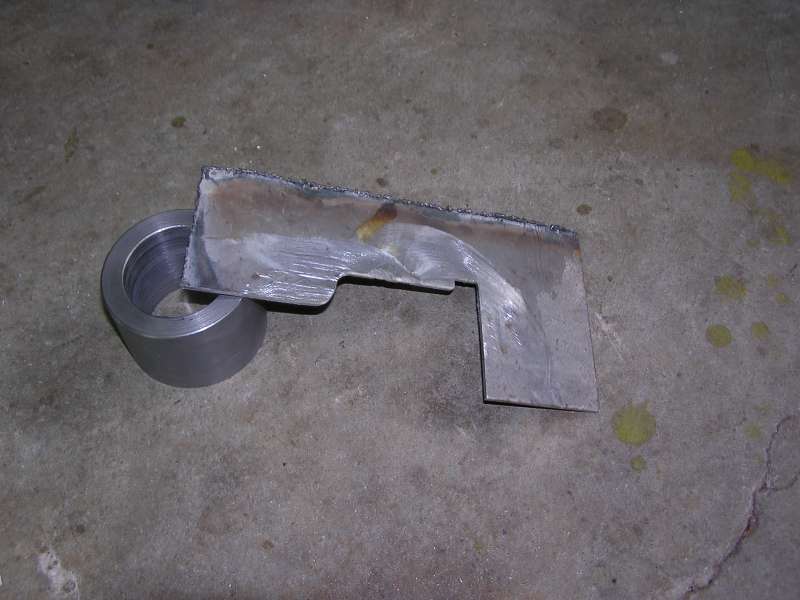
 There is a serious casting flaw on the inside radius of the rim of one of the
flywheels. This flaw is roughly 18" in circumference and leaves you with no
reference with which to use body filler to. I needed a way to accurately form
the body filler on the inside of the rim on the same radius of the rest of the
flywheel. This tool was sawed and filed to match the profile of the rim.
There is a serious casting flaw on the inside radius of the rim of one of the
flywheels. This flaw is roughly 18" in circumference and leaves you with no
reference with which to use body filler to. I needed a way to accurately form
the body filler on the inside of the rim on the same radius of the rest of the
flywheel. This tool was sawed and filed to match the profile of the rim.
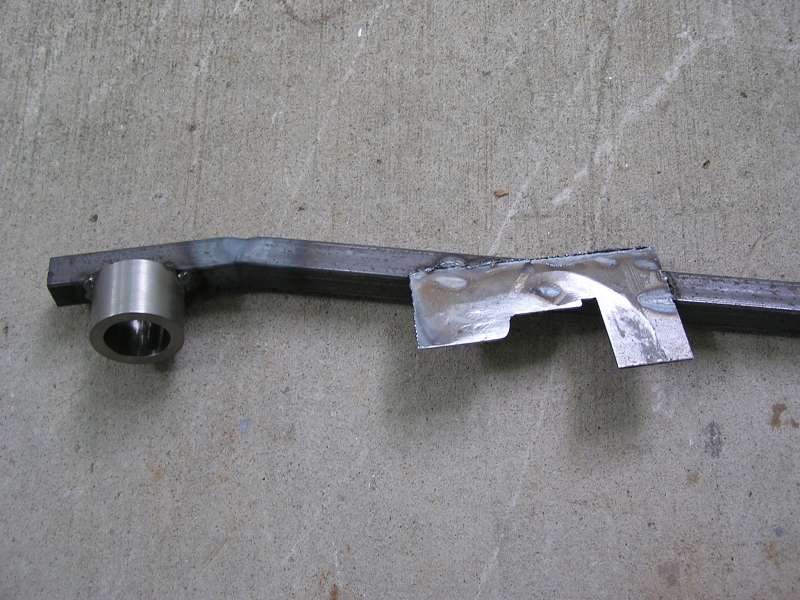
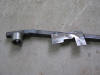
 I turned a bushing about .005 over the crankshaft diameter and the welded a
piece of tubing to the top of the bushing. Then used the torch to bend the
tubing down to where it would touch the rim profile plate. Here it is being
tacked in place.
I turned a bushing about .005 over the crankshaft diameter and the welded a
piece of tubing to the top of the bushing. Then used the torch to bend the
tubing down to where it would touch the rim profile plate. Here it is being
tacked in place.
 Removed the tool and welded it up solid. This is the finished tool.
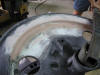 Mixed up some body filler and spread it on thick. Then just dragged the tool
around and it formed the filler where it should be. It only took two
applications of filler and the tool to get it leveled off. Just a little sanding
and it was done. I was surprised how well it worked.
Mixed up some body filler and spread it on thick. Then just dragged the tool
around and it formed the filler where it should be. It only took two
applications of filler and the tool to get it leveled off. Just a little sanding
and it was done. I was surprised how well it worked.
 Missy took this picture as I was getting started on one of the wheel for the
cart. They are being painted the same apple green as the engine. At the moment I
have 3 of the 4 wheels done. Ran out of masking tape last night so I couldn't
prep the 4th wheel. The outside of the rims are sprayed in Rhino liner material.
This is an experiment to see how well it holds up.
Missy took this picture as I was getting started on one of the wheel for the
cart. They are being painted the same apple green as the engine. At the moment I
have 3 of the 4 wheels done. Ran out of masking tape last night so I couldn't
prep the 4th wheel. The outside of the rims are sprayed in Rhino liner material.
This is an experiment to see how well it holds up.
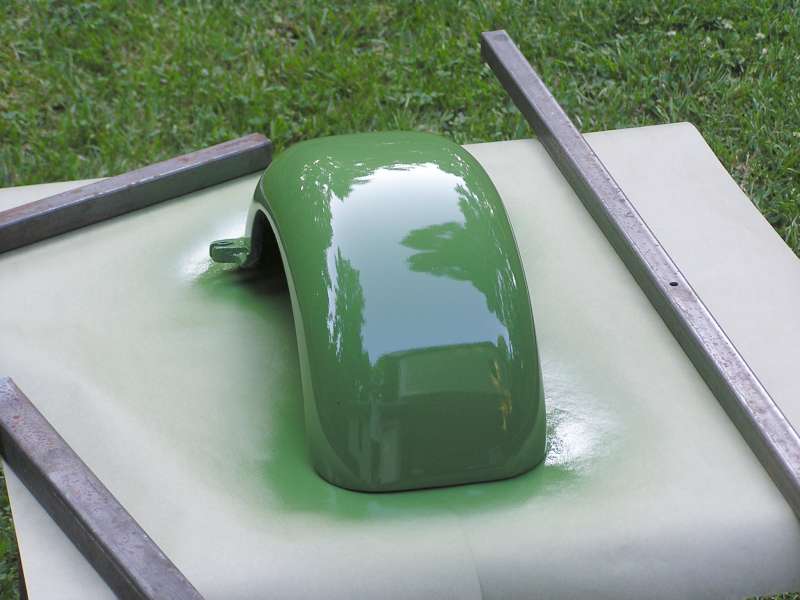
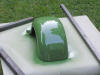 Had a little paint left while painting wheels so I went ahead and sprayed the
crank guard. Sure hope the rest of the engine turns out this well! I really like
the way Imron slicks out. Guess that's why I've stuck with it for over 27 years
of paint and body work.
Had a little paint left while painting wheels so I went ahead and sprayed the
crank guard. Sure hope the rest of the engine turns out this well! I really like
the way Imron slicks out. Guess that's why I've stuck with it for over 27 years
of paint and body work.
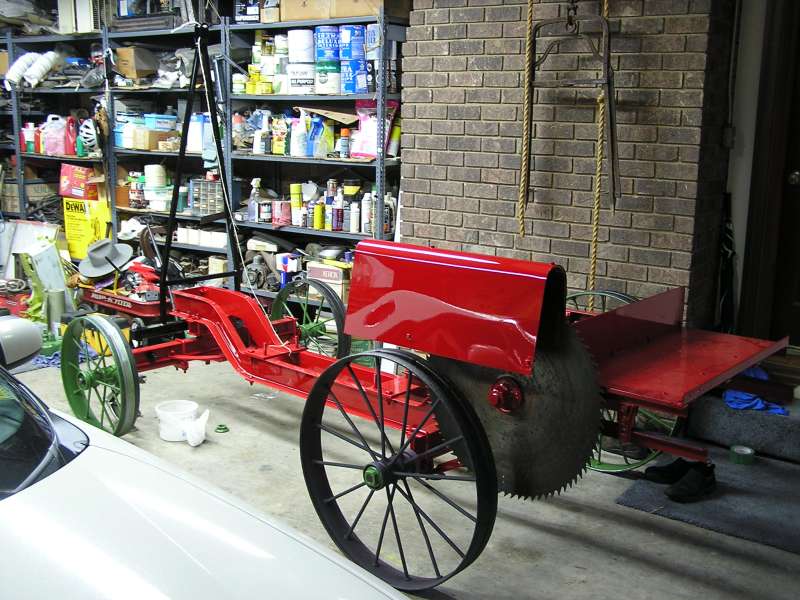
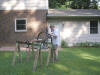
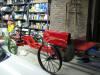 Rain most of yesterday changed the engine painting plans,so I focused on
assembling the saw rig parts onto the drop frame cart. Notice the one wheel yet
to paint.
Rain most of yesterday changed the engine painting plans,so I focused on
assembling the saw rig parts onto the drop frame cart. Notice the one wheel yet
to paint.
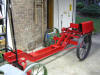 And a view from the front.
Remaining is getting paint on the engine
base/cylinder/hopper combination and the flywheels. Weather permitting the
engine will be painted tomorrow morning. All the small engine parts are painted,
so once the engine is done it is just a matter of assemble time. It's not but 8
days 'till we leave for SIAM. It's gonna be tight getting it done! Later....
 Several big items remain to complete the project including constructing a lift
to lift the painted engine and set it on the cart without dinging paint. This
was welded up out of tubing and bolts into the mains. The backbone goes up into
the cylinder bore. The angled part was needed to get the lift center forward to
balance.
Several big items remain to complete the project including constructing a lift
to lift the painted engine and set it on the cart without dinging paint. This
was welded up out of tubing and bolts into the mains. The backbone goes up into
the cylinder bore. The angled part was needed to get the lift center forward to
balance.